"Break Free of the Candy Conglomerates with some homemade Sweetness"

Time is running out; and if you, like me, find yourself caught out on a limb this "Valentine's Day"—look no further then right here...

How better to impress that Sweetheart in your life, then surprising them with some handcrafted treats...


Anyone can go down to the local CVS, Walgreens or Right Aid and pick up a box of pre-packaged, mass produced and thoughtless candy all wrapped up in a paper board heart by some anonymous candy robot in a factory tucked away in some small dark corner of the country...


Or you can step out of the shadows of the industrialized, corporatized candy conglomerates and do something from the heart for a change...


This right here, I kid you not, is the easiest and simplest recipe you'll ever make for that chocolate lover in your home this holiday—and I promise, not only will they love it but they'll be impressed and delighted to know that you cared enough to make their day special. From scratch...


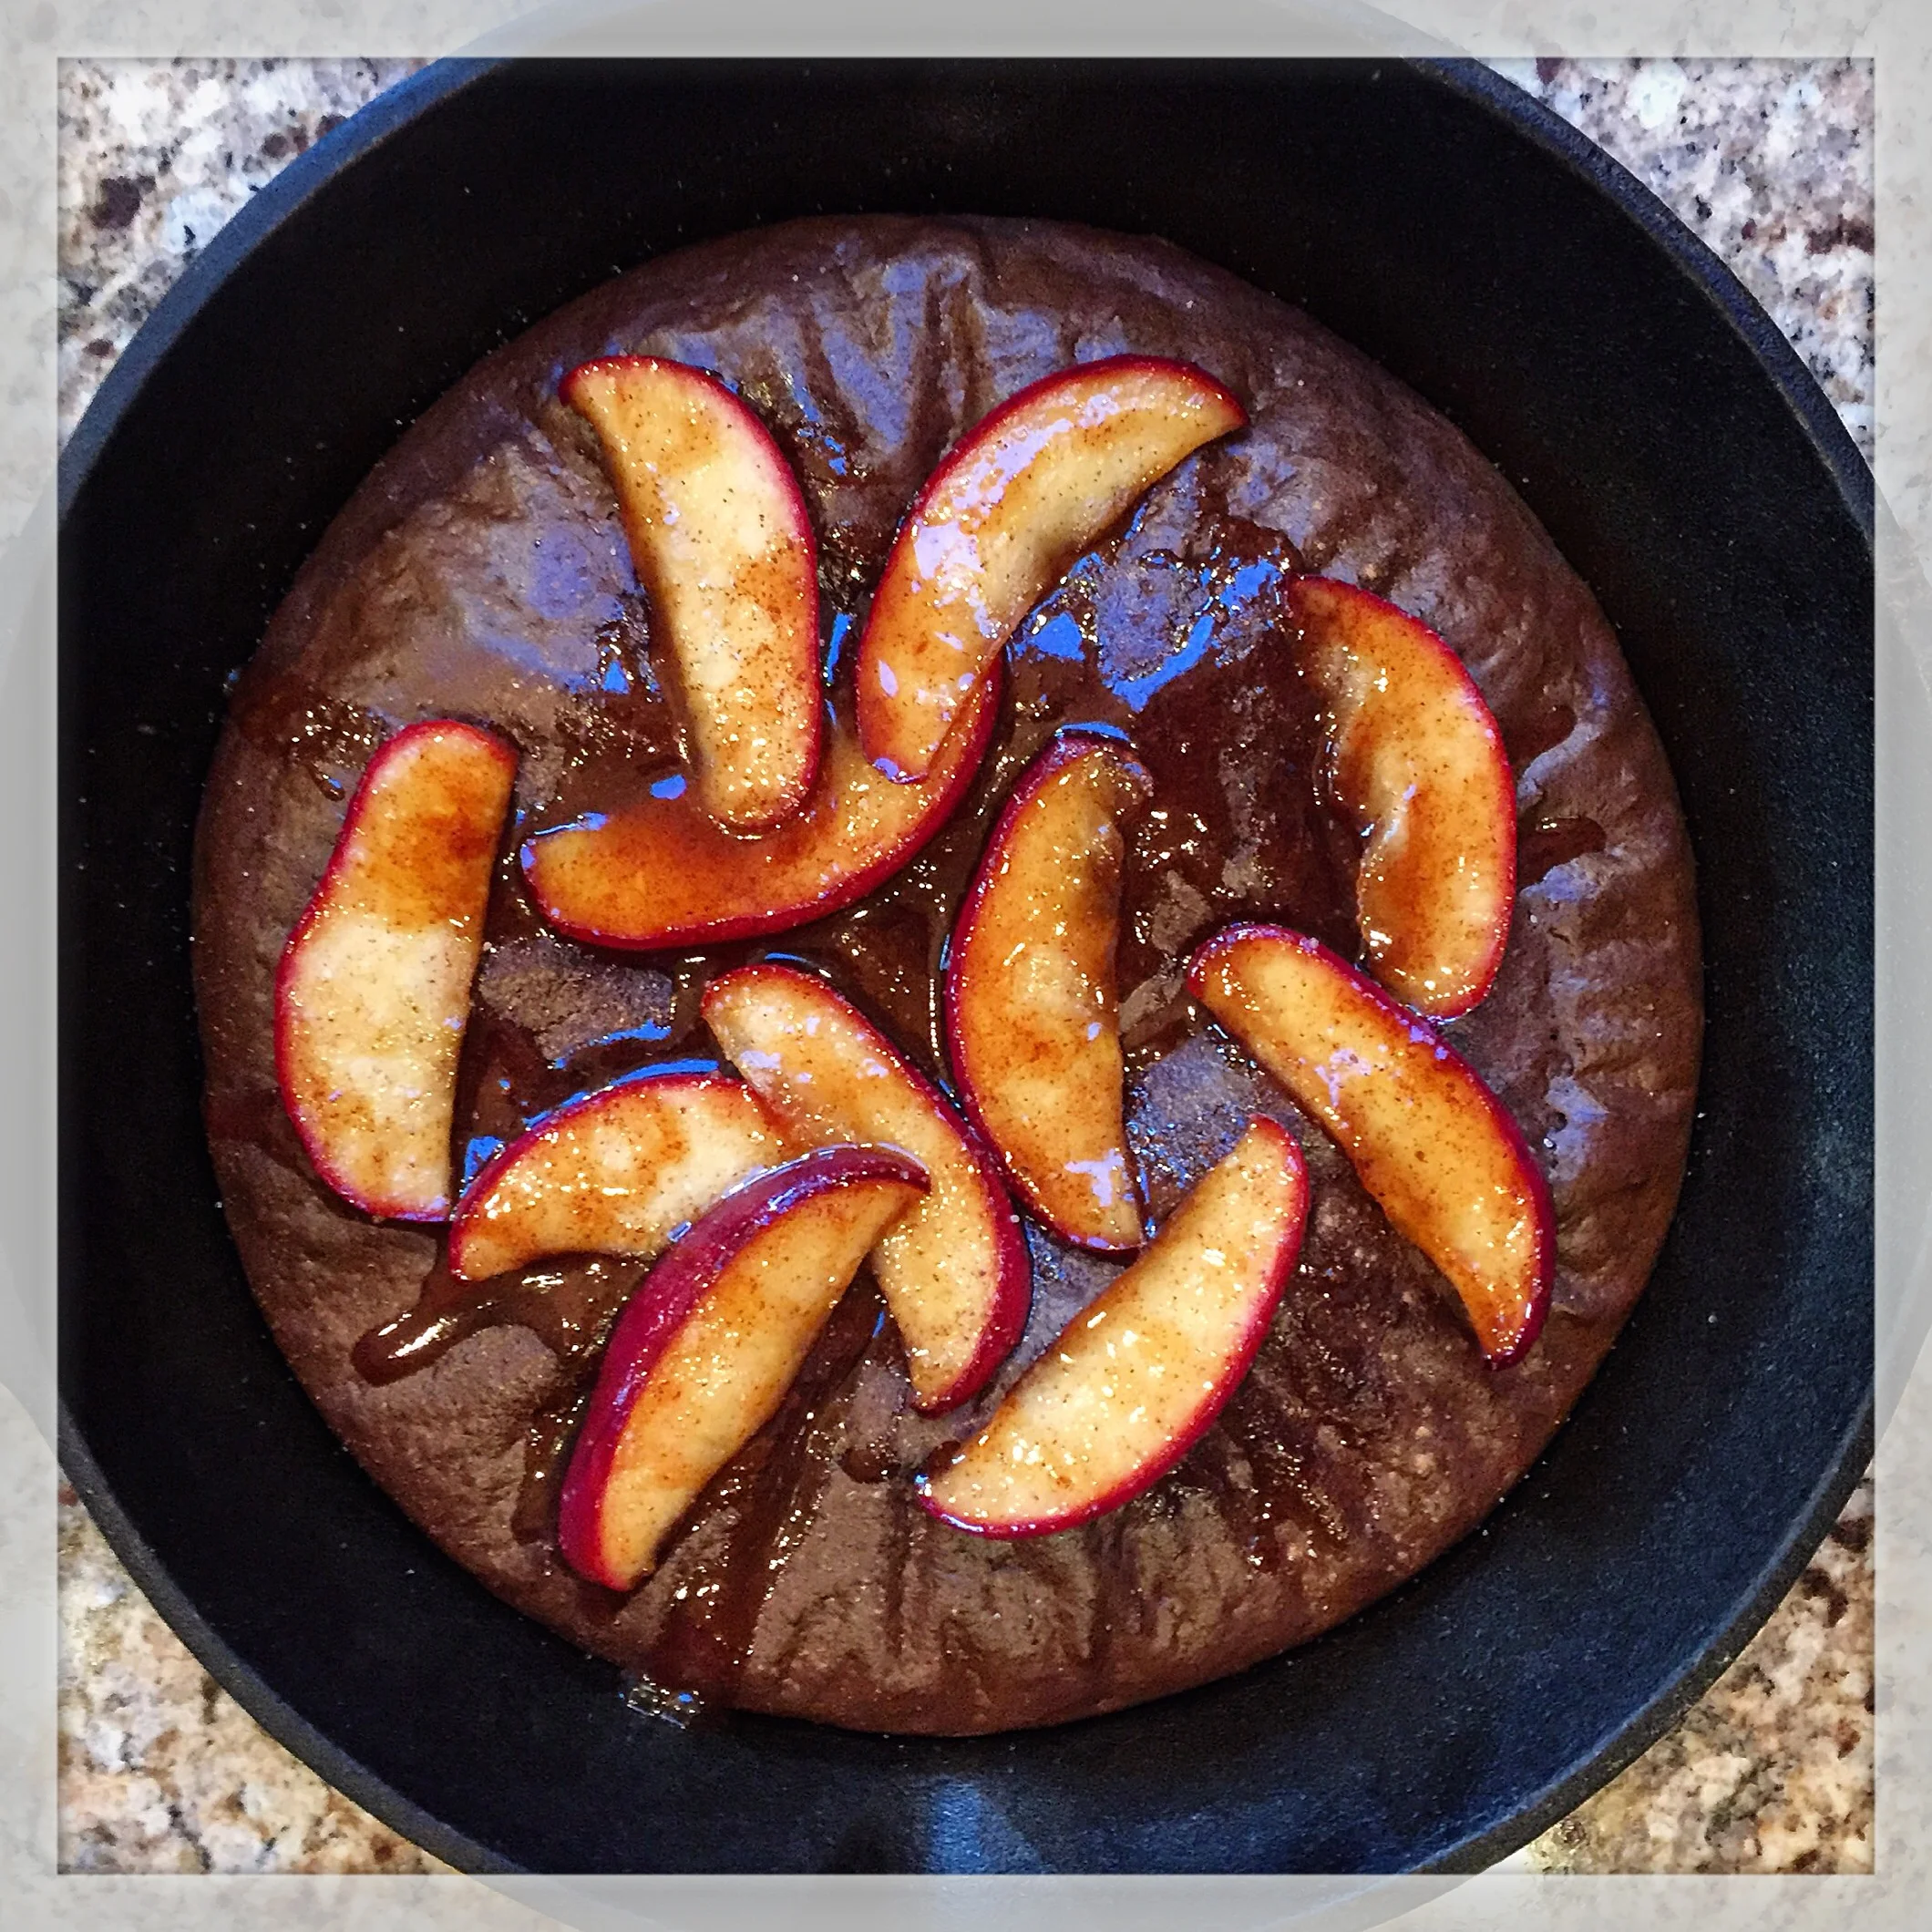
So if my caramels seem to difficult and baking apple roses aren't your thing—try this recipe out, I think you'll find they are so "Definitely Delish"


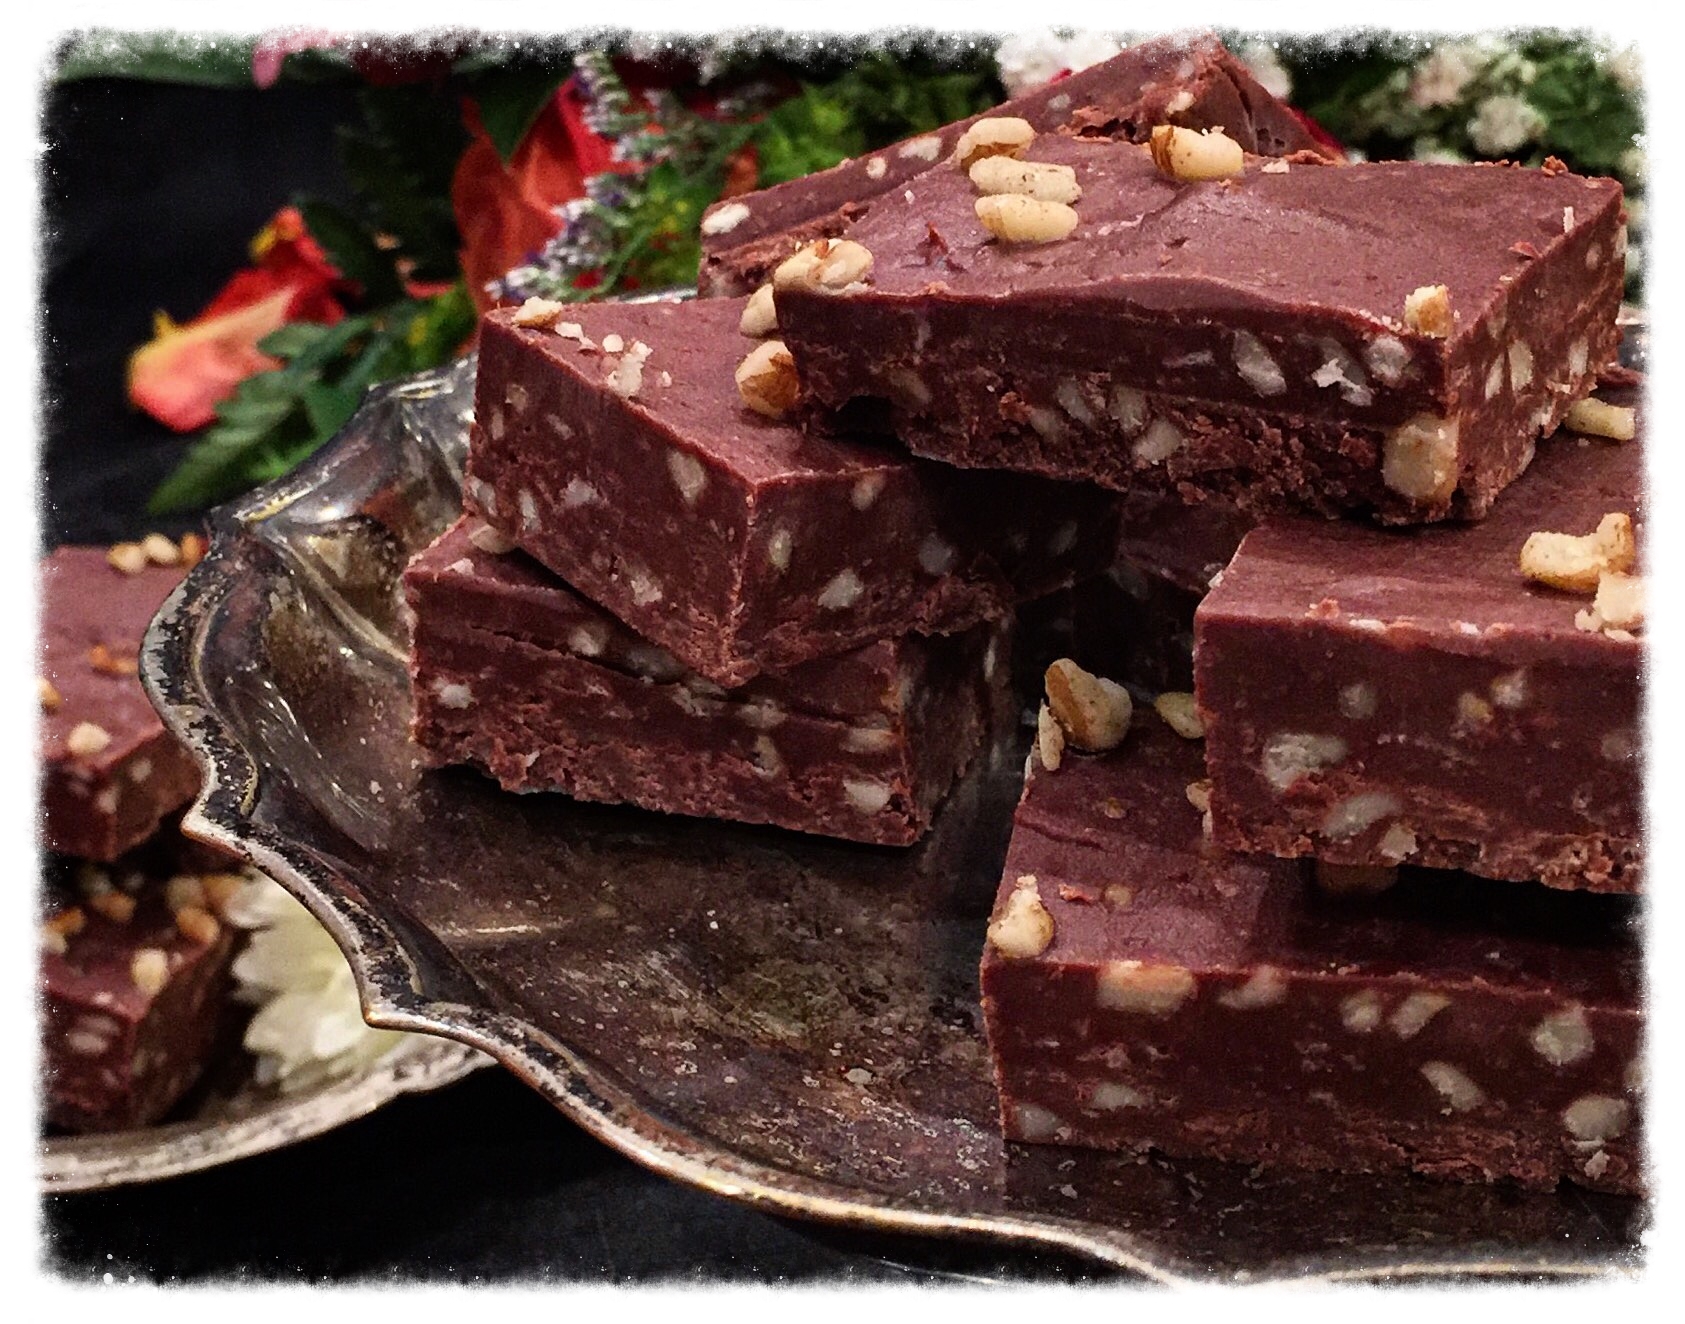
"Simply Delish Fudge"

Ingredients:
2 (12 oz.) packages semisweet chocolate chips
1 can sweetened condensed milk
2 tablespoon water
2 teaspoon vanilla extract
1 cup chopped walnuts, toasted (optional)

Directions:
1. Line a 9x9 inch baking pan with waxed paper or plastic wrap; set aside. (The larger or smaller the pan, the thicker or thinner the fudge)
2. In a medium microwave-safe bowl, combine chocolate pieces, sweetened condensed milk, and water...
3. Microwave, uncovered, for 1 minute; stir. Continue microwaving 20 seconds at a time until chocolate is melted and smooth—about 1 minute more...
4. Stir in nuts (if using) and vanilla extract...
5. Pour mixture into prepared dish and spread it evenly...
6. Chill fudge about 1 hour in refrigerator until firm...
7. Cut fudge into 1 inch squares. Makes 24 to 48 pieces depending on size and shape of pan used...

Notes:
1. This is a super simple way to make fudge and is easily altered to suit tastes or to change it up...
2. Change or mix nut types, or leave them out completely...


"Wake up the Romance this Valentine's Day"

Well it's another cold winters day here in New York, and I'm in my kitchen thinking about what to do for Valentine's Day this year...
Well after more then a little bit of thought, and a tiny measure of anxiety, what else could I possibly do but roses—I mean you can't go wrong with roses, right..?
So after deciding to stick with tradition you would think I'd be done; but nothing could be further from the truth, taking the traditional I immediately tossed it on its head and got creative—and that's where this idea was born, the "Apple Rose Cinnamon Pecan Roll"

I mean what better way to wake up your loved one in the morning then the smell of hot cinnamon rolls and baked apples served up with some fresh brewed coffee...
You'll have a whole day yet for the candy hearts, long stem roses and homemade confections—so why not start with a rose that'll really impress when your special someone first opens their eyes on this Sunday...
I think you'll find that they'll be both amazed, and impressed, by your choice; but even more importantly, their stomachs will be beyond satisfied by your thoughtfulness this holiday—because these are, without doubt, so "Definitely Delish"


"Apple Rose Cinnamon Pecan Rolls"

IMG_6677.JPG

Ingredients:
For Dough:
2 3/4 cups all-purpose flour (measured correctly)
3 Tablespoons granulated sugar
1 teaspoon salt
1 package instant yeast (1 packet = 2 and 1/4 teaspoons)
1/2 cup water
1/4 cup milk
2 1/2 Tablespoons unsalted butter
1 large egg
For Apples:
3 medium Rome apples
4 tablespoons sugar
2 tablespoons lemon juice
For Filling:
1/2 cup toasted chopped pecans
1 tablespoon melted butter
5 tablespoons organic sugar
2 teaspoons ground cinnamon
1/4 ground cloves
For Topping:
1-2 tablespoons of raspberry or apricot preserves (I used my homemade Blood Orange marmalade)

Directions:
1. Set aside 1/2 cup of flour. In a large bowl, sift the 2 1/4 cups flour, the sugar, salt, and yeast together until well mixed-then set aside...
2. Heat the water, milk, and butter together in the microwave until the butter is melted and the mixture is hot to touch...
3. Stir the butter mixture into the flour mixture; then add the egg and only enough of the reserved flour to make a soft dough. I only needed about a 1/3 cup, but you may need the full 1/2 cup. (Dough will be ready when it gently pulls away from the side of the bowl and has an elastic consistency)
4. On a lightly floured surface, knead the dough for about 3-4 minutes. Place in a lightly greased bowl (I used non-stick spray) and let rest for about 10 minutes...
5. After 10 minutes, roll the dough out in a 12x12 inch rectangle...
6. Pre-Heat oven to 400 degrees Fahrenheit. Then spray a regular-size muffin pan with non-stick baking spray...
7. Wash and core apples. Then thinly slice each one, leaving the peel on...
8. In 2-quart saucepan, heat 4 cups water, 4 tablespoons sugar and the lemon juice to boiling. Add the apple slices; boil about 3 minutes or until apples are soft. You want to be easily able to bend them without breaking...
9. Drain apples, and place on paper towels to dry and cool completely...
10. Melt 1 to 2 tablespoons of butter and brush dough; now mix sugar, cinnamon and cloves together in a small bowl—then sprinkle the mixture on the surface of the dough, followed by the chopped toasted pecan pieces....
11. Using pastry cutter (or pizza cutter), cut dough into 12 (1-inch) strips...
12. Arrange cooled apple slices end to end down each strip; with the apple peel end overhanging the edge slightly, and overlapping each other partially...
13. Carefully roll up each strip, and place in the muffin (cupcake) pan...
14. Brush the tops of the apples gently with the preserves; then bake 20 to 25 minutes or until nicely golden. Remove from pan, and cool on cooling rack...
Serve and enjoy!


"Dark Chocolate Salted Caramels for your Sweetheart"

IMG_6674.JPG

Chocolate may be the go-to sweet for Valentine’s Day, but it’s time to show caramel a little love.
It’s been relegated to a supporting role in heart shaped boxes of candy for far too long. So this year, it's about time we let caramel be the star...
Golden brown caramel is versatile enough to hold its own as a candy, plain or embellished. This version, covered in dark chocolate ganache and the wonderfully tangy crunch of the sea salt is sure to impress your sweetheart this Valentine's or any day...

IMG_5379.JPG

This recipe, I am excited to report, is one that has been published here in New York for the Valentine's Day holiday. It was lucky enough to be included in the New York Newsday's (which has a circulation of up to over four hundred thousand papers) "What's Happening Long Island" magazine insert...


IMG_6676.JPG

Definitely made my whole week to see it there, just so excited to share my recipes and as always I hope that anyone who tries one out enjoys them as much as me and my family does...


"Dark Chocolate Salted Caramels"

Ingredients:
Caramel:
2 cups packed brown sugar
1 cup Butter
3/4 cup light corn syrup
1 (14 oz.) can sweetened condensed milk
2 teaspoons vanilla extract 

Topping:
1 cup semi sweet chocolate chips
1/4 cup Heavy Whipping Cream
1 teaspoon or more coarse sea salt

Directions:
1. Line 9-inch square pan with aluminum foil, extending over edges. Butter bottom and sides of foil...
2. Combine brown sugar, butter, corn syrup and sweetened condensed milk in heavy 3-quart saucepan...
3. Cook over medium heat 6-8 minutes, stirring occasionally, until mixture comes to a boil...
4. Cook 20-25 minutes, stirring occasionally, until candy thermometer reaches 240°F-242°F or small amount of mixture dropped into cold water forms soft pliable ball. 5. Remove from heat; stir in vanilla. Pour into prepared pan...
6. Cool 2 hours at room temperature until set...
7. Combine chocolate chips and whipping cream in bowl...
8. Microwave 1-2 minutes, stirring every 15 seconds, until chocolate is melted.
9. Spread mixture evenly over caramels. Cool 5 minutes...
10. Then sprinkle with sea salt. Refrigerate until completely cooled...
11. Remove caramels from pan using foil; remove foil. Cut into 1-inch squares with sharp knife...
12. Wrap caramels in candy wrappers or waxed paper. Store refrigerated...
13. Remove from refrigerator 10 minutes before serving...


"Do You Know What Day It Is-It's Pancake Day"

It's "Pancake Day" today; and not to be left out, or left behind, I've thrown together my own surprise in support of the simple and versatile "Flapjack"
Whether you're having "Silver Dollars" stacked to the sky or bigger then the plate sized monstrosities filled with chocolate chips (like my favorites at Red's in Salem), the Pancake rarely disappoints...


From fluffy buttermilk to healthy whole grain, gluten free to southern "Hoe Cakes"—there are just so many styles, flavors, fillings and toppings to choose from...
So whether you're having them for Breakfast or "Brinner" (breakfast for dinner) there'll always be a pancake to fit the occasion...


"Nutella Crepe Cake" with "Chocolate Ganache"

Ingredients:
1 cup plain flour
1 tablespoon powdered sugar
1 cup milk
1 cup water
3 eggs
1 1/2 teaspoons Vanilla extract
1 1/2 tablespoons butter, melted
3/4 cup Nutella, softened
1 cup heavy cream
1/2 cup of 70% dark chocolate, melted
2 tbsp coconut oil

Directions:
1. Combine the flour, sugar and salt in a bowl and stir to combine...
2. In a large bowl whisk together the milk, water, eggs and vanilla and add to the dry ingredients. Whisk until smooth and then add the melted butter to the batter and stirring it in then set aside...
3. Heat an 8 inch pan on a medium-high heat and add a little oil to coat...


4. Take a 1/4 cup of batter and pour into the hot pan. Swirl around tilting the pan to evenly cover it in a thin pancake and then cook for 1 min or until the top is no longer wet...
5. Use a spatula to gently lift the edge enough to grasp with your fingers; then using both hands, gently flip the crepe to the other side and cook for 30 seconds more. (I find this easier then flipping like you see on TV, just be gentle to avoid tearing)
6. Repeat with the remaining batter ensuring you keep your pan oiled between crepes. You should end up with about 20 crepes. (You can use wax paper or linen towels to stack crepes on top of each other without them sticking)

7. Allow them to cool completely before putting together the cake...
8. Now, if necessary, soften the Nutella in the microwave for a few seconds through. Meanwhile, using a hand mixer with whisk attachment, add cold heavy cream to a bowl and whisk until peaks form and you've created a nice whipped cream—now fold the Nutella into the whipped cream until just incorporated...
9. Finally it's time to make the cake; start by spreading 2 tbsp of Nutella cream between each crepe, stacking them as you go. (You can use a spring-form pan to help keep them centered if you want)
10. Finish the cake by melting the chocolate with the coconut oil and pouring it over the top. Garnish with a little grated chocolate or cocoa powder before serving...

"Dessert for Breakfast-Not quite, but close enough"

It’s Fall outside and though the leaves haven’t quite all changed as of yet, it’s still beautiful to me…
Everything is still so new in our home that I haven’t quite gotten into a rhythm yet with my cooking; though I have kept busy cooking some oldies but goodies, such as my yummy Vodka sauce and delish Chicken Parm’…

Instead, this morning, I decided to try something I haven’t done in a while—that being, of course, some unbelievably scrumptious “Æbelskivers
These little, almost munchkin like, treats are actually a small stuffed Danish pancake—traditionally they were filled with bits of apple, or applesauce, leading them to be called appleskivers at times…
Me though, I have an overriding need to experiment and play around with any recipe no matter how simple it might be; and what can be simpler then pancakes, really…
So not only did I decide to use this wonderful sugar free (low carb) pancake mix by “Maple Grove Farms of Vermont“—but I also subbed out the oil, and one egg, for a couple of heaping tablespoons full of applesauce instead…

Now you might be thinking, why cut some carby corners with the batter; well let me tell you, it was so I wouldn’t feel to bad about filling these delicious little devils with a nice amount of chocolate chip cannoli cream
Oh my goodness—they were so incredibly tasty, much more so then your average breakfast (but not so crazy as to be a full blown dessert), though the line was more then a little blurry…
Such a great treat on this bright, brisk and beautiful Fall morning—and oh so Definitely Delish….

“Æbelskivers with Cannoli filling”

Ingredients:
Æbelskiver:
1 cup dry pancake mix (I used Maple Grove Farms Sugar Free mix)
1/3 cup +3 tablespoons Water
3 heaping tablespoons Applesauce
1 Egg (plus 1 white, optional)
1/4 teaspoon Vanilla extract
1/4 teaspoon Cinnamon Sugar

Cannoli Cream:
1 pound Ricotta cheese
3/4 cup Powdered Sugar
1/2 teaspoon Vanilla extract
1/4-1/2 cup Mini Semi-Sweet Chocolate chips

Other:
Æbelskiver pan
Cooking spray
Cheesecloth
Pastry bag
Powdered Sugar for dusting

IMG_3069.PNG

Directions:
Cannoli Cream:
1. Place ricotta cheese into a piece of folded cheesecloth, and wrap tightly, placing it into a colander in a bowl with a plate and heavy weight on top (I usually use a 32 ounce can of tomatoes). Drain for an hour at least or overnight (in a pinch you can squeeze and twist the cheesecloth, and wrap it in paper towels to try and dry the cheese out quickly but your cannoli cream will be a little softer then usual—though still tasty)…
2. Dump the ricotta into a bowl, adding powdered sugar and vanilla—then use a hand mixer until it’s blended fully together…
3. Add in desired amount of mini chips and mix—then place cannoli cream inside pastry bag and place in freezer while working on batter…

Æbelskivers:
1. Add dry mix, cinnamon sugar, vanilla extract, applesauce, egg and water to bowl—mix vigorously with a whisk (add extra egg white or extra water) till a smooth batter forms….
2. Heat an Æbelskiver pan over medium heat and spray with some cooking spray, then add a tablespoon or so of your batter to each indentation…
3. While they begin cooking; remove the pastry bag of cannoli cream from the freezer and as the batter begins to set, squeeze out a nice amount of the cannoli cream into the center of each one…
4. After that add a little more batter on top of each Æbelskiver, and prepare to flip each one over using a spoon or two (this can be a little tricky at times)
5. Continue for a minute or two more until they are fully cooked and remove them to a warm plate (in a low heated oven to keep them warm) and continue with making more until all of the batter is used up…
6. Plate them and dust with powdered sugar; you can also serve them with a dollop of whipped cream as well, if desired…

(Just like pancakes, they’re quick to make once you have the batter ready and the fillings are really only restricted by your imagination)

"Therapy Through Fried Dough"

Invariably there are times where things don’t go as planned or where you truly thought
things would work out a certain way but they don’t. Sometimes those things are out of your
control and there’s really no way you could make them happen differently. I had one of those
weeks just recently…
I know, I know-I definitely let myself become a little over excited about the prospect of a
project; and after hours and hours of prep, even more hours of cooking, photographing, clean
up and editing (not to mention the cost in time and money) I was left with a lot of unused
material. I blame myself mostly, I definitely should not have gone as overboard as I did and
with everything else being what it was, I definitely should not have been telling people what
I was up to. The embarrassment of it not being what I had thought it was, and told people it
would be, I think hurt more then the money and time lost…

So I don’t want you all to think I’m just rambling on in a woe is me attitude, I do have a point
that I’ll be coming to here in the end. It will be worth the wait. Trust me…
Now I know there are more then a few people out there who when life’s hit them below the
belt, and you’re feeling kind of down, have turned to something for therapy…
Whether it’s drinks that you drown your sorrows in or “Shopping” therapy to heal that hurt
(cause who doesn’t like buying something new, right all you ladies); we each have that one thing we all turn to,                                                                  in the end…
For me, when life’s handed me lemons I’ll end up making lemon meringue pie; or better yet, I’ll
make myself some “Fried Dough” with some delicious Fall flavors. I mean any cooking in the
kitchen helps me to feel better, even if it’s to get over a cooking disappointment like this
time…

So with no time to spare, I hunkered down and got to work on a cathartic cooking concoction to comfort my conscious. Now without any further blubbering, or blabbering, I give you two wonderfully fall’licious donuts to try-AppleCider Glazed” and Cinnamon Sugar Coated
I think if you make them for yourself you’ll find that not only will they boost your spirits but that they are also, oh so- “Definitely Delish


Fried Donuts with Apple Cider Glaze” and “Cinnamon Sugar

Ingredients:
For the Donuts:
2 tablespoons White Vinegar
3/8 cup Milk (3 oz.), scalded then cooled
2 tablespoons Shortening
1/2 cup Organic Cane Sugar
1 Egg, room temperature
1/2 teaspoon Vanilla
2 1/2 cups Flour, sifted (extra may be needed)
1/2 teaspoon Baking Soda
1/4 teaspoon Sea Salt
Canola oil (for frying)

For Apple Cider Glaze:
2 cups Apple Cider
4 cups Powdered Sugar
2 tablespoons Corn Syrup

For Cinnamon Sugar Coating:
2 cups Organic Cane Sugar
1-2 tablespoons ground Cinnamon
1/8 teaspoon of ground Nutmeg and Cloves
2 tablespoons melted butter

Directions:
For Donuts:
1. Stir vinegar into milk and let stand for a few minutes until thick. Then in a separate bowl
cream together the sugar and shortening…
2. Add eggs and vanilla to the sugar mix and stir until blended…
3. Sift together flour, salt, and soda. Stir into the sugar mixture; alternating with a little, at a
time, of the milk mixture until both are incorporated thoroughly…
4. Lightly dust your work surface with flour and then roll your dough out to about a 1/3 of an
inch thick. Now cut into doughnut shapes with a biscuit (doughnut) cutter. Roll excess dough
into small balls and flatten to make more donuts. Cut out centers of each doughnut using a
smaller biscuit cutter (or shot glass) and save dough for doughnut holes…
5. Pour an inch or two of oil into a large saute, or deep sided frying pan, and heat until it is
approximately 375 degrees and then fry doughnuts a few at a time till they turn golden brown
(about 2-3 minutes); then flip donuts and continue cooking till both sides are nice and golden
(about 2 minutes more)…
6. Remove to a paper towel lined plate to drain, then continue with remaining donuts and
doughnut holes…
For Apple Cider Glaze:
1. Boil 2 cups of Apple Cider until you’ve reduced it to 1 cup of liquid, then remove from
heat, add corn syrup and stir to combine…
2. In a large bowl add 4 cups of powdered sugar; then pour heated apple cider into bowl,
stirring with a whisk until fully mixed together. Set aside to cool on counter while frying
donuts…
3. Take your fried donuts and dip into the glaze, be sure to cover both sides completely-then
set on a wire rack over a cookie sheet to drain and set. Repeat with as many donuts and doughnut
holes as you want glazed…
For Cinnamon Sugar Mix:
1. Mix all ingredients in a large shallow bowl, or high sided dish, and set aside till ready to
dip your donuts…
2. Melt butter in a separate bowl and let sit til ready to use… (You can do this right before
you begin dipping)
3. Brush fried donuts with melted butter and place into the cinnamon sugar mix, being sure
to coat both sides-then set aside and repeat with remaining donuts and doughnut holes…

Now make a pot of dark coffee, some mulled cider or a hot toddy and enjoy…

"Hitting a Homer while on a food Odyssey"

Some days I’ll come across something; be it online or in a magazine, and I’ll think to myself—I’ve got to try that out….
This weekend I ended up doing just that; but far be it from me to leave well enough alone, I just had to play around and in the end put my own stamp on this tasty recipe…

IMG_4667.PNG

So, taking a small amount of inspiration from a picture I saw; I got down to work and made for me and my beautiful Baby a yummy, healthy and gluten free version of
Zucchini Fritters with Tzatziki Sauce
They ended up being so very good; I mean I just love it when I can take a recipe or two and smash them together, put in a few tweaks and end up with something that is wholly mine and no one else’s….
Definitely one of the things I enjoy most about cooking is the ability to create something out of nothing and put a little of yourself into a recipe….

All you avid home Chefs know what I mean; just search online for a recipe, any recipe and you could get 5, 10, a 100 different choices—but take that idea and throw in a little garlic, take out the flour, sprinkle some paprika or substitute butter for oil; and voilà, you’ve created something truly original to share with the world….
To me that is a lovely and beautiful thing…..
So without any further ado, I give you my own take on these tasty treats….
Enjoy the photos, get the recipe and try them out for yourself—cause they are, oh so
Definitely Delish…”

Zucchini Fritters with Tzatziki Sauce

Ingredients:
Fritter:
4 cups shredded zucchini
2/3 cup coconut flour
2-3 tablespoons shredded Cheddar(I used the 2% Mexican mix from Sargento)
2 large eggs & 2 egg whites, lightly beaten
1/3 cup sliced scallions (green and white parts-plus extra for garnish)
1-2 cloves fresh garlic, minced
1 tablespoon fresh chopped parsley (extra for garnish)
1-2 teaspoons fresh or freeze-dried Chives (plus extra for garnish)
1/4 teaspoon Pink or Sea Salt
1/8 teaspoon ground black pepper
—Tzatziki:
2 (7-ounce) containers Greek yogurt
1 cucumber, seedless
1/4 cup sour cream
2 tablespoons freshly squeezed lemon juice
1 tablespoon white wine vinegar
1 tablespoon minced fresh dill
1 1/2 teaspoons minced garlic
2 teaspoons pink or sea salt
1/2 teaspoon freshly ground black pepper
Other:
Grape-seed and Olive Oil for cooking (can sub in vegetable oil or coconut oil if desired)
Cheesecloth

IMG_4778.PNG

Directions:
Tzatziki:
1. Place the yogurt in a medium bowl….
2. Grate the cucumber on a grater and squeeze the grated cucumber with your hand, or using cheesecloth, to remove some of the liquid….
3. Add it to the yogurt along with the sour cream, lemon juice, vinegar, dill, garlic, salt and pepper and stir to combine….
4. Refrigerate until ready to use…
Fritters:
1. Shred Zucchini with a grater and place in a colander set over a bowl and sprinkle the zucchini lightly with salt. Allow the zucchini to stand for 10 minutes….

2. Dump zucchini into a folded square of cheesecloth and squeeze out as much liquid as possible. Then transfer the zucchini to a large bowl….
3. Add the coconut flour, eggs, whites, sliced scallions, garlic, parsley, chives, cheddar cheese, 1/4 teaspoon salt and 1/8 teaspoon pepper to the bowl…
4. Begin stirring until the mixture is well combined. Then line a plate with paper towels….
5. Coat the bottom of a cast iron pan with a mix of olive and grape-seed oil and place it over medium-high heat….
6. Once the oil is hot, scoop 3-tablespoon mounds of the zucchini mixture and using your hands, form them into a patty….
7. Place them in the hot oil, spacing them at least 2 inches apart….
8. Cook the zucchini fritters for 2 to 3 minutes, then flip them once and cook an additional 2 minutes until golden brown and cooked throughout….
9. Transfer the zucchini fritters to the paper towel-lined plate and immediately sprinkle them with a tiny bit of salt….
10. Repeat the scooping and cooking process with the remaining zucchini mixture until done…
11. Serve the zucchini fritters topped with Tzatziki sauce, or with it on the side and garnish with sliced scallions, chives and parsley….

"Just Fixate on the Braised side of Life"

8 (12).jpg

So I’ve been more than a little busy recently between spending time with my Baby, work and home; an even though I continue to try and remain active on my Food Blog & Instagram as much as possible, sometimes I need a little me time as well. (Usually consisting of hitting the gym or some non food photography)
 

With everything on my plate, as it were, a few things occasionally slip through the cracks….


For one, I am way behind on posting a bunch of photos in general; but, secondly, this little gem has sat by the wayside for a few days more then intended as well. (I blame the house, gym and pasta video for that—lol)

So without any further pontificating or procrastinating, I give you the other nights delectable & succulent delicious dish of “Braised Short Ribs inside Roasted Spaghetti Squash
Oh my goodness, what a wonderfully healthy take (for the most part) on a spectacular dinner dish. From the pan seared and seasoned goodness of the Short Ribs that had been slow cooked to perfection in a mix of Malbec wine, crushed tomatoes, garlic and thyme—all the way to the roasted, healthy and filling spaghetti squash; this was one flavorful treat….
I definitely enjoyed the fact that the squash complimented the braised ribs as well as any time that I’ve had them out; when they would be served alongside a pasta, polenta or mashed potato of some sort—definitely a whole bunch more healthy for you then otherwise, that’s for sure….

Me and my Sweetie loved it and if not for how filling the squash can be, I think we could of eaten every last bite. (But that’s what leftovers are for—a second day of yumtastic enjoyment, lol)
A perfectly wonderful delectable dish and most assuredly, oh so—”Definitely Delish

Braised Short Ribs inside Roasted Spaghetti Squash

Ingredients:
1 large Spaghetti squash (I look for one that’s evenly shaped)
2 tablespoons melted butter
3 pound beef short ribs, cut into 2″ pieces
Sea salt
freshly ground pepper
1/2 cup all-purpose flour, plus more
2 tablespoons olive oil
2 cups of fresh peeled Pearl onions (or 10 ounce package frozen pearl onions, thawed)
4 garlic cloves, chopped
2 tablespoons tomato paste
2 cups Malbec wine
Pinch of dried rosemary
6 sprigs Thyme, plus 2 tablespoons chopped
2 cups crushed Tomatoes (I used San Marzano)
2 cups beef stock (low sodium/low fat)
1-2 cups of water
1/4-1/2 cup part skim Mozzarella
Couple of pinches fresh shredded Parmesan
Fresh chopped Parsley for Garnish

Directions:
For Spaghetti Squash:
1. Preheat oven to 400 degrees Fahrenheit; then while waiting, cut spaghetti squash in half
along the long axis and scrape out seeds (making a couple of boats for your filling)…
2. Brush down insides with melted butter and lightly season with salt and pepper; then
place face down on a large cookie/baking pan with sides…
3. Roast squash for 45 minutes, then remove from oven to sit before filling… (You can roast
squash while short ribs are simmering to save time and ensure that they’re nice and hot
when filling)

For Braised Short Rib Filling:
1. Season short ribs with sea salt and pepper; toss with 1/2 cup flour on a rimmed baking
sheet. Heat oil in a large heavy pot over medium-high heat and, working in batches, shake excess flour from ribs and cook, turning occasionally, until deeply browned, 8–10 minutes per batch. Using a slotted spoon, transfer to a large bowl…
2. Add Pearl Onions to same pot and cook, stirring occasionally, until golden brown; season with sea salt and pepper and, using a slotted spoon, transfer to a small bowl…
3. Reduce heat to medium, add garlic and a drizzle of olive oil to the pot, and cook, stirring, until softened, about 2 minutes…
4. Add tomato paste and cook, stirring often, until slightly darkened in color, 5–8 minutes…
5. Add wine, rosemary, and thyme sprigs, bring to a boil, and cook, scraping up browned bits,
until liquid is reduced slightly, 4-6 minutes…
6. Then add 2 cups crushed tomatoes, 2 cups of beef stock and 1-2 cups of water (alternately
use 3 cups or more of water, leaving beef broth out) to pot and bring to a boil…
7. Return short ribs to pot; season with sea salt and pepper. Reduce heat and simmer gently,
uncovered, until short ribs are almost falling apart and liquid is thick enough to lightly coat
a spoon, 2 1/2–3 hours…
8. Add onions and chopped thyme to pot and stir to break up short ribs (removing bones from
pot with tongs); season filling with sea salt and pepper. Remove herb sprigs…
9. Scoop filling into prepared Spaghetti Squash halves then sprinkle with mozzarella and
Parmesan cheeses…
10. Place back on rimmed baking dish and cook in oven till cheese melts. Remove from oven
and garnish with fresh chopped parsley…


Now enjoy…! (Preferably with some of that Malbec wine you didn’t use while cooking—lol)

"Cravin Cajun-NOLA on my MInd"


It had been, sad to say, more then a little bit since last I had shared with all of you some of my home cooking when, finally, I had posted this delectable dish…
A good amount of the reason behind that had been that me and my Baby had been in the process of moving and the time was just not there (plus it can be a little difficult to cook when everything’s boxed up—lol).

Finally, though, I can say that we’ve begun settling in nicely and our house is quickly becoming a home…

So now that all of our stuff is finding its place and we’re not rushing hither, thither and yon—I can at last set about getting some good ole Chef’ing done in our amazingly beautiful new kitchen….
And so, for what was the very first meal in our new home, I decided to go with a favorite of mine inspired by one of my loves, the city of New Orleans (my first loves being my Baby Nicole and then Cooking, of course).

I just love the various foods to be had down there, especially all of that wonderfully spicy and delicious river fish (most of all, catfish) blackened to perfection and served up with grits or red beans and rice, fried okra or collared greens—truly, I could go on and on about the food to be had in that hauntingly lovely and historic southern city…


Keeping that in mind, I did my best to do that spectacular culinary culture justice with my own take on “Blackened Catfish with Habanero Honeyed Goat Cheese Grits and Roasted Asparagus
Such a yummy and flavorful dish filled with just the right amount of fiery heat balanced by the luscious cheese and sweetened Rosé wine…


Definitely a meal worth reveling in and savoring every bite of; because it is, oh so, “Definitely Delish“…

Blackened Catfish with Habanero Honeyed Goat Cheese Grits

Ingredients:
Catfish Filet (the bigger the better in my opinion)
1/2 Cup Grits
1 1/2 cups Water
1/2 cup light (or heavy) Cream
1 Habanero Chile
8 oz. package Honey Goat Cheese
Pink Himalayan Salt
Fresh Ground Pepper
1 Scallion Chopped
1 teaspoon Fresh Rosemary and Thyme, chopped
1 clove Garlic, minced
Fresh chopped Italian Parsley
Blackened Seasoning (Recipe below)
1-2 tablespoons Sweet Cream Butter
1-2 tablespoons Olive Oil

Directions:
1. Bring Water to a boil in medium saucepan, then add cream and Grits…
2. Stir 5-7 minutes, adding a dash of pink salt—meanwhile heat a large pan or griddle on medium to medium-hi  (depending on stove)…
3. Add some minced garlic, rosemary, thyme, pepper and half the habanero to grits halfway through cooking         time—then season one side of Catfish with blackened seasoning…
4. Add 1 tablespoon of Butter and Oil to griddle/pan and then place Catfish seasoning side down on to it…
5. Continue cooking Grits, adding a little butter if desired and a touch of scallion and parsley—then remove from  heat and mix in desired amount of Goat cheese…
6. As Catfish cooks, season the top with more blackened seasoning and flip about a little over halfway done           (around 4-5 minutes)
7. After cooking Catfish for around 4 minutes more, move to plate and garnish with sliced scallions and fresh    chopped parsley…
8. Serve with Habanero Honey Goat Cheese Grits garnish with minced habanero pepper, any extra honey goat     cheese you might have left (to cool the flames) and a Vegetable if desired (I did roasted Asparagus with thyme, salt and oil)

Wine Pairing:
I paired it with a light but Fruit forward Merlot Rosé  by theBaiting Hollow Farm and Vineyard Winery of Long Island; It is delightful, yet slightly milder and  somewhat sweeter Rosé and helped to quell the heat from all that wonderful habanero and blackened seasoning…

Blackened Seasoning:
Ingredients:
1 tablespoon sweet paprika
2 1⁄2 teaspoons salt
1 teaspoon onion powder
1 teaspoon garlic powder
1 teaspoon cayenne
3⁄4 teaspoon white pepper
3⁄4 teaspoon black pepper
1⁄2 teaspoon dried thyme leaves
1⁄2 teaspoon dried oregano leaves

Directions:
1. Combine all ingredients, mix well and
keep unused portion in air tight container…


"Where We're Going-We Don't Need Carbs"

Look; I like cookies, cakes and snacks as much as the next guy—but lately I've been going overboard. Between the various experiments with cookies and fudges at night in preparation for the holidays, (thank goodness I'm able to unload most of that on my co-workers in the mornings) as well as all the eating out for dinner I've been doing—I definitely am feeling like I need a long break and a lot of gym time...
So in trying to pare myself back from the plethora of carbs and sugars (damn you sugar..!!!! Lol..)


I decided to bring back something I haven't made in quite a while...
This, of course, is my "Chocolate Protein Dutch Baby" with "Cinnamon Apples"
For the uninitiated; a Dutch Baby is a pancake which is baked in the oven, which allows it to puff up (and collapse in the center) while cooking...
I just love them, and with this wonderful recipe I get to make my cake and eat it to—and all without any of the guilt... (You can't beat that–really)
So I won't continue to bore you too much more with a whole lot of blither and blather, and get right to the good stuff—the recipe...
This ones pretty simple and shockingly good; a scoop of protein powder, some cocoa, vanilla, sugar substitute, baking powder, almond milk and an egg for the Pancake. Then a few apple slices, cinnamon, butter (or your favorite butter flavored substitute) and sugar substitute (truvia or stevia) for your topping...
For those who want it and just can't live without a little syrup on their pancake;  Mancakes makes a maple flavored syrup that's high fiber, and low sugar, and tastes close to the real thing... (Available at your local Vitamin Shoppe)
Either way this recipe is a terrific alternative to counter the carb heavy holidays we find ourselves in; so continue to fixate on the fun, walk off the sweets as you shop and try this for your next breakfast—I think you'll find that it is, oh so "Definitely Delish"


IMG_5765.JPG

"Chocolate Protein Powder Dutch Baby" with "Cinnamon Apples"

Ingredients:
Pancake:
1 scoop of Chocolate Protein Powder (Quest works best as far as I've seen)
2 Eggs, at room temperature
1/2 teaspoon Baking Powder
1 teaspoon Vanilla Extract
1 1/2 tablespoons Cocoa Powder (I use Hersheys special dark)
1-2 teaspoons Truvia (Or your prefered Sugar substitute)
1 tablespoon Coconut flour
1/8 teaspoon fine Sea Salt
1 tablespoon Butter (Light or your favorite substitute)
2-4 tablespoons of Unsweetened Almond Milk (More if necessary)

Apple Topping:
1 tablespoon Butter (Light or Substitute)
1/2 Apple, sliced thin
1/2 teaspoon Cinnamon (Plus more for dusting)
1 teaspoon Truvia (Or substitute)

Directions:
Pancake:
1. Pre-heat oven to 450 degress farenheit, with a 10 inch cast iron skillet
placed inside...
2. In a bowl, or blender, combine the pancake ingredients-mixing until a smooth
batter like consistency is reached. Additional Almond Milk beyond 4 tablespoons
may be required...
3. Once the oven has reached temperature, remove (using an oven mitt) the cast iron skillet
and place a tablespoon of butter into it. Swirl the butter around coating the sides and
bottom of the skillet, then pour the butter into your batter...
4. Place your skillet on the stove, quickly mix the butter into the batter and then pour
all of the batter into your skillet covering the entire bottom of the skillet...
5. Now put your skillet back inside the top half of your oven and cook for 20 to 25 until puffed and darkened at edges...
6. Remove the skillet from the oven with an oven mitt, then pour or ladle the apple slices (directions below)
over top of your now finished Dutch Baby pancake...
7. Finally, garnish the top with a light sprinkling of additional cinnamon if desired...

Apples:
1. While your Dutch Baby Pancake is baking inside the oven get to work on your apples; first by coring 1 apple,
cutting it in half and then slicing that half into thin pieces...
2. In a seperate pan or skillet, melt your butter and add your apple slices. Cook for 1 or 2 minutes...
3. Now sprinkle over top of your apples the sugar substitute you're using and the cinnamon, then continue
cooking for 2-5 minutes more-or until apple slices soften and turn golden brown...
4. If you feel your apples are dry you can add 1 to 2 tablespoons of apple cider or additional butter to create more of a topping-though
this adds to the overall calorie content...