"Kataifi - Turkish Street Food"

I've been looking to try something new for a long while, months and months back in passing I saw one of the many videos that percolate through Facebook and YouTube involving street food..

It was barely a second or two but something about one of the dishes caught my eye—an that was KataÏfi or Knafeh or really as I was to discover dozens of other names and styles..

So after procrastinating for far to long I finally set out to try to bring together a version all my own..

I then went about scouring the internet; searching YouTube videos, and food blogs, predominately from the local chefs and cooks kind enough to add English translations in the Eastern Mediterranean, Turkey, Greece, Israel and the Levant when I could..

After learning as much as I could in a short while about the many different versions and styles this street food is created in throughout the region, I then finally decided upon the style I would attempt..

Taking my cues from several versions I saw, I then tweaked and touched up my version and went about trying to make it my own..

From chopping the shredded philo, to the decision to mix and match several eastern style white cheeses from the region, and finally to the small changes to my syrup..

It was surprisingly much easier to work with then I expected, especially as it was my first time working with philo dough of any kind—but I always love trying new things from around the world, it's part of the fun of cooking..

Everyone in my family loved it, as well as my Greek boss at work who took several pieces home to his family to enjoy—an I have to say I really enjoyed it myself too, was just the right mix of ingredients and the syrup was just to yummy for words on top of all that dough and cheese..

This Turkish inspired street food is much easier to make then you might expect so I encourage you to try it out at home for yourself—I know you'll find that it is oh so "Definitely Delish"

"Kataifi - Knafeh - Kunafa - Kadaïfi"

Ingredients:
Dough:
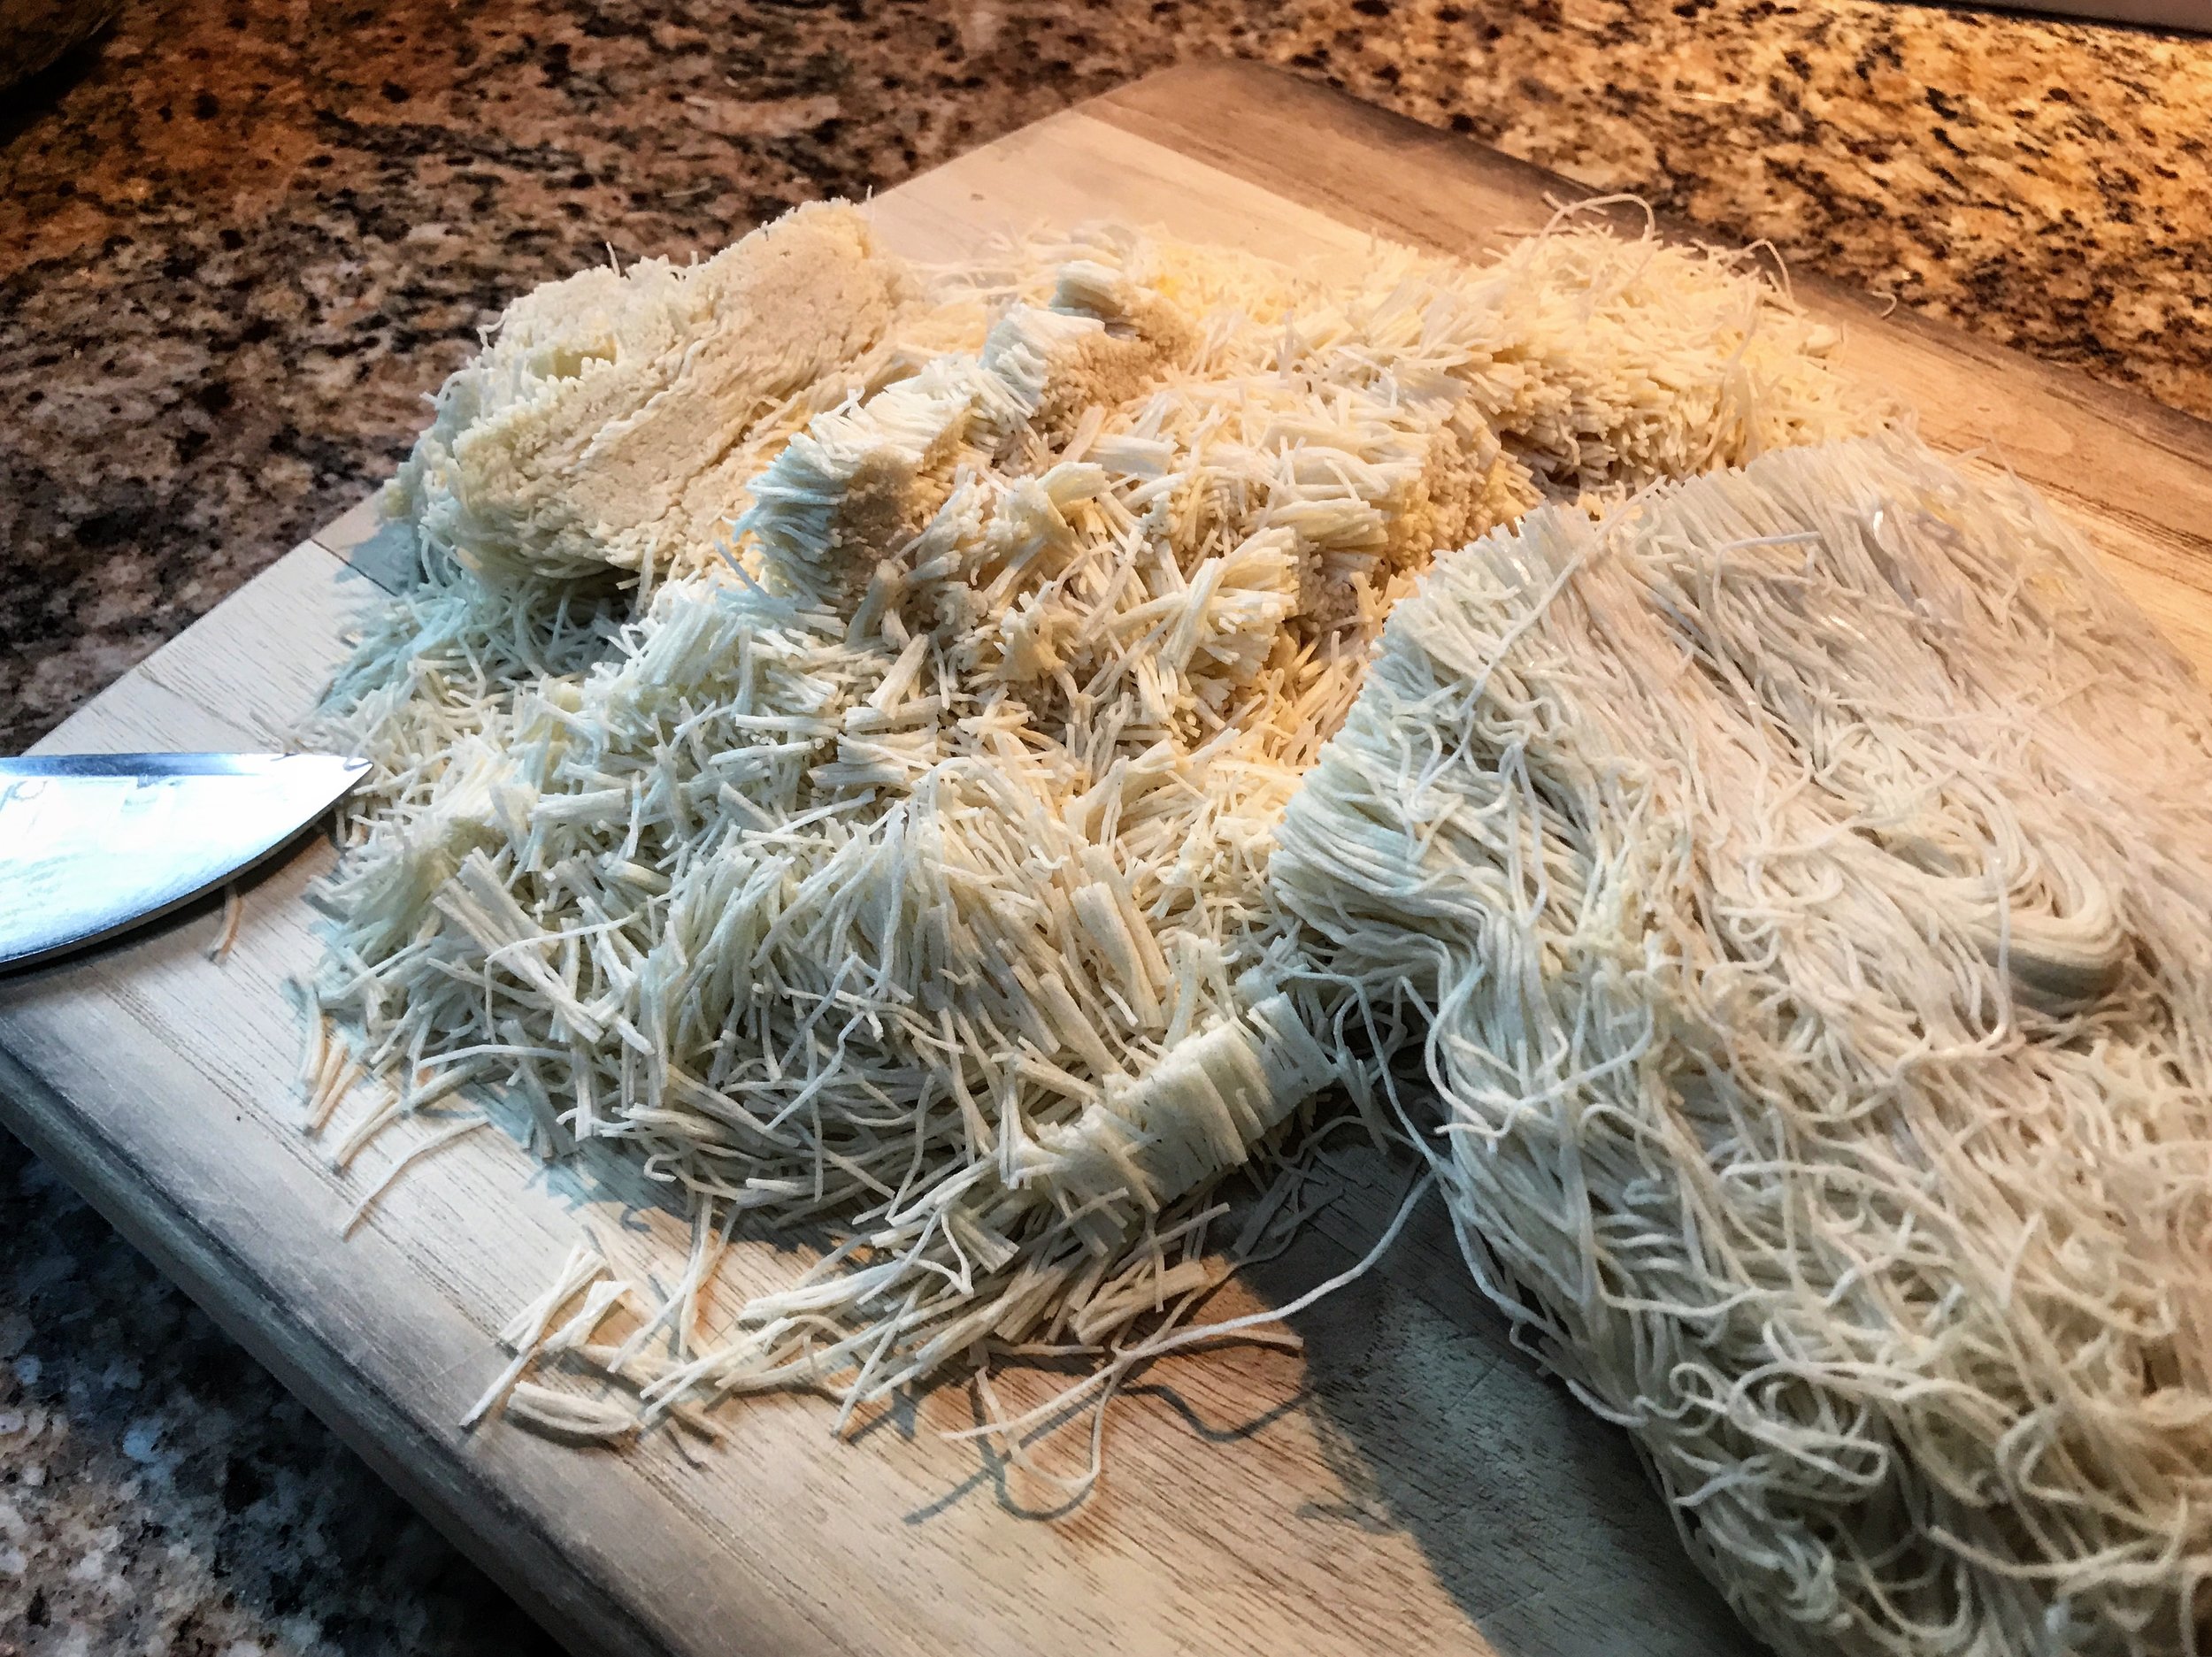
Knafeh Dough (Shredded Philo)
1 cup Unsalted Butter

Orange Blossom Syrup:
1 1/2 cups Water
2 1/2 cups Raw Sugar
1 tsp Lemon Juice
1 tsp Rose Water
1-2 tsps Orange Blossom Water
1 teaspoon Orange liqueur
1 teaspoon of finely grated Orange Zest
1 1/2 tsps fine Himalayan Pink Salt

Filling:
1/2 cup of Semolina flour
Mix of White Cheeses (unsalted if possible) 4 cups, shredded & loosely packed into a large measuring cup (I used a mix of Armenian string cheese, Greek Kasseri cheese, Akkawi and frsh Mozzarella cheeses)

Extras:
Chopped & crushed Pistachios, roasted & salted

Directions:
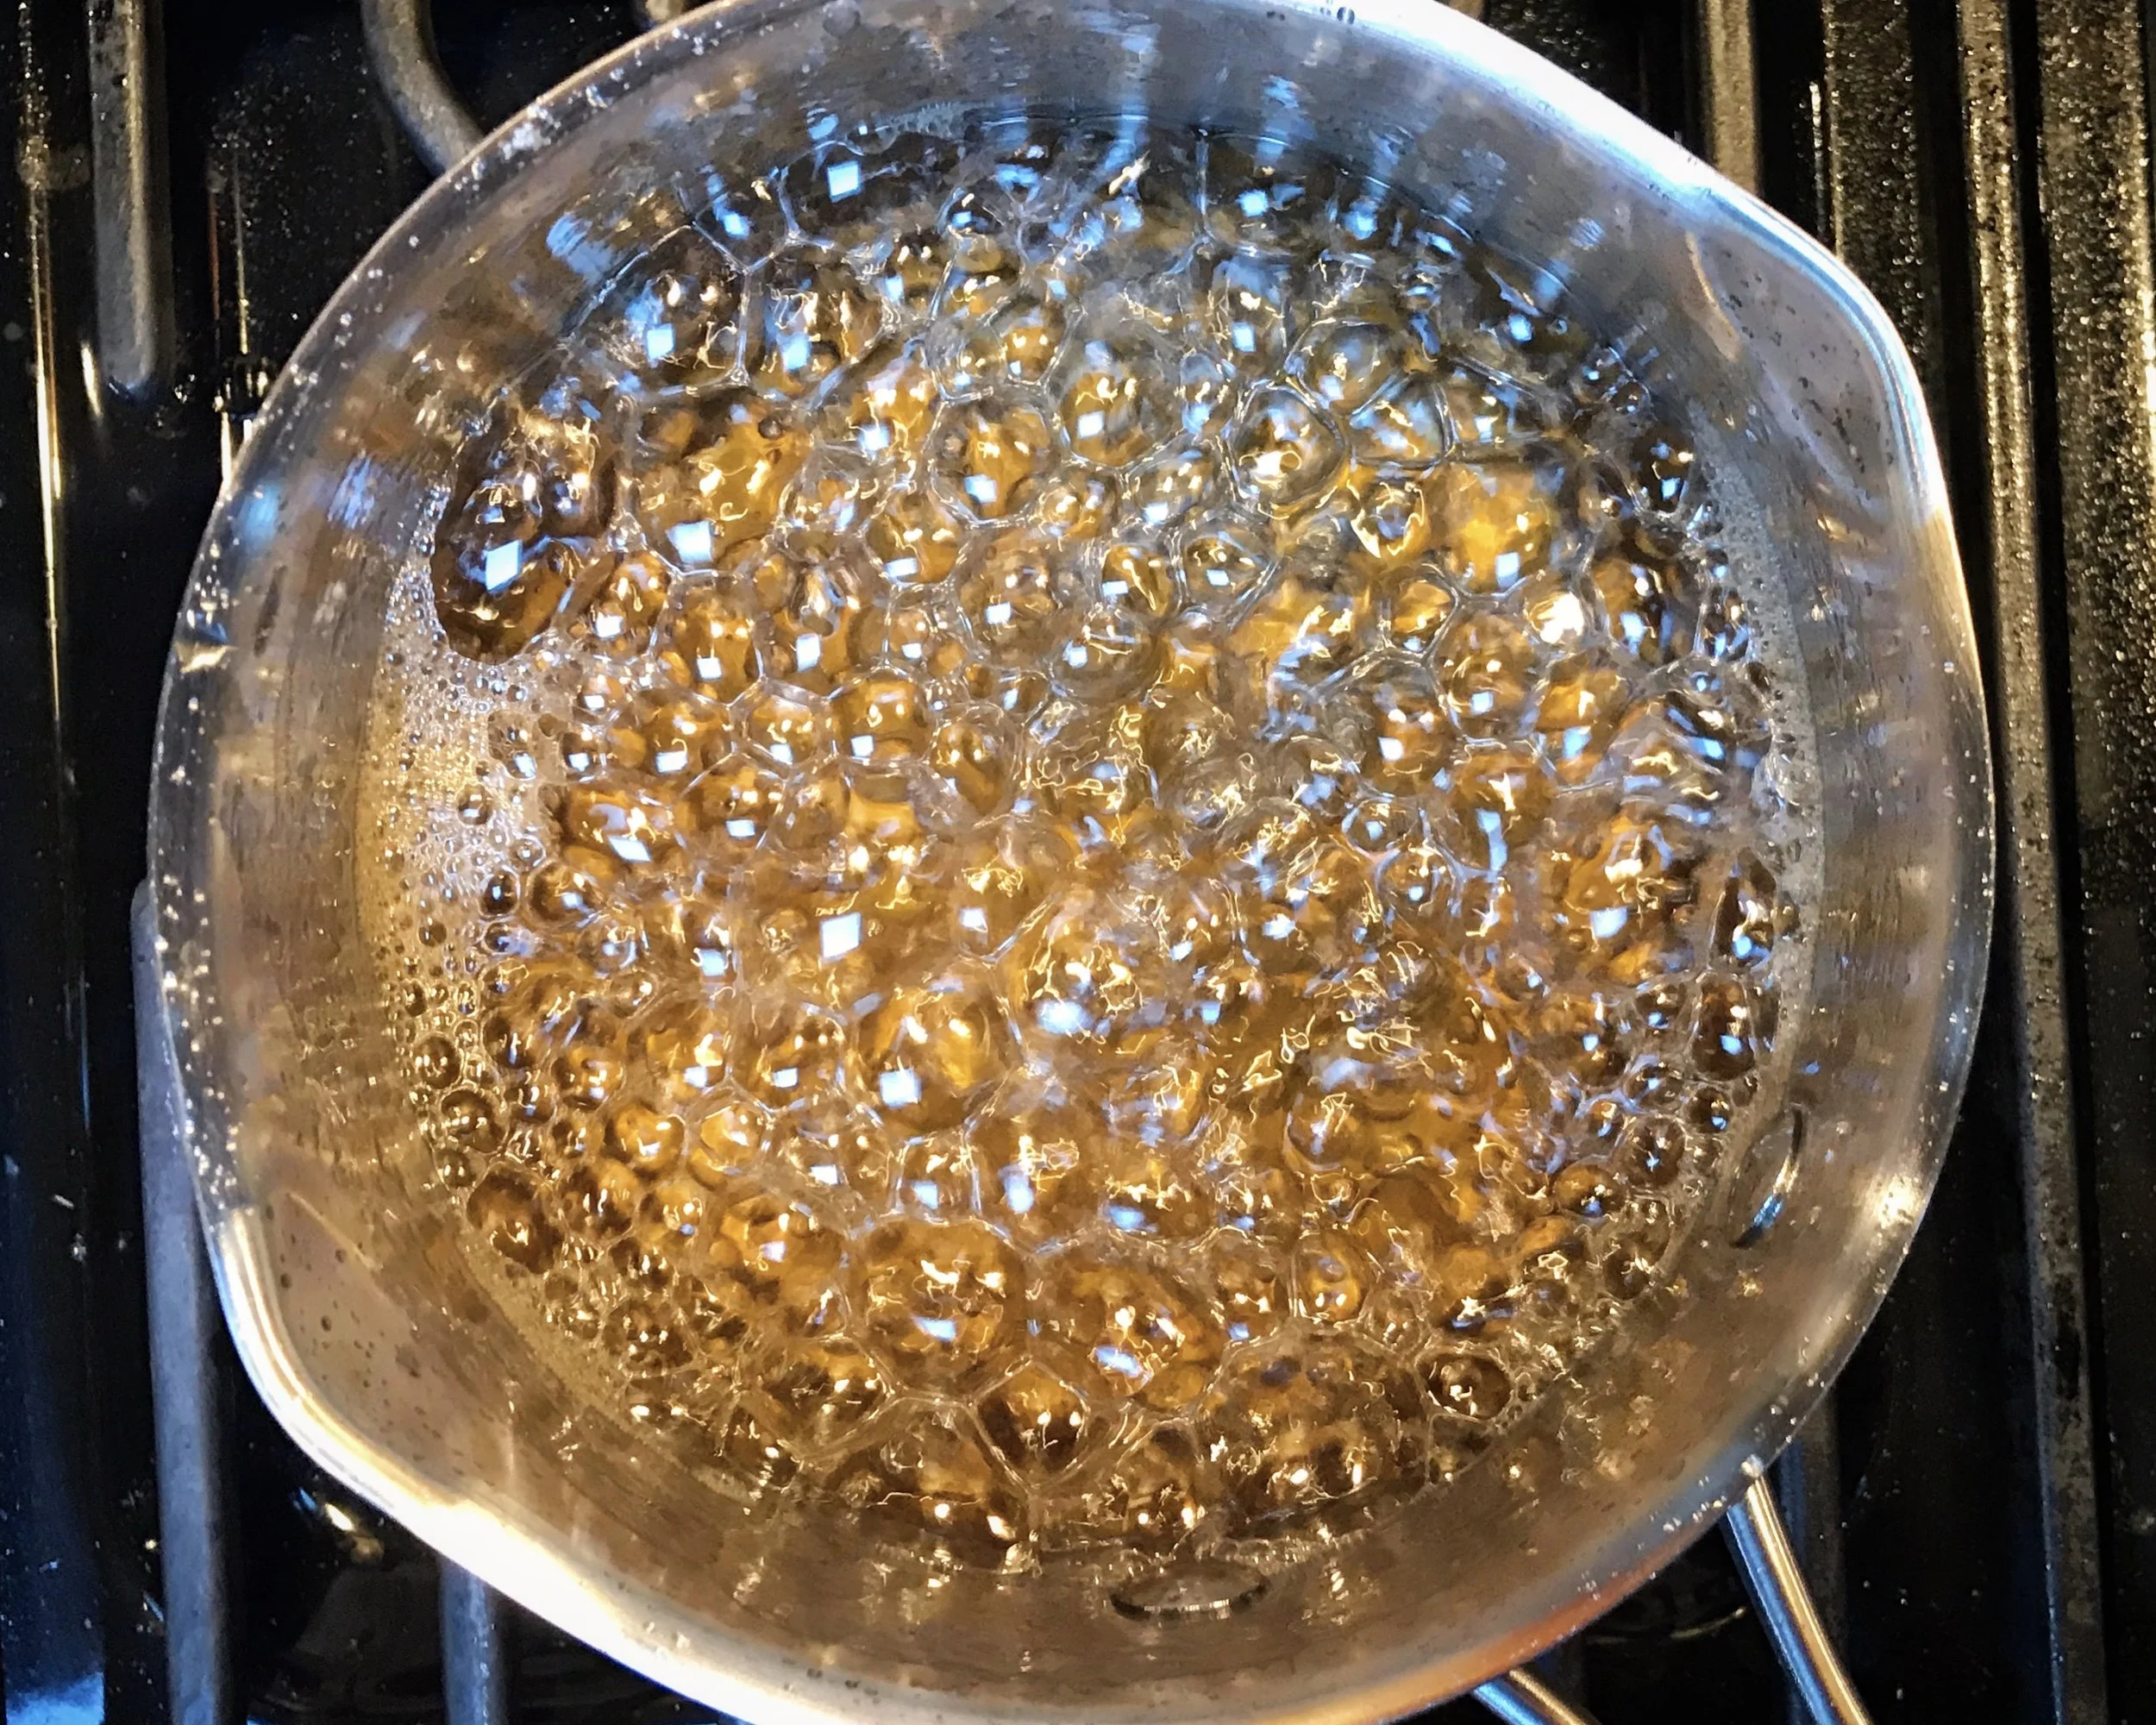
1. To prepare the sugar syrup:
2. Put the sugar and water in a small saucepan and place over medium heat..
3. Stir until the sugar dissolves. Leave to boil then add the lemon juice and keep on medium heat for 10 min until the syrup thickens..
4. Add the orange zest, orange liqueur, orange blossom water and rose water. Remove from heat and transfer to a large bowl..

For the Dough:
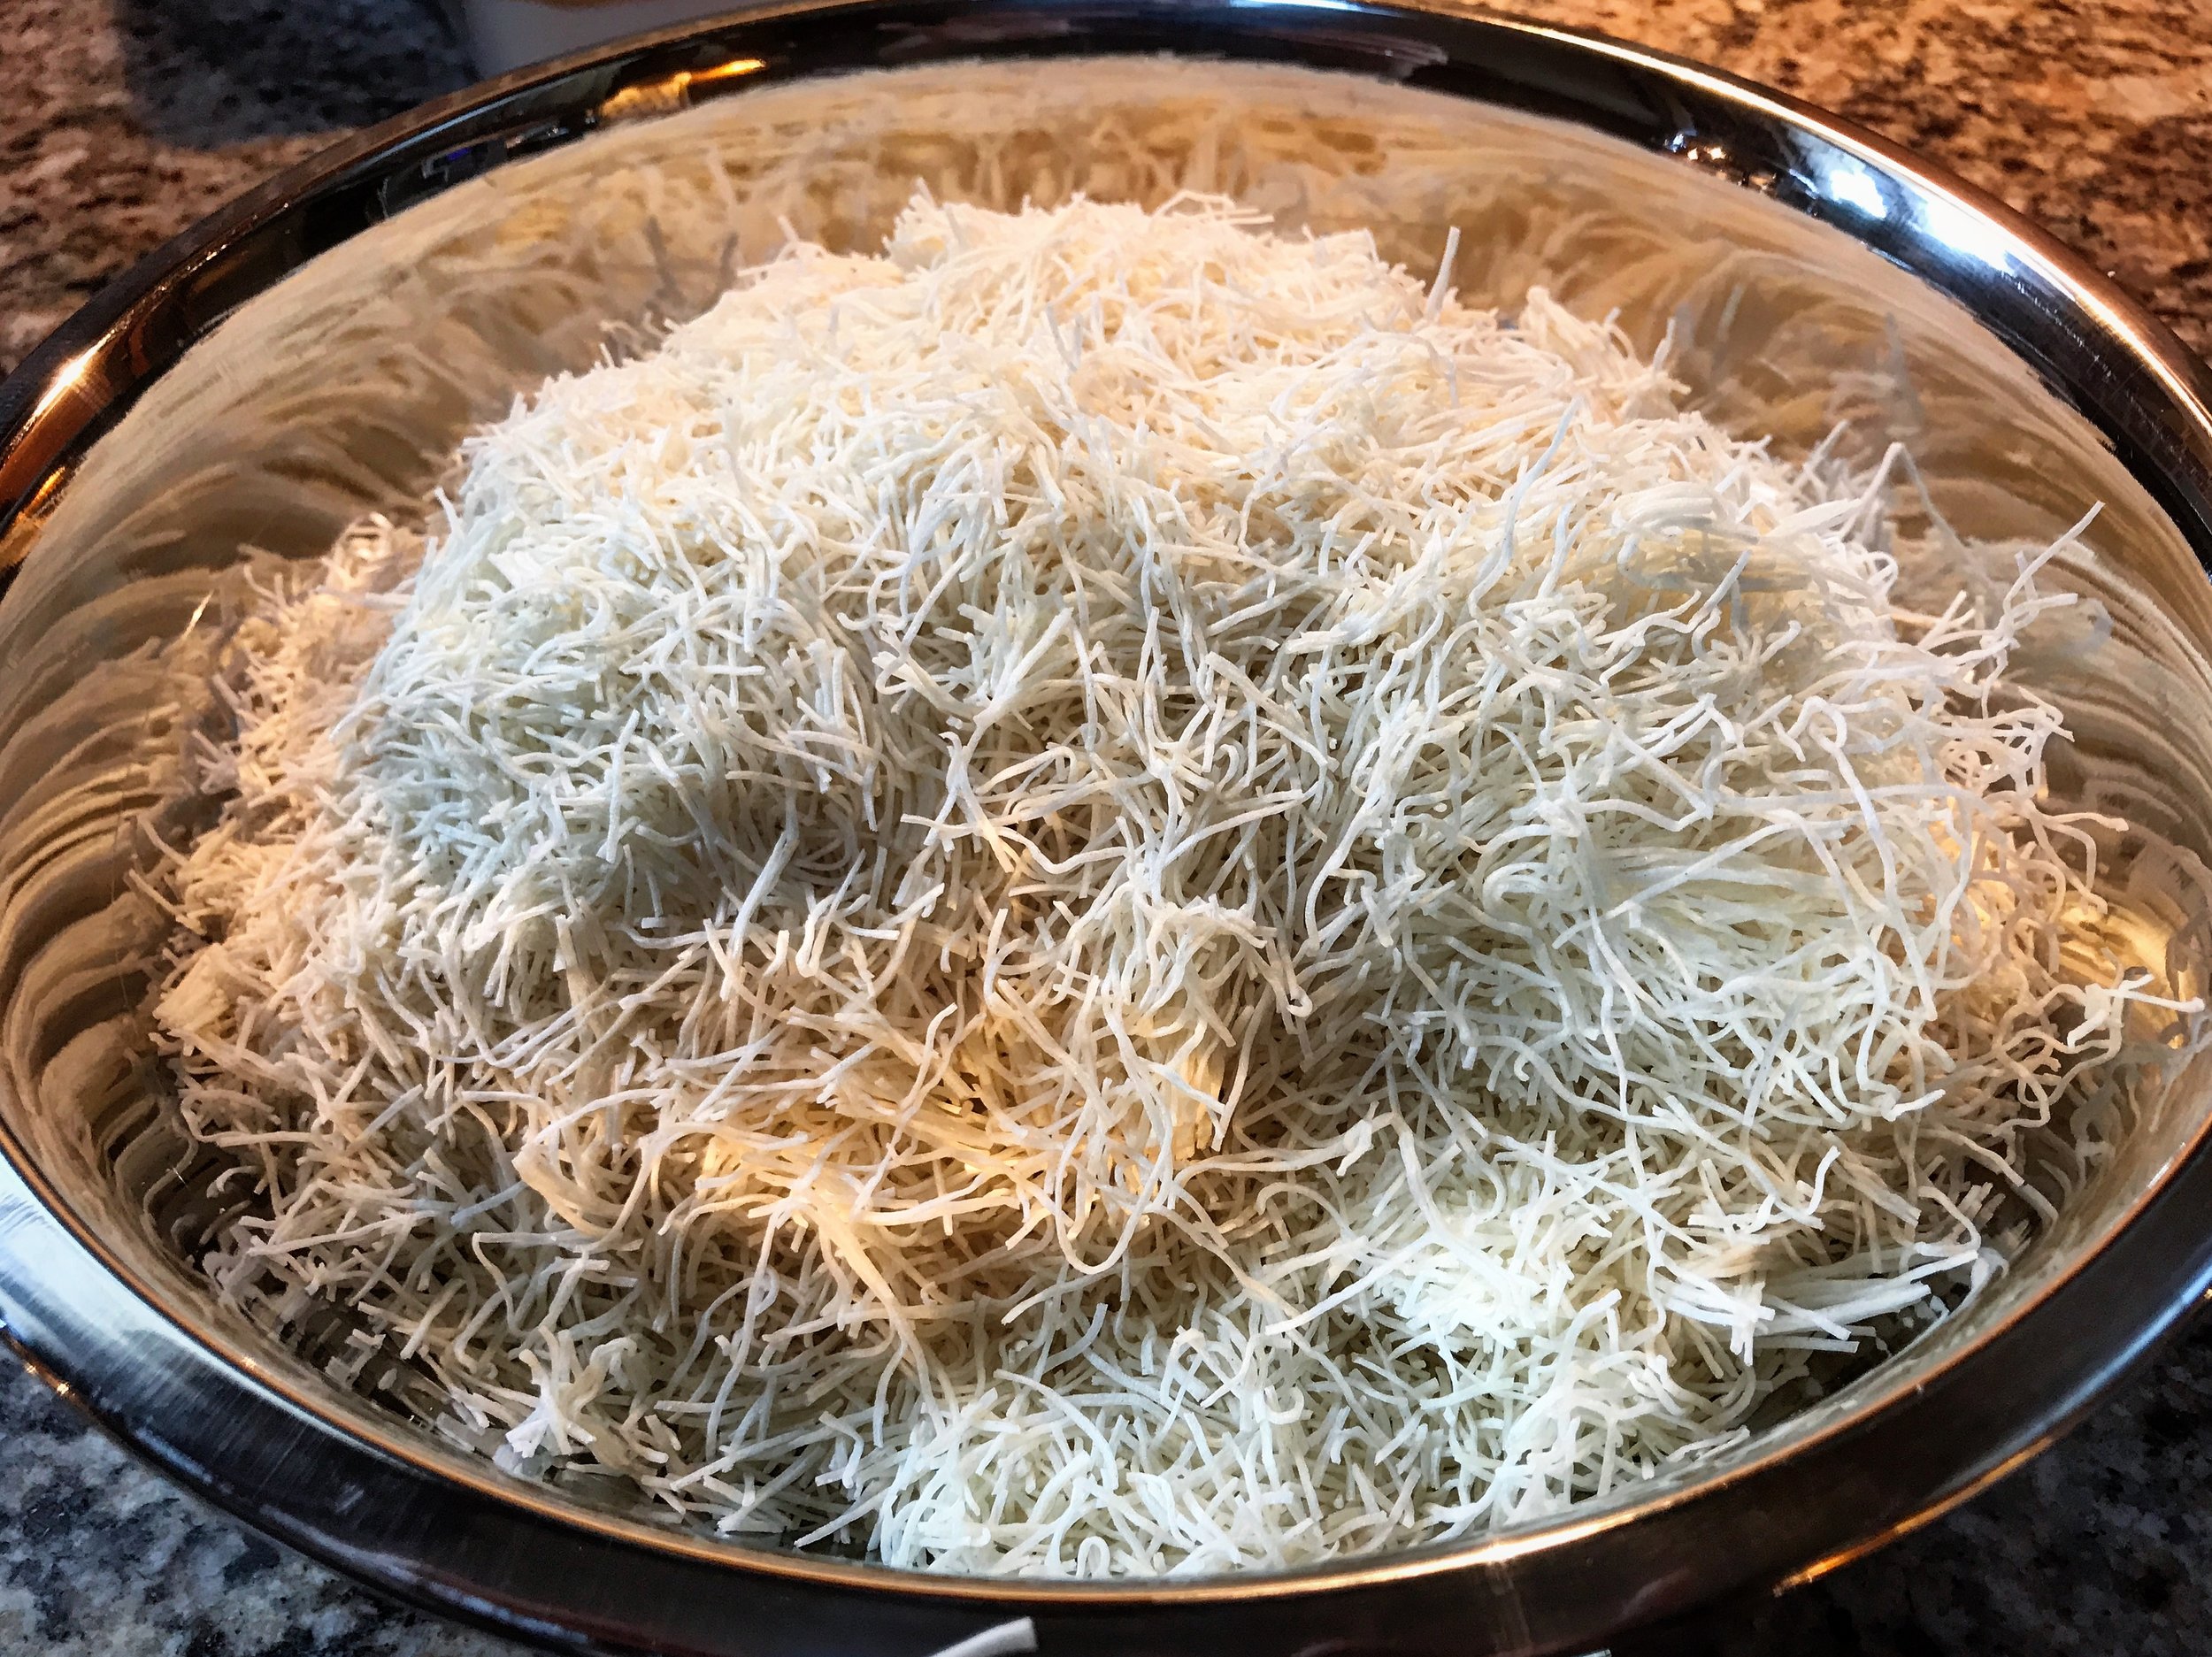
1. Put the knafeh pastry in a large bowl. Pull out and separate the strands as much as possible with your fingers so they do not stick together..
2. Chop the kataifi/Knafeh into shorter segments to fit inside the food processor. (I chopped with my knife on a cutting board, though you can do whichever is easier for yourself) Process half or more of the dough is shredded into small, crumbly strands instead of clumped together..
3. Divide the dough in half, keep some of the longer shreds for the top in one bowl.
4. Melt your butter and then pour the melted butter over each half of dough and work it in very thoroughly with your fingers, pulling out and separating the strands and turning them over so they do not stick together and are entirely coated with butter..
5. Lightly grease the sides of a parchment lined 9 x 13 inch baking dish or 12 in round baking pan..
6. Take the finer chopped half of dough and cover the bottom of the baking dish, and press with your hands to pack it down. Press some of it up the sides of the pan as well..
7. Pre-heat your oven to 350 degrees Fahrenheit and place your rack just above the middle of the oven..
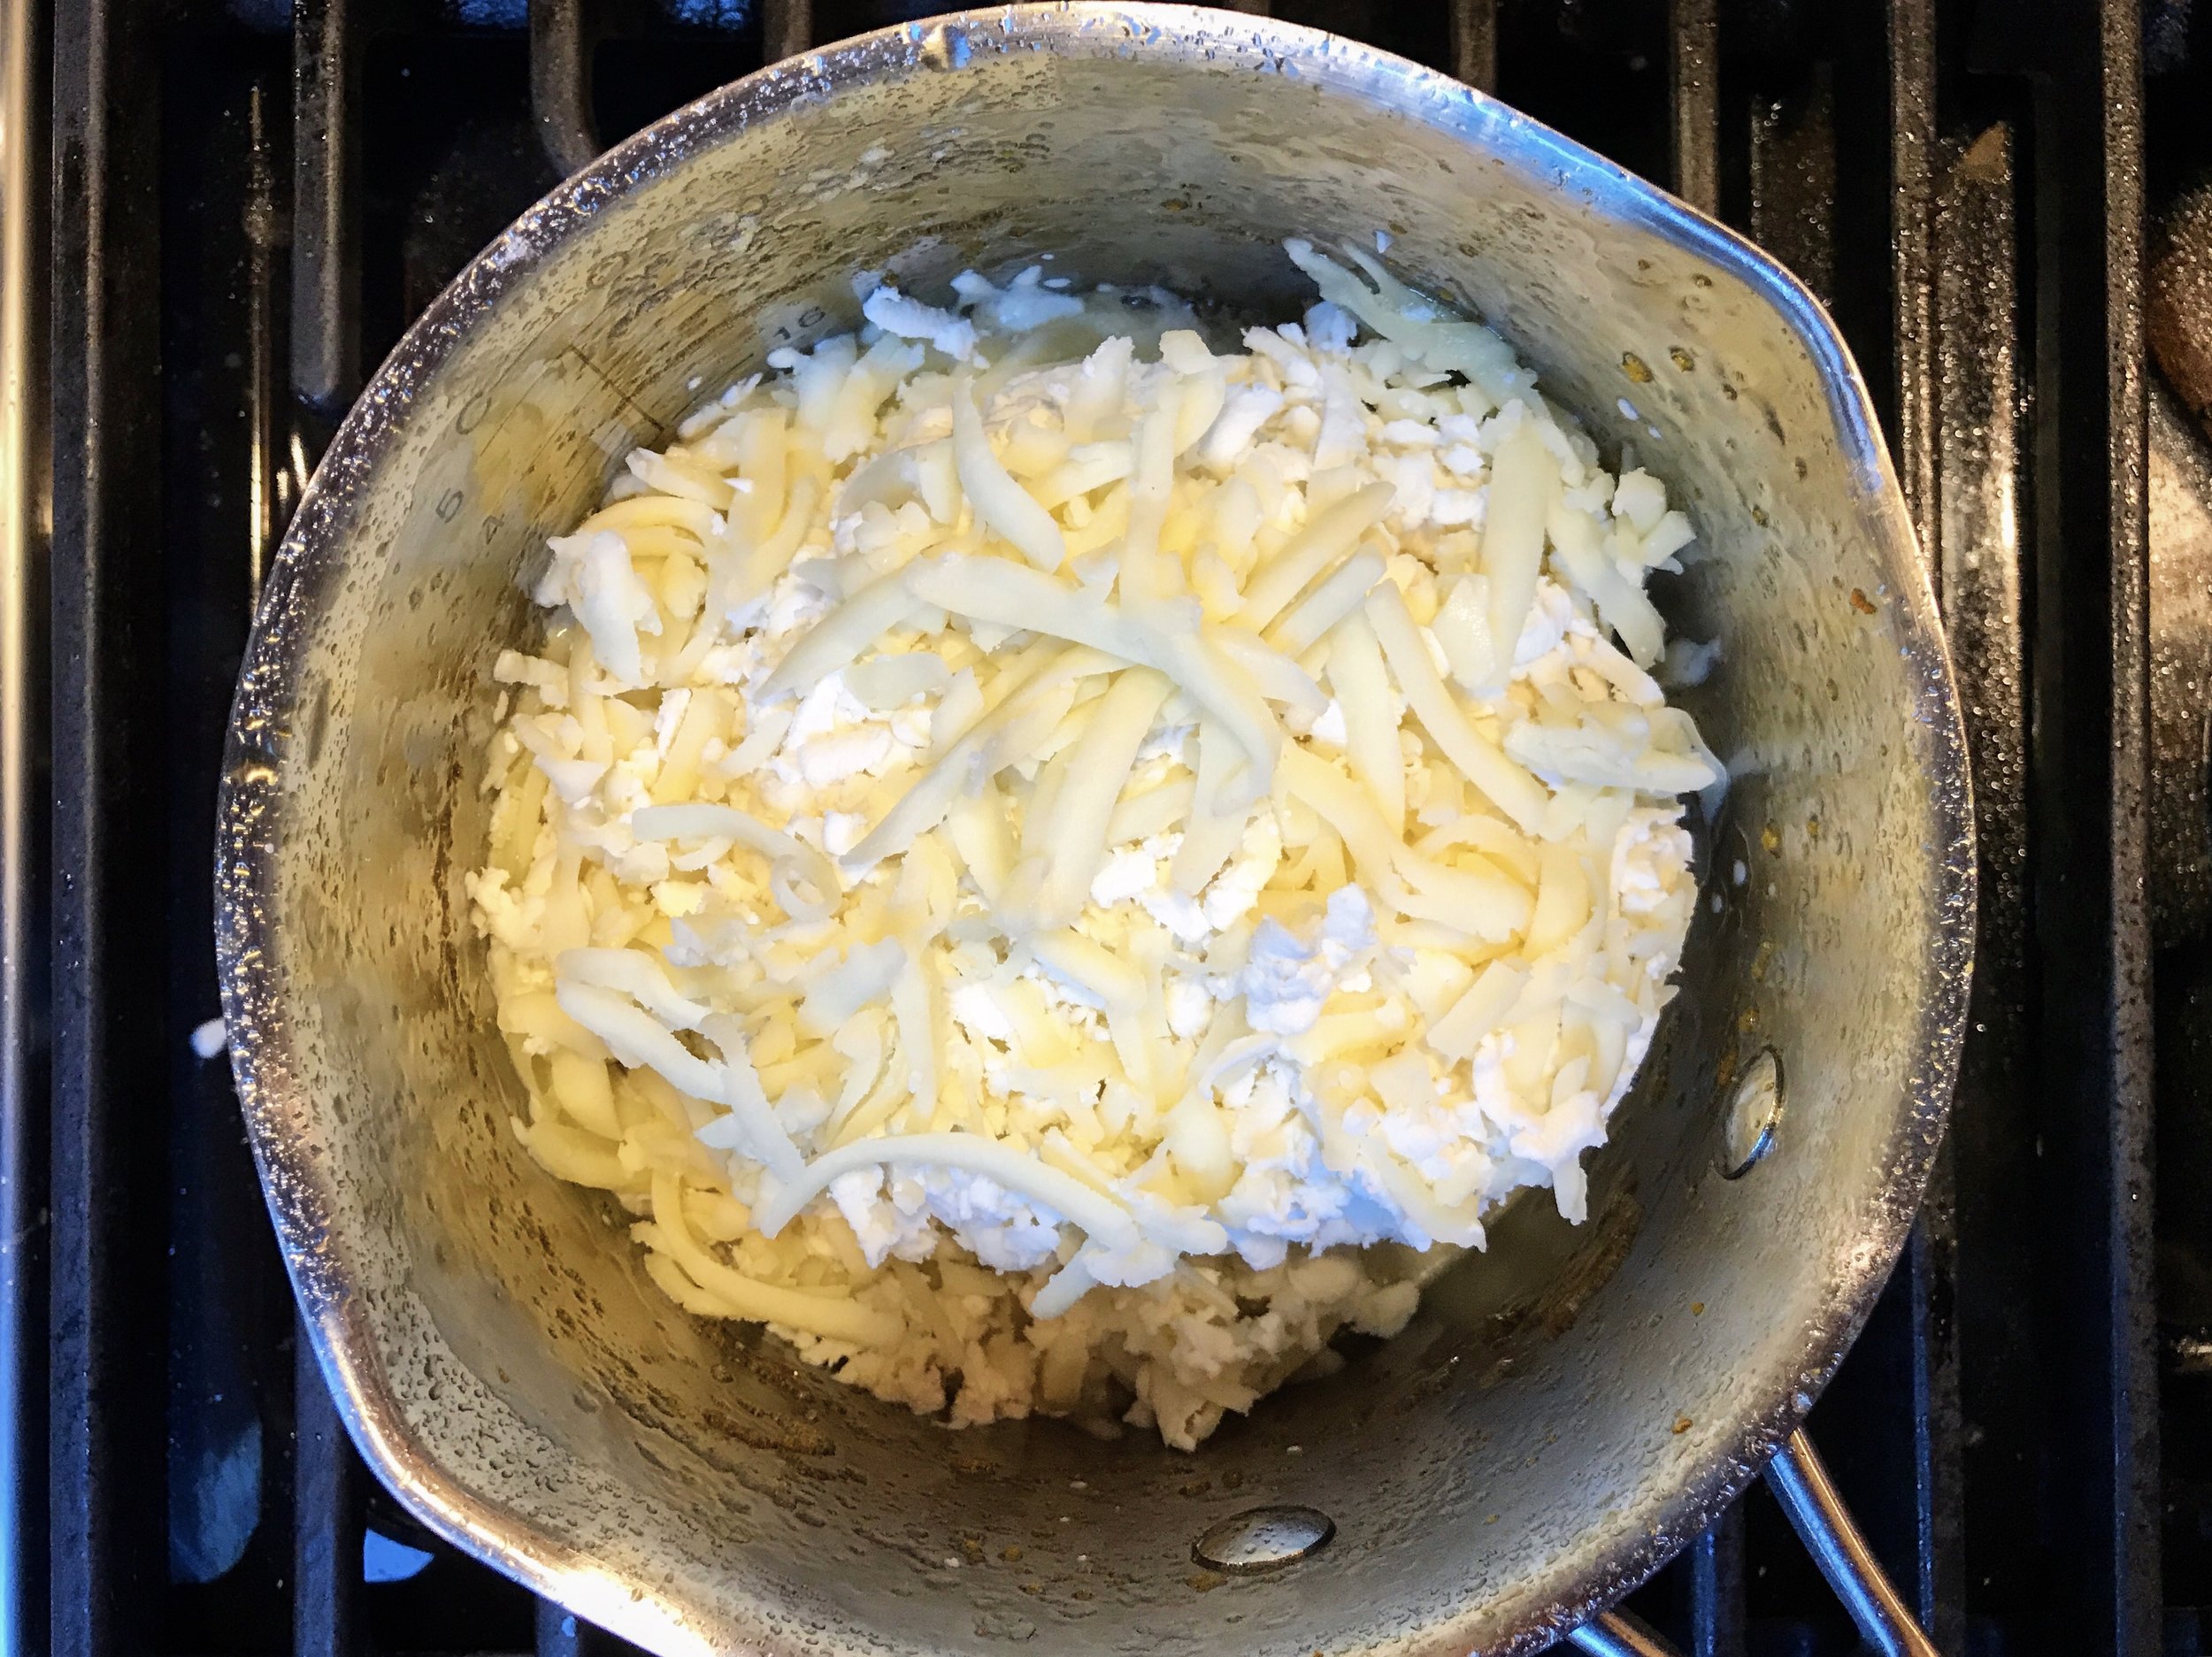
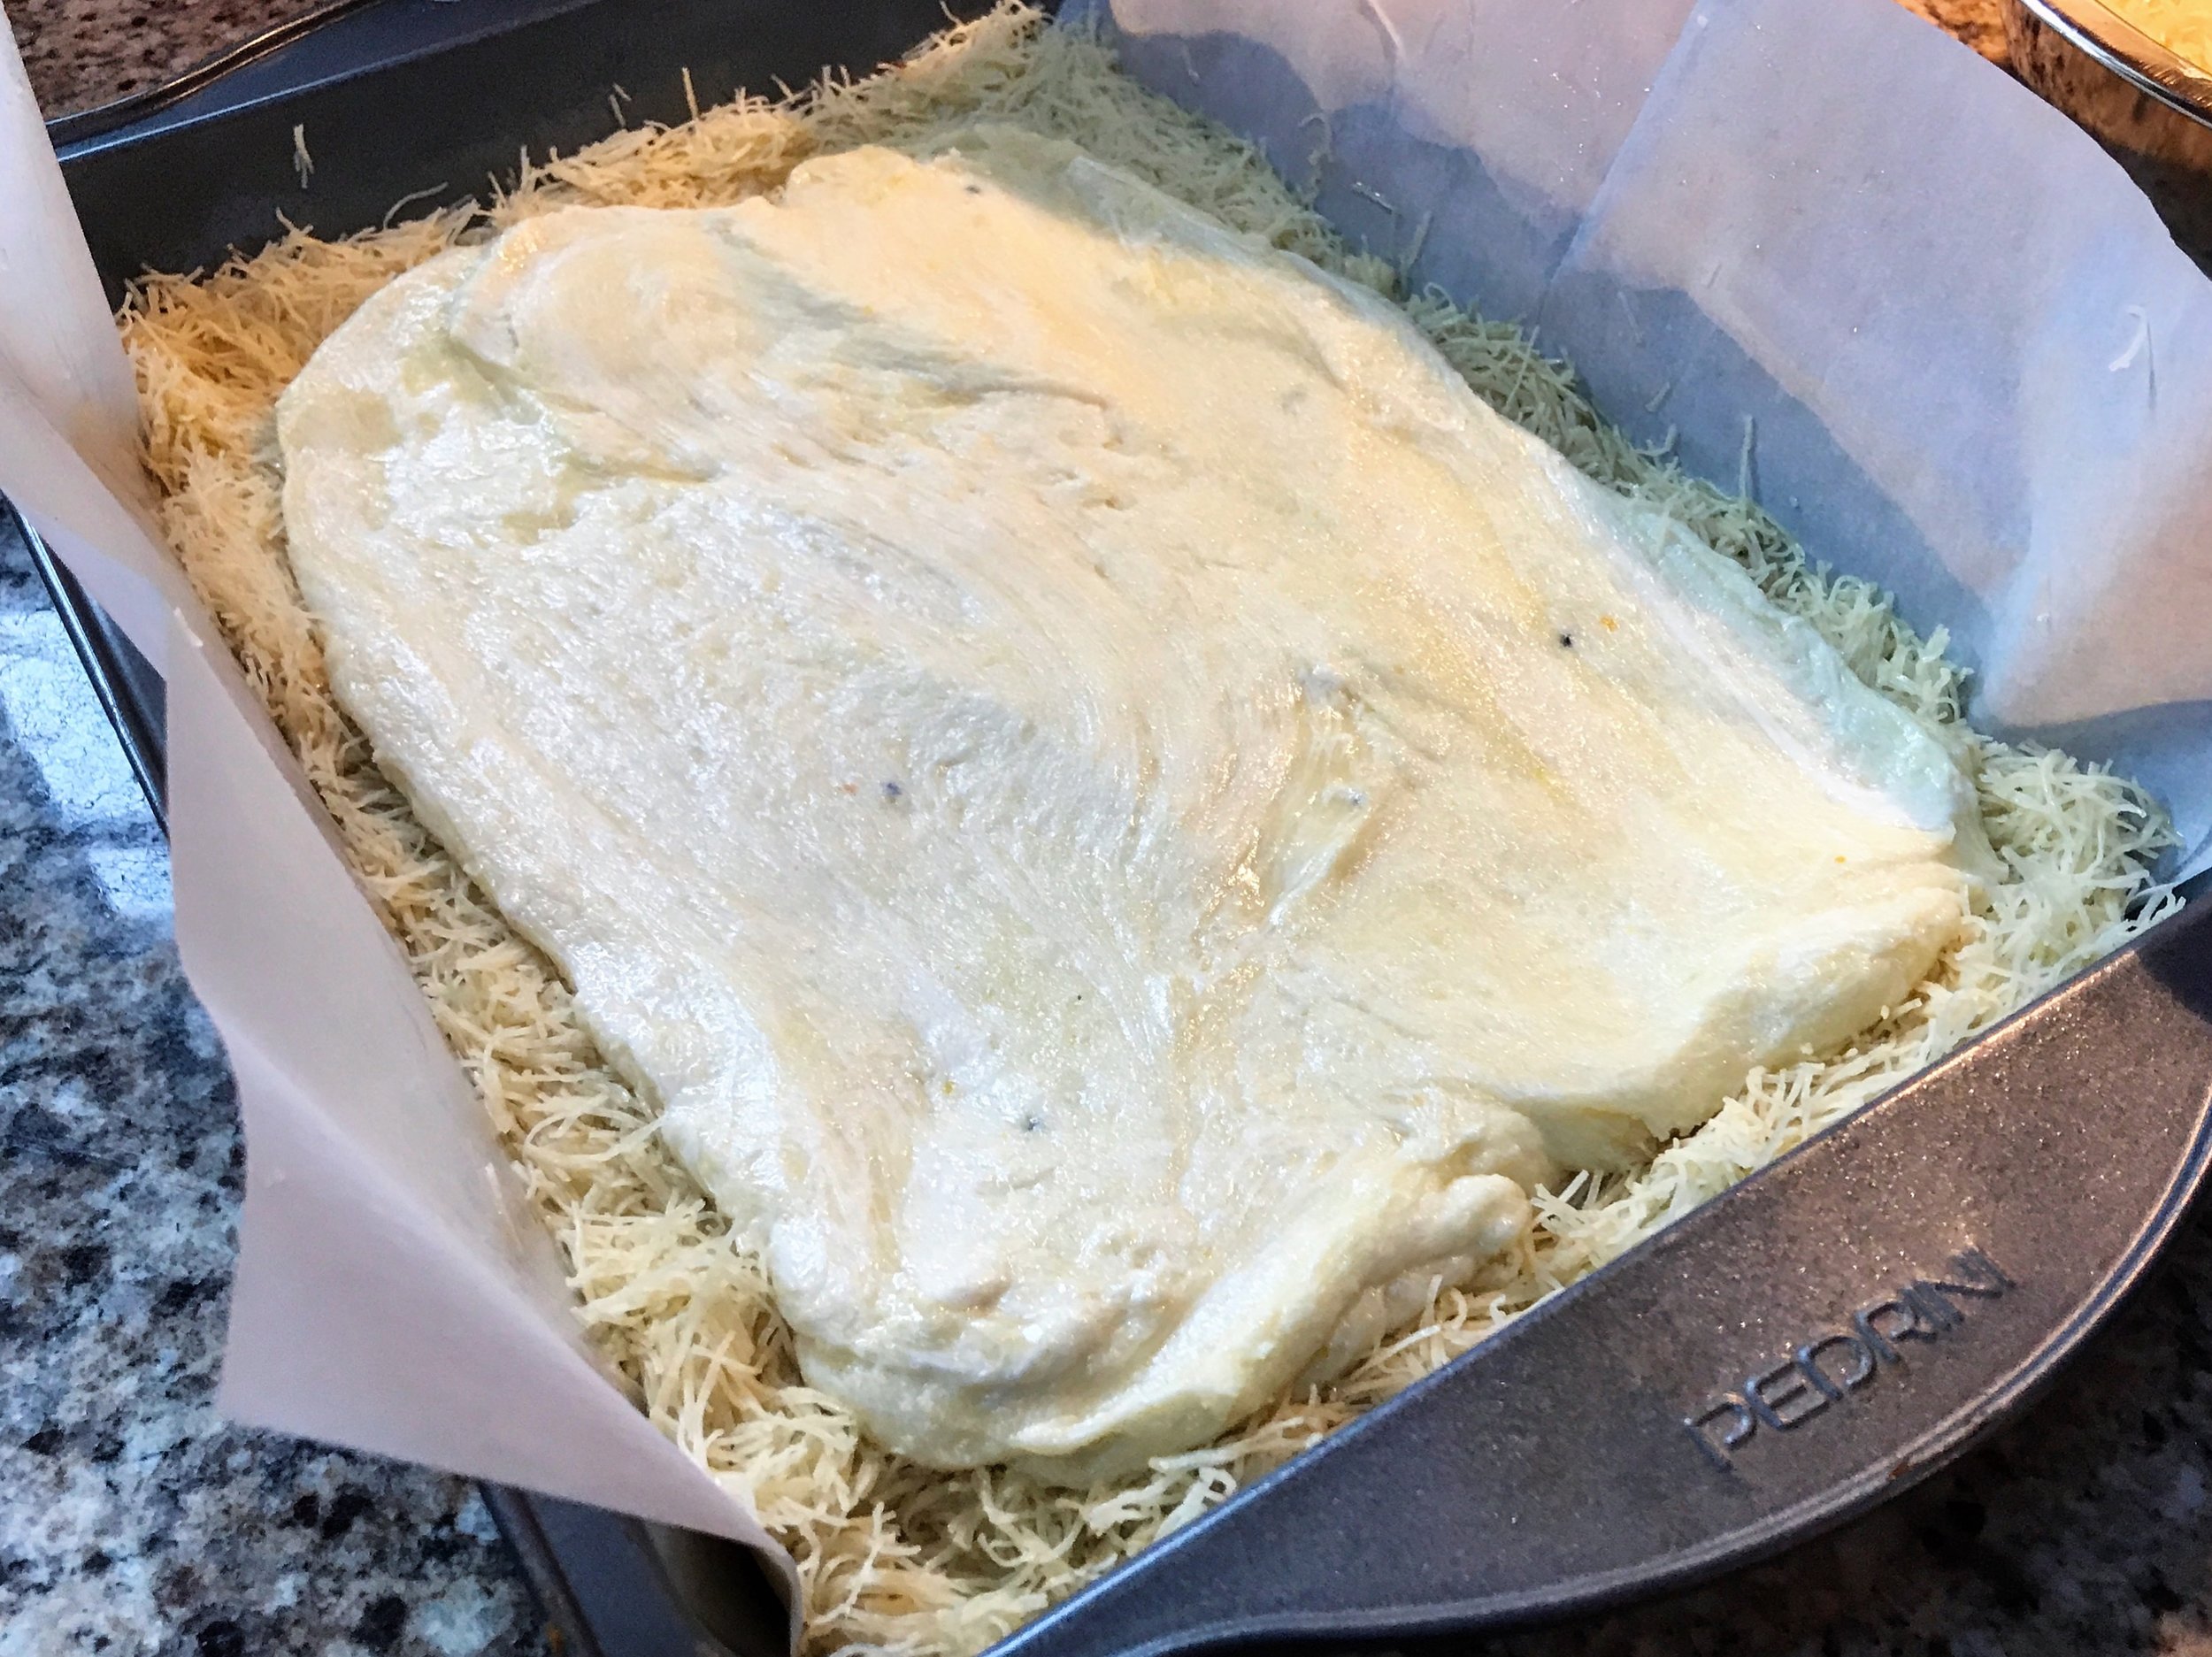
For the Filling:
1. Add the mix of shredded cheeses together in a saucepan on medium heat..
2. Stir until some of the water oozes out. Discard the water..
3. Add in the fine semolina and 1/2 cup of the syrup and mix. When the cheese mixture melts together, remove from heat and pour over the knafeh/Kataifi dough..
4. Spread evenly and allow to cool for 5 minutes or more..

To Finish:
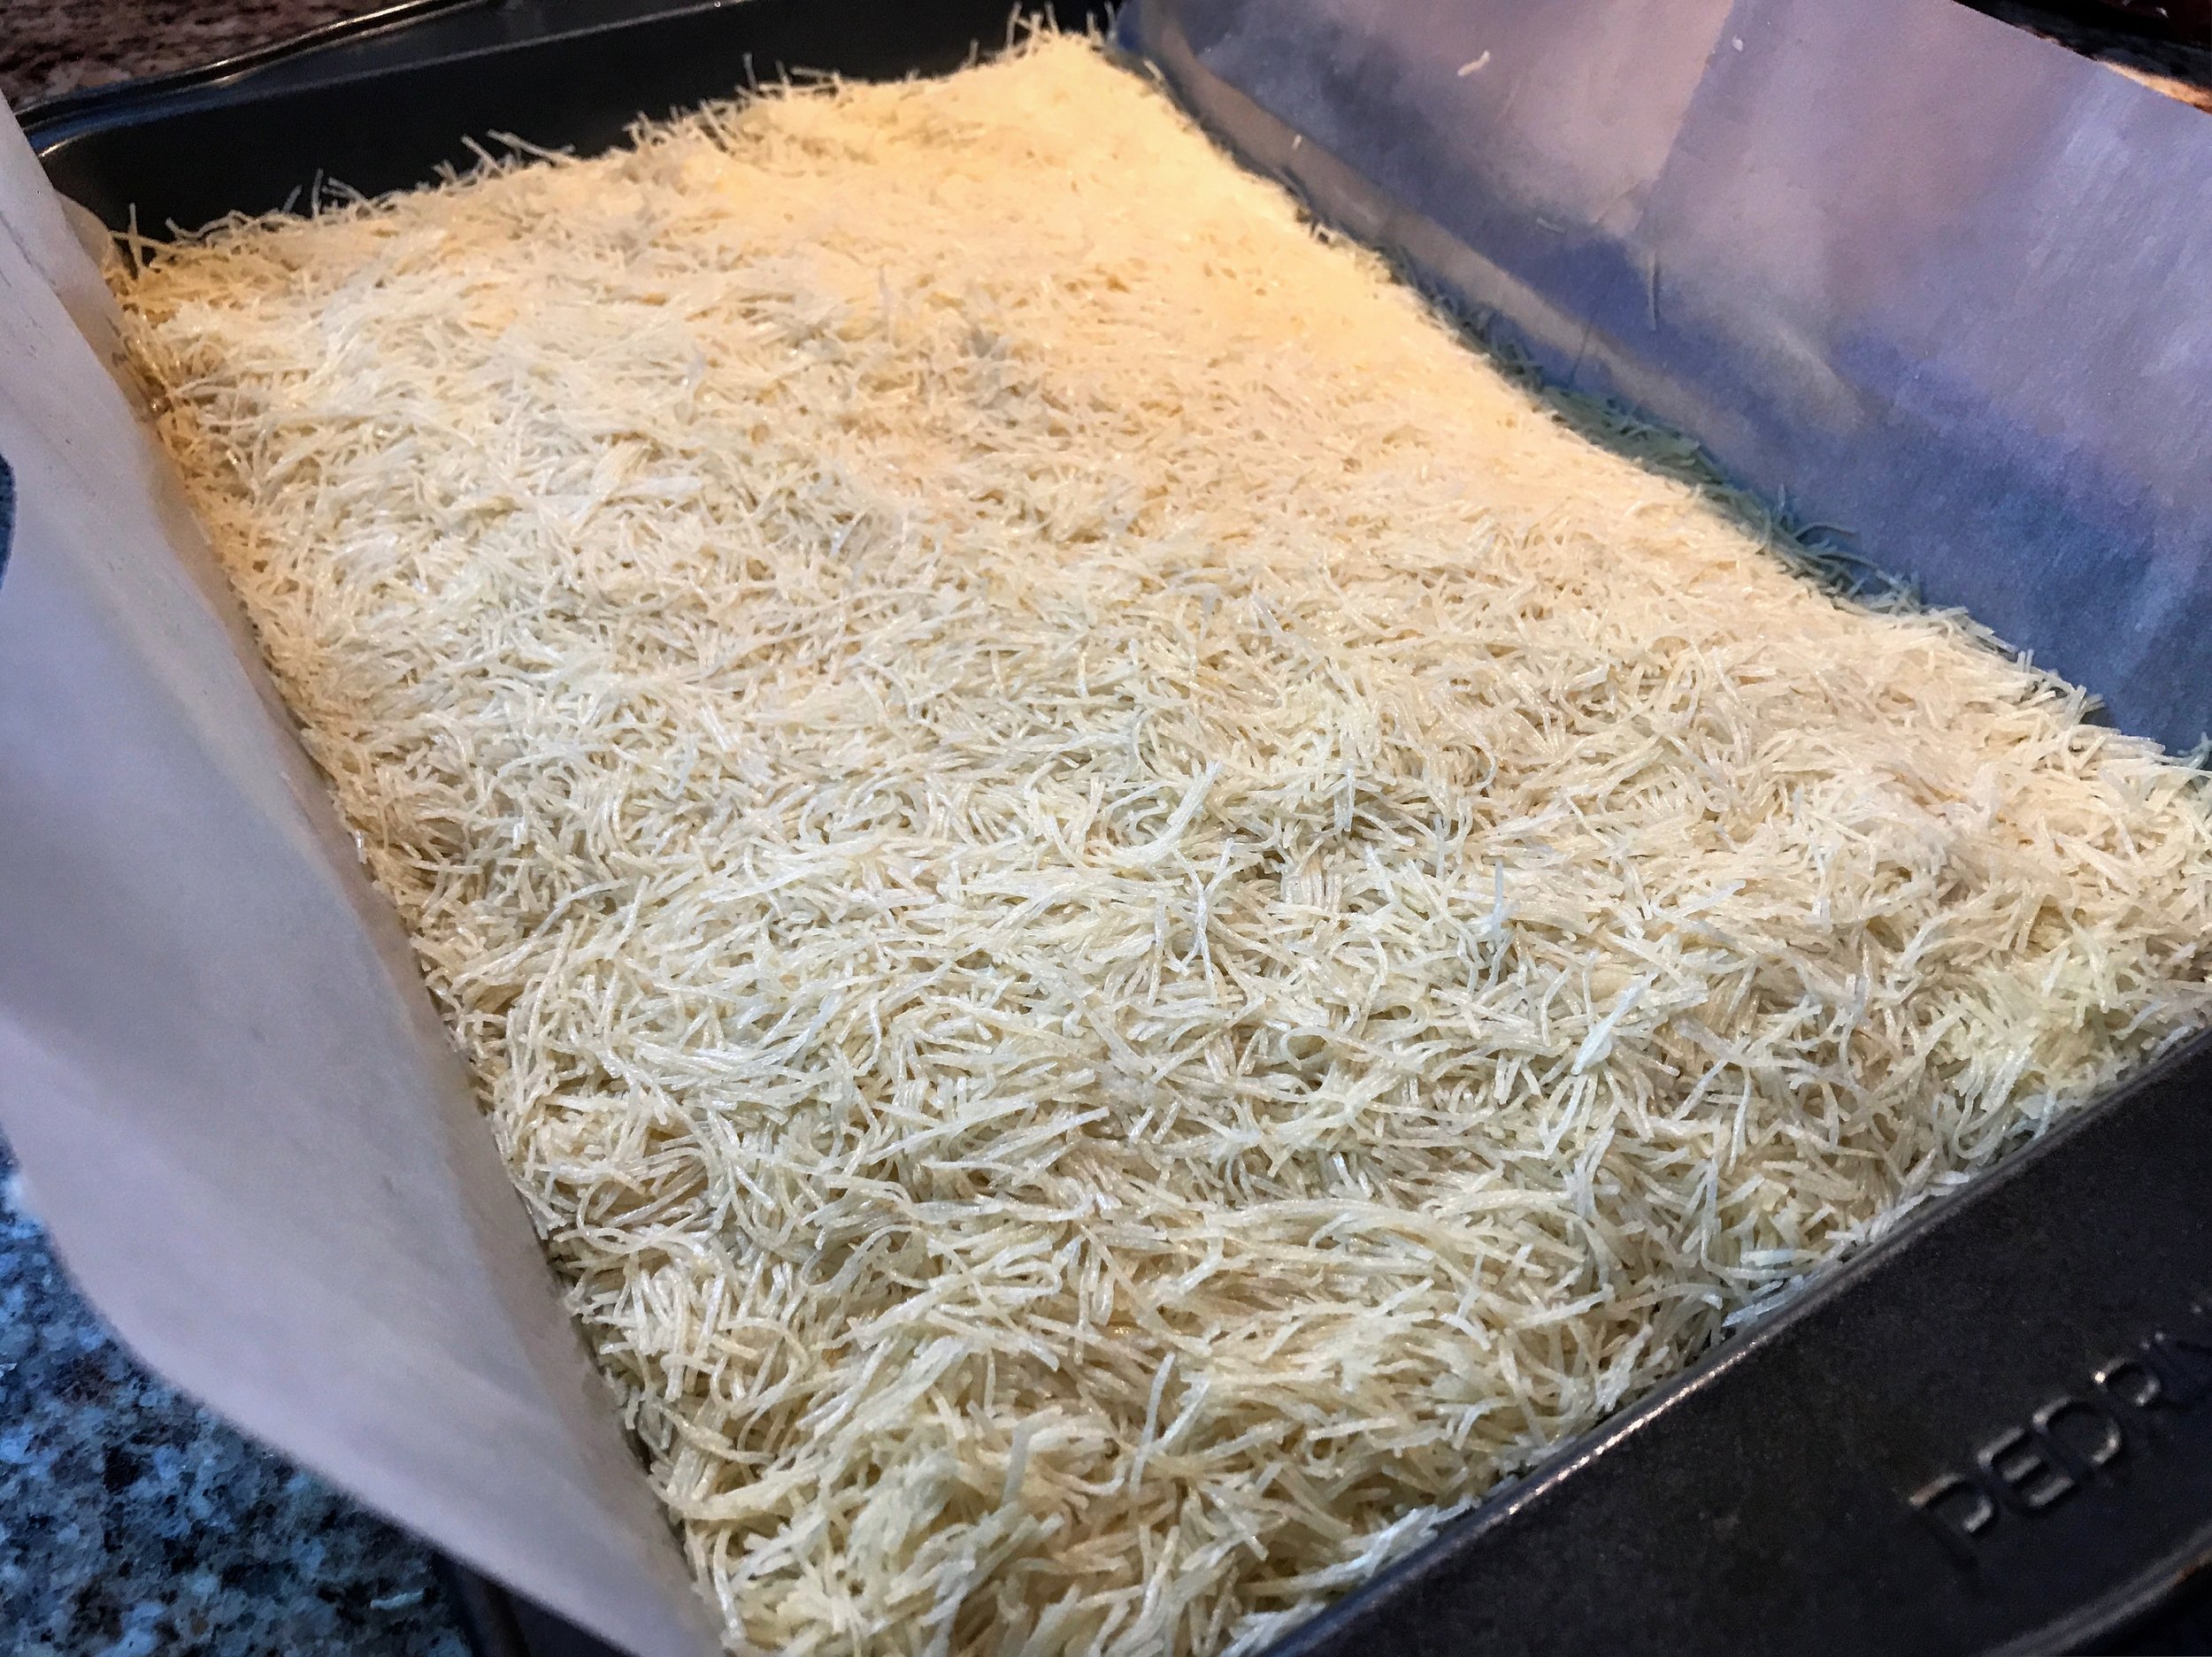
1. Sprinkle the other half of dough evenly over the cheese layer. Press it down softly to even the layer out..
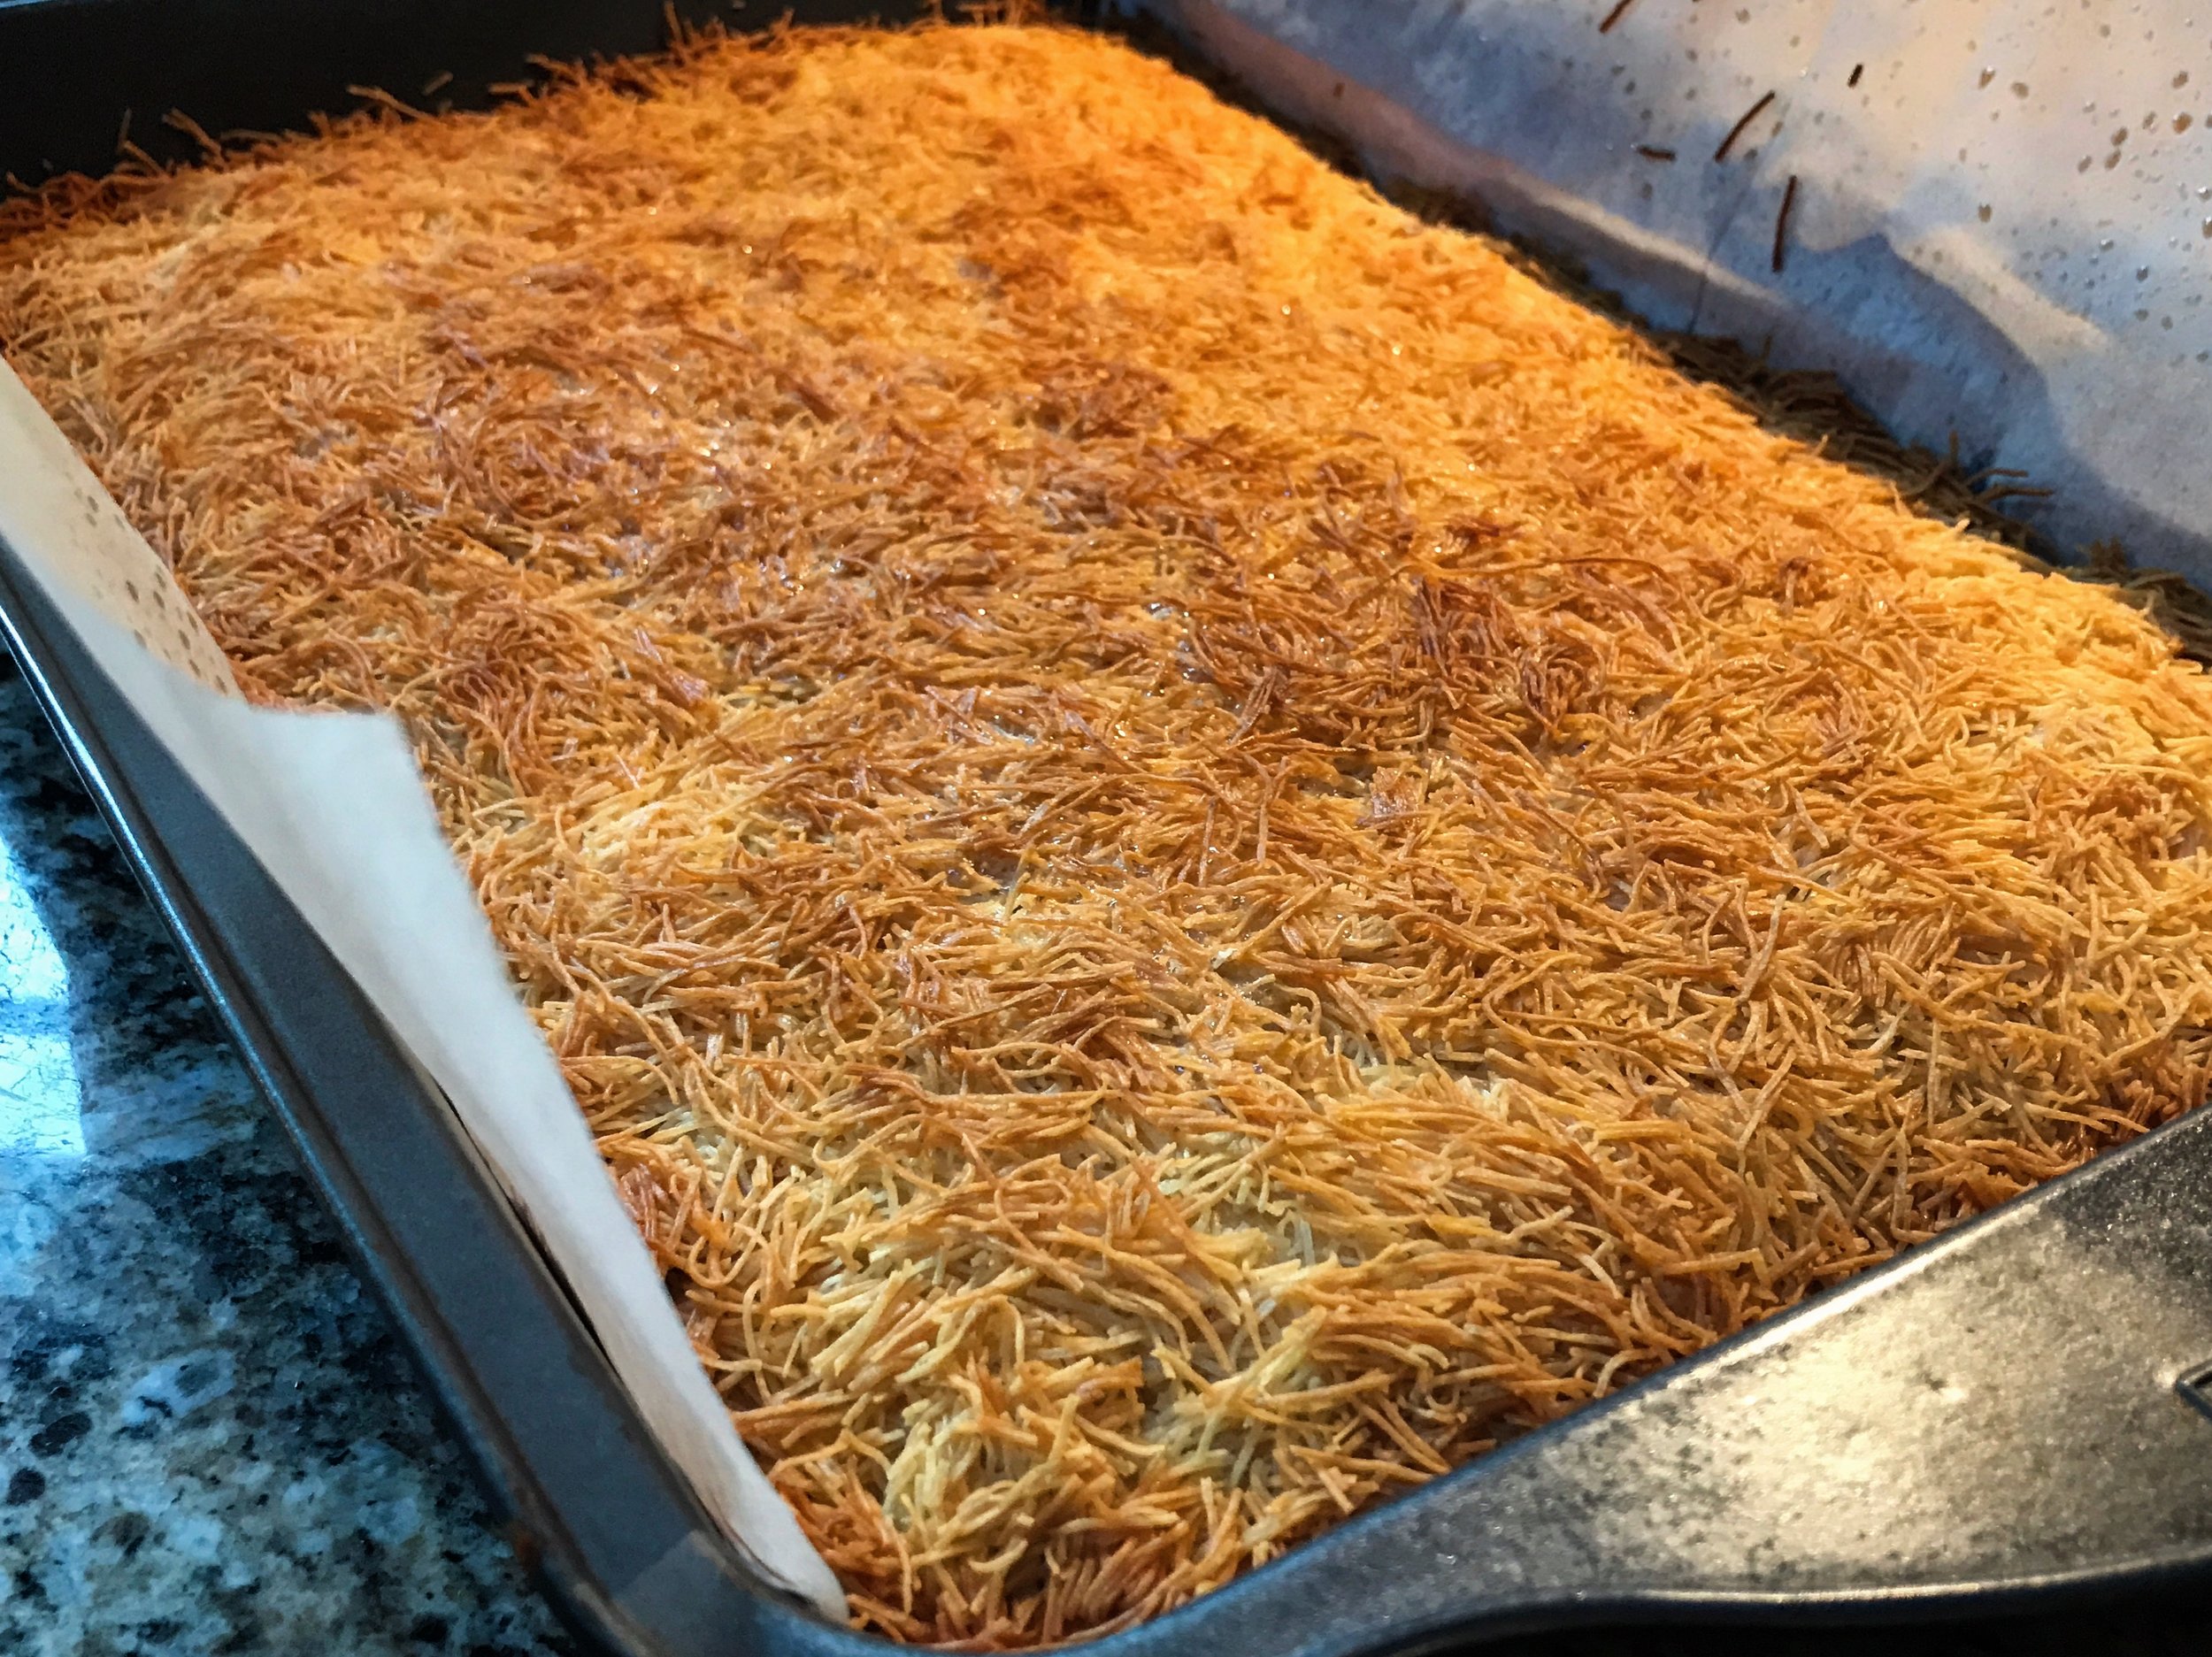
2. Leave out for 5 more minutes before putting it into the oven. Bake for 35 to 45 minutes, until the top of the dough is visibly lightly browned..
3. Remove Knafeh from the oven, and let cool for at least 5 minutes (see notes about flipping)
4. Pour 1/4 to 1/3 of the remaining orange blossom syrup evenly over the dessert (depending on how sweet you would like it.)
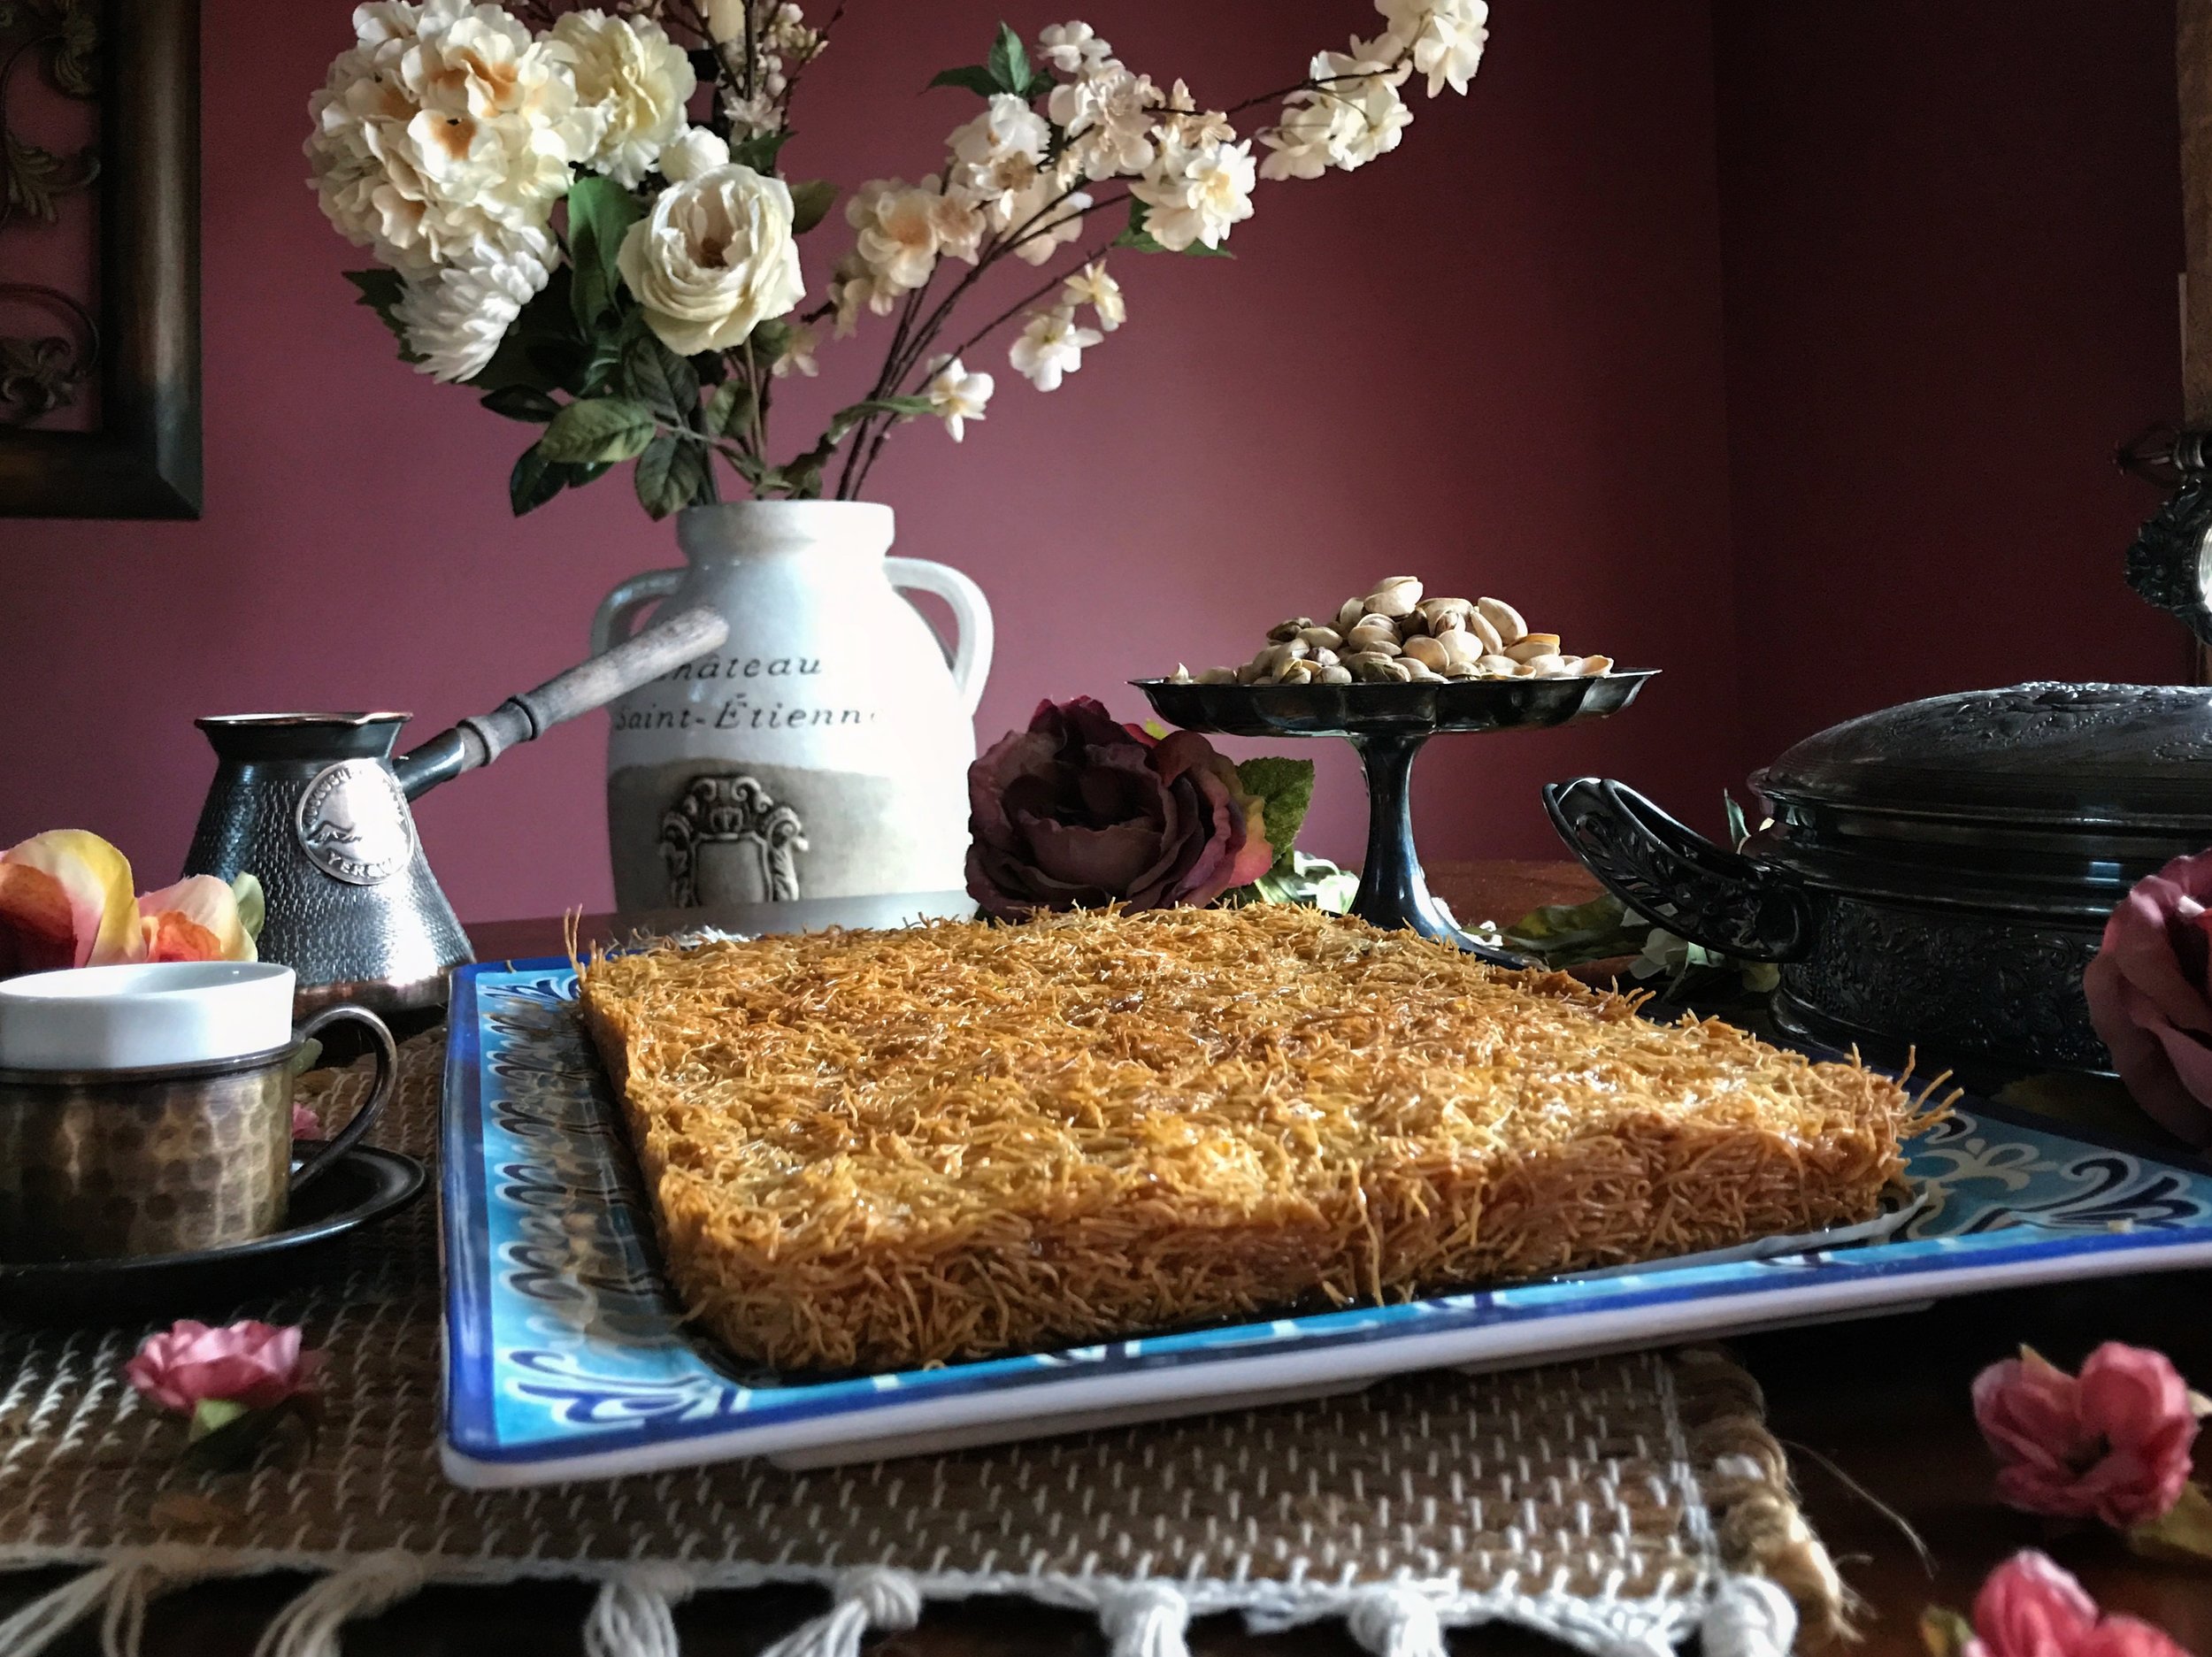
5. Top the Knafeh with chopped, crushed pistachios..
6. Serve immediately, if possible, while still hot and with extra syrup on the side.
7. Slice, drizzle with extra syrup, and enjoy!

Notes:
1. Flipping it is optional, but can make the finished dessert more visually appealing. (Though doing like I did and using parchment paper to line your dish and transferring to a plate looks as good or better to me-personal preference)
2. First, loosen the kunafa from the edges of the dish with a knife..
3. Cover the top of the baking dish with a large, flat baking sheet or other large, rectangular serving dish..
4. Flip the baking dish while it is covered by the sheet, so it will end up on the baking sheet..

5. If you're going to flip I would suggest some of the longer strands for the bottom (reverse which half of dough from the earlier steps to use for the bottom)
6. If you're not going to flip then you can line your pan with greased parchment paper—and after baking and allowing to cool for 5 minutes, lift out or lift slide out side onto plate using parchment paper..


"Gluten-Free Copycat Nabisco Chocolate Snaps"

Every once in a while, I'll have this—I don't know, this deep seeded sense of nostalgia..


It doesn't happen too much, I'm not that old yet, but when it does I can get to reminiscing about the things of my youth—when things seemed fresh, new and so much simpler by far..

Often it'll be food that gets me to dreaming about days gone by—when TV Dinners were in aluminum trays you heated in the oven, Ring Dings came in foil wrappers and Nabisco made their Snap cookies..

It was this last one that hit me recently. First, I wistfully thought of the cute little box with the tiger on the cookie and then it was trying to remember that taste—there was really no other cookie like it and I can remember eating them for years growing up..

Sadly, like so many things from my childhood, these had disappeared long ago from store shelves..

Being somewhat handy in the kitchen and after imagining the wonderful simple plain chocolate cookie taste with just the tiniest bit of snap to it—I decided I could wait no longer, so I set about attempting to discover again that sweet memory of flavor..


As I gathered myself to bake, and after tweaking a few ideas to fit my thought of what it would take to create this long gone snack, I decided that since I have been on such a Gluten-Free cooking kick lately—well, I would just try and continue with this recipe..


I'm not exactly sure why, I don't have Celiacs or a gluten intolerance, but I know some who do—so I guess I've been wanting to see what I can make for them that isn't out there like it should be..

A few ingredients, just a little bit of work and before you know it they started flying out of the oven needing a quick squish—then set aside to cool till done..

They were perfect..

Just like I remember..

Thin, chocolatey and with just a little snappy bite to them..

So if you, like me, remember that tiny rectangular box with the tiger face drawn on the cookie from the 70's and 80's then you will fall in love with these simple, plain, wafer'ish cookies—because without a doubt they are "Definitely Delish"


"Gluten-Free Copycat Nabisco Chocolate Snaps"

Ingredients:
1 1/2 cups shortening
1 1/2 cups Light Brown Sugar
1 cup White Sugar
2 Eggs
1/2 cup Cocoa
1/4 cup Special Dark Cocoa
1/3 cup Milk
3 tsp. Vanilla
2 tsp. Baking Powder
2 tsp. fine Pink Himalayan Salt
1/4 tsp. Cinnamon
1/4 tsp. Baking Soda
4 cups Gluten Free Baking Flour (I use King Arthur Brand)

Directions:
1. Preheat oven to 375 degrees.
2. Cream 1 1/2 cup shortening, 1 1/2 cup light brown sugar and 1 cup white sugar. Add 2 eggs and beat..
3. Add 3/4 cup cocoa, 1/3 cup milk and 3 tsp. vanilla and beat.
4. Add remaining ingredients of 2 tsp. baking powder, 2 teaspoons of Himalayan salt, cinnamon, 1/4 tsp. soda and 4 cups of gluten free baking flour..
5. Form in balls size of walnut and place about 2 inches apart on a cookie sheet..
6. Bake 12 minutes. Smash flat when they come out of the oven while still warm. 
7. Repeat until all dough is used up. Makes about 100 cookies, or more, depending on how big you make them..
 

"Frosted Pumpkin Nutella Pop-Tarts"

It's fall, the leaves are finally changing colors and Halloween is almost upon us—and with that, also, there has been the kids return to school and everything that entails...

After school activities, sports, tournaments, projects, homework and a million other little things to keep the parents as busy as the kids—especially when you take into account work, family dinners and packed lunches...


With that in mind I wanted to make a recipe with a few easy over the counter items, that could be made ahead of time and saved for when you need it for the little crumbsnatchers gallivanting about your homes...

What better snack could fit this than a Fall take on a toaster classic—the "Pop-Tart"


Using pre-made store bought pie crusts, canned pumpkin, Nutella and some tubs of buttercream frosting—an what you end up with is an incredibly delicious treat that can be fridged or frozen for days or weeks in advance...

Heat it in a toaster oven, frost it and sprinkle a bit of cinnamon sugar on top for good measure and yum, just yum...


Truly can't beat it for a quick fix before your kids youth tournament or for that next play date...

Try it out for yourself one day; I truly think you'll find it, like me, oh so "Definitely Delish"


"Frosted Pumpkin Nutella Pop-Tarts" with "Cinnamon Sugar"

Ingredients:
Pies:
4 packages raw pie crust
1 cup pumpkin puree (not canned pumpkin pie mix)
1 egg
1/4 cup packed dark brown sugar (use 1/3 cup if you want it sweeter)
1/2 teaspoon ground cinnamon
1/8 teaspoon ground cloves
1/4 teaspoon ground nutmeg
1/4 teaspoon ground allspice
1/4 teaspoon salt
1 tablespoon light cream
1 cup Nutella, melted
2 tubs store-bought Buttercream Frosting

Glaze: (If using glaze, follow glaze directions)
1/4 cup butter  
2/3 cup + 2 tablespoons powdered sugar
2 tablespoon pure maple syrup
1 1/2 teaspoons vanilla extract
1 tablespoon light cream, if needed
1/2 cup cinnamon sugar, for sprinkling

Directions:
1. Preheat the oven to 350 degrees F...
2. In a bowl beat together the pumpkin, egg, brown sugar, cinnamon, ginger, nutmeg, salt and milk until smooth...
3. On a floured surface, roll the dough out into an 1/8-inch thickness. Cut the dough into rectangles, roughly about 4 x 3 inches. Place a heaping tablespoon of the pumpkin filling on one of the rectangles, smoothing the pumpkin out to just before the edge of the dough...
4. Drizzle the melted Nutella over the pumpkin and use a toothpick or knife to lightly swirl the Nutella into the pumpkin...
5. Lay the another rectangle of dough over the filling and seal the edges by crimping with the back of a fork. Repeat until all the dough has been used, saving the scraps and re-rolling to make more rectangles...
6. Bake the pop tarts for 20 to 25 minutes, then let cool completely on the counter...

Glaze: (If freezing leave un-glazed and use frosting instead after reheating-see Notes)
1. While the pop-tarts cool make the frosting. Melt the butter on medium heat until frothy and then whisk in the powdered sugar, maple syrup and vanilla...
2. If needed, whisk in the milk to thin. If the frosting seems too thin, add 1 tablespoon powdered sugar at a time until the frosting is thick, but pour-able...
3. Drizzle the glaze over the cooled pop-tarts and sprinkle generously with cinnamon sugar. The glaze will harden after 5-10 minutes...

Note:
1. Store in an airtight container for up to 4-6 days in the fridge. If desired these can be heated in a 350 degree oven for 3-5 minutes to warm them before eating, BUT the glaze will melt slightly on the pop-tart.
2. Un-glazed pop-tarts can be frozen for up to 3 months. Thaw and then heat in the oven at 350 for 5-10 minutes..
3. If saving Pop-Tarts for later, after reheating, frost with pre-made store bought buttercream frosting and sprinkle with cinnamon sugar. (I used Pillsbury but any brand is as good)