"Gluten-Free Copycat Nabisco Chocolate Snaps"

Every once in a while, I'll have this—I don't know, this deep seeded sense of nostalgia..


It doesn't happen too much, I'm not that old yet, but when it does I can get to reminiscing about the things of my youth—when things seemed fresh, new and so much simpler by far..

Often it'll be food that gets me to dreaming about days gone by—when TV Dinners were in aluminum trays you heated in the oven, Ring Dings came in foil wrappers and Nabisco made their Snap cookies..

It was this last one that hit me recently. First, I wistfully thought of the cute little box with the tiger on the cookie and then it was trying to remember that taste—there was really no other cookie like it and I can remember eating them for years growing up..

Sadly, like so many things from my childhood, these had disappeared long ago from store shelves..

Being somewhat handy in the kitchen and after imagining the wonderful simple plain chocolate cookie taste with just the tiniest bit of snap to it—I decided I could wait no longer, so I set about attempting to discover again that sweet memory of flavor..


As I gathered myself to bake, and after tweaking a few ideas to fit my thought of what it would take to create this long gone snack, I decided that since I have been on such a Gluten-Free cooking kick lately—well, I would just try and continue with this recipe..


I'm not exactly sure why, I don't have Celiacs or a gluten intolerance, but I know some who do—so I guess I've been wanting to see what I can make for them that isn't out there like it should be..

A few ingredients, just a little bit of work and before you know it they started flying out of the oven needing a quick squish—then set aside to cool till done..

They were perfect..

Just like I remember..

Thin, chocolatey and with just a little snappy bite to them..

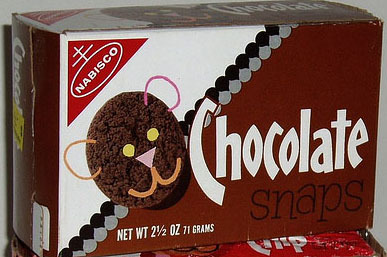
So if you, like me, remember that tiny rectangular box with the tiger face drawn on the cookie from the 70's and 80's then you will fall in love with these simple, plain, wafer'ish cookies—because without a doubt they are "Definitely Delish"


"Gluten-Free Copycat Nabisco Chocolate Snaps"

Ingredients:
1 1/2 cups shortening
1 1/2 cups Light Brown Sugar
1 cup White Sugar
2 Eggs
1/2 cup Cocoa
1/4 cup Special Dark Cocoa
1/3 cup Milk
3 tsp. Vanilla
2 tsp. Baking Powder
2 tsp. fine Pink Himalayan Salt
1/4 tsp. Cinnamon
1/4 tsp. Baking Soda
4 cups Gluten Free Baking Flour (I use King Arthur Brand)

Directions:
1. Preheat oven to 375 degrees.
2. Cream 1 1/2 cup shortening, 1 1/2 cup light brown sugar and 1 cup white sugar. Add 2 eggs and beat..
3. Add 3/4 cup cocoa, 1/3 cup milk and 3 tsp. vanilla and beat.
4. Add remaining ingredients of 2 tsp. baking powder, 2 teaspoons of Himalayan salt, cinnamon, 1/4 tsp. soda and 4 cups of gluten free baking flour..
5. Form in balls size of walnut and place about 2 inches apart on a cookie sheet..
6. Bake 12 minutes. Smash flat when they come out of the oven while still warm. 
7. Repeat until all dough is used up. Makes about 100 cookies, or more, depending on how big you make them..
 

"Frosted Pumpkin Nutella Pop-Tarts"

It's fall, the leaves are finally changing colors and Halloween is almost upon us—and with that, also, there has been the kids return to school and everything that entails...

After school activities, sports, tournaments, projects, homework and a million other little things to keep the parents as busy as the kids—especially when you take into account work, family dinners and packed lunches...


With that in mind I wanted to make a recipe with a few easy over the counter items, that could be made ahead of time and saved for when you need it for the little crumbsnatchers gallivanting about your homes...

What better snack could fit this than a Fall take on a toaster classic—the "Pop-Tart"


Using pre-made store bought pie crusts, canned pumpkin, Nutella and some tubs of buttercream frosting—an what you end up with is an incredibly delicious treat that can be fridged or frozen for days or weeks in advance...

Heat it in a toaster oven, frost it and sprinkle a bit of cinnamon sugar on top for good measure and yum, just yum...


Truly can't beat it for a quick fix before your kids youth tournament or for that next play date...

Try it out for yourself one day; I truly think you'll find it, like me, oh so "Definitely Delish"


"Frosted Pumpkin Nutella Pop-Tarts" with "Cinnamon Sugar"

Ingredients:
Pies:
4 packages raw pie crust
1 cup pumpkin puree (not canned pumpkin pie mix)
1 egg
1/4 cup packed dark brown sugar (use 1/3 cup if you want it sweeter)
1/2 teaspoon ground cinnamon
1/8 teaspoon ground cloves
1/4 teaspoon ground nutmeg
1/4 teaspoon ground allspice
1/4 teaspoon salt
1 tablespoon light cream
1 cup Nutella, melted
2 tubs store-bought Buttercream Frosting

Glaze: (If using glaze, follow glaze directions)
1/4 cup butter  
2/3 cup + 2 tablespoons powdered sugar
2 tablespoon pure maple syrup
1 1/2 teaspoons vanilla extract
1 tablespoon light cream, if needed
1/2 cup cinnamon sugar, for sprinkling

Directions:
1. Preheat the oven to 350 degrees F...
2. In a bowl beat together the pumpkin, egg, brown sugar, cinnamon, ginger, nutmeg, salt and milk until smooth...
3. On a floured surface, roll the dough out into an 1/8-inch thickness. Cut the dough into rectangles, roughly about 4 x 3 inches. Place a heaping tablespoon of the pumpkin filling on one of the rectangles, smoothing the pumpkin out to just before the edge of the dough...
4. Drizzle the melted Nutella over the pumpkin and use a toothpick or knife to lightly swirl the Nutella into the pumpkin...
5. Lay the another rectangle of dough over the filling and seal the edges by crimping with the back of a fork. Repeat until all the dough has been used, saving the scraps and re-rolling to make more rectangles...
6. Bake the pop tarts for 20 to 25 minutes, then let cool completely on the counter...

Glaze: (If freezing leave un-glazed and use frosting instead after reheating-see Notes)
1. While the pop-tarts cool make the frosting. Melt the butter on medium heat until frothy and then whisk in the powdered sugar, maple syrup and vanilla...
2. If needed, whisk in the milk to thin. If the frosting seems too thin, add 1 tablespoon powdered sugar at a time until the frosting is thick, but pour-able...
3. Drizzle the glaze over the cooled pop-tarts and sprinkle generously with cinnamon sugar. The glaze will harden after 5-10 minutes...

Note:
1. Store in an airtight container for up to 4-6 days in the fridge. If desired these can be heated in a 350 degree oven for 3-5 minutes to warm them before eating, BUT the glaze will melt slightly on the pop-tart.
2. Un-glazed pop-tarts can be frozen for up to 3 months. Thaw and then heat in the oven at 350 for 5-10 minutes..
3. If saving Pop-Tarts for later, after reheating, frost with pre-made store bought buttercream frosting and sprinkle with cinnamon sugar. (I used Pillsbury but any brand is as good)

"Strawberry Shakeology Gelato To Fixate On"

It's not every day that you come to the conclusion that you need to make a change; whether it's lifestyle or your job, when this epiphany occurs its sometimes best for you to take that chance and dive right in head first...

"Strawberry Shakeology Gelato"


In my life this happened within the last few years; you see after surgery to remove a failing organ, as well as a terrible relationship which was dragging me down both physically and emotionally, I decided I had had enough and needed to get my life back on track and start taking care of myself for a change...

"Spring Flowers"


For too long I had let things slide and as a result I had put on more weight then some could realize, as my height tended to hide it well-but in actuality between my poor diet and stress, I was falling apart...

Now with sometime having passed, and with me having made the changes necessary in my life to get back on a healthier road and a healthier lifestyle, I see my Baby doing something similar with an old friend from school...

"Strawberry Shakeology Gelato"


You see; after Nikki excitedly went back and forth talking with her friend, we decided we'd join up, with Emily, as Beachbody Coaches too. Between the exercise routines, challenges and wonderful Shakeology shakes-you get a full range of products that taste good and with the people you meet, the encouragement to keep on the straight and narrow... 

"Spring has Sprung"

So considering my not to modest cooking skills, and my love of experimentation, I decided to put them to the test and play around with different recipes and products to come up with some delicious 21 day fix meals as well as some tasty treats using, of all things, protein powder-of which this is the first...

So sit back and try the first in what I hope will be a series of dishes and treats, I think you'll find that they are oh so "Definitely Delish"


"99% Fat Free Shakeology Gelato"


"Strawberry Shakeology Gelato"

Ingredients:
1 1/2 cups fresh Strawberries
1 1/2 teaspoons Vanilla extract
2 teaspoons Sweetener (stevia, splenda, truvia, coconut palm sugar)
1/2 teaspoon Strawberry extract, if needed
2 scoops Strawberry Shakeology protein powder
1/2 cup unsweetened Almond Milk
3-6 drops of red food coloring
2 containers Fat Free Cool Whip (You could also make whipped cream using coconut milk)

"Protein Powder Gelato"

Directions:
1. Defrost Cool Whip on counter for 1 to 2 hours. Take out strawberries, remove greens and then slice into smaller pieces. Place strawberries in freezer for 1 hour hour minimum...
2. Meanwhile take a bowl and add in the "Shakeology" protein powder, vanilla, sweetener, almond milk and blend using a hand mixer. Add the red food coloring, mix and then set aside...
3. Take frozen strawberry pieces from freezer and chop them up using a food processor, blender or nutri-bullet/ninja. You do not want them to completely puree, there should be some variation in texture with bigger and smaller pieces mixed in with the pulped berry...
4. Add the processed strawberries to the liquid protein powder mix and stir together. Now pour the combined mixture into a large bowl with the defrosted cool whip. Stir together slowly until completely combined...
5. Pour the mixture into a nice sized Tupperware container with a lid and then freeze for a minimum of four hours before serving, overnight is best, and then enjoy...