"Vegetable Frittata" With "Pancetta & Cheese"

The wonders of buttered eggs. I had never thought or heard of buttered eggs until reading one I discovered, what the French have never forgotten, the joys of hot buttered eggs..

As John Masefield writes- “Time, Tide and buttered eggs wait for no man…


So taking this new found knowledge, on how to create the silkiest eggs you’ve ever tasted, I applied it to the creation of the most wonderful custard'y textured frittata I had ever had.

If you’ve never tried a frittata before, they are this incredibly versatile dish that is more than an omelet but less than a quiche. It’ll taste as good cold or room temperature as it does fresh from the oven; and luckily, it is also a dish you can prepare ahead of time. Thus making it a perfect accompaniment to any Holiday brunch..


“Vegetable Frittata with Pancetta and Cheese”

Ingredients: 
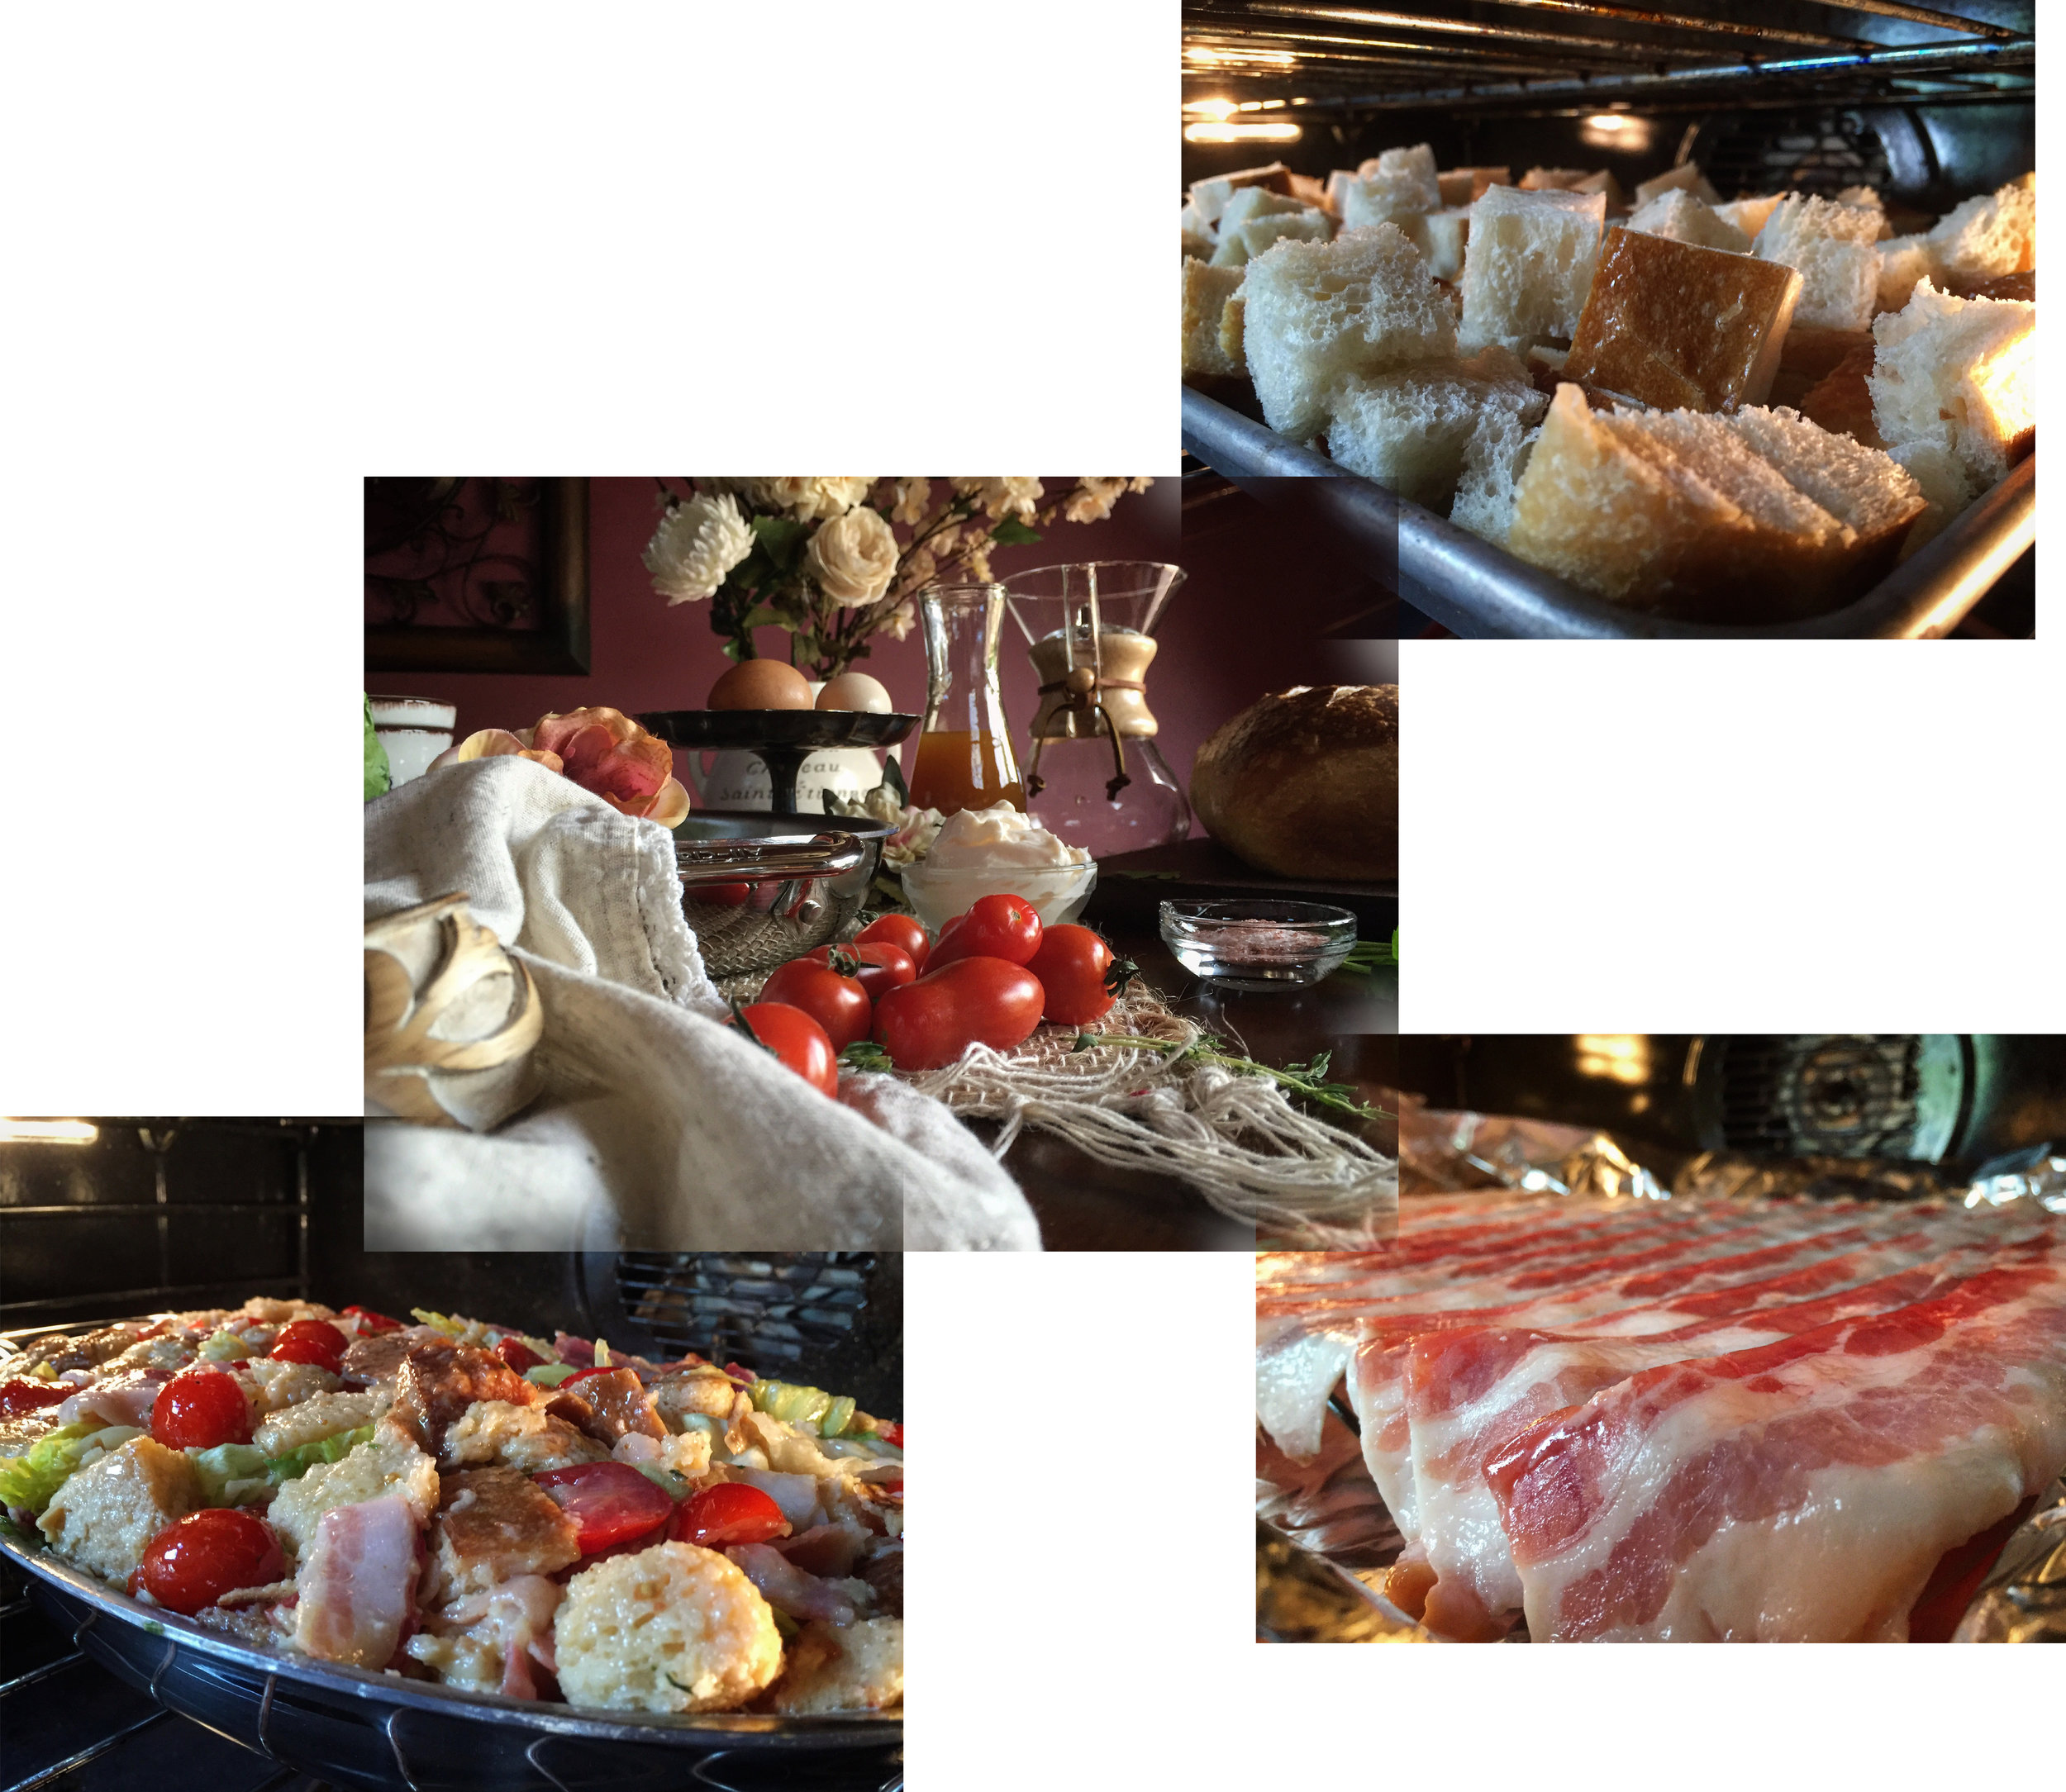
6 ounces diced Pancetta (you can use boars head brand diced pancetta available at Pat’s market as well as Stop and Shop’s in your neighborhood-optionally you can use 4 slices chopped cooked bacon)
1 small Vidalia onion, sliced
Several baby Bell mushrooms, sliced
7-8 Eggs, at room temperature
3 tablespoons Cream
2-3 tablespoons Butter, just barely melted
2 teaspoons Olive Oil, plus additional butter for sautéing vegetables
6-8 Fingerling potatoes, sliced (I used a mix of gold and purple potatoes)
Asparagus, woody ends removed and cut into 2-3 inch long pieces
Grape tomatoes, a handful sliced in half (I used mini Marzano tomatoes available at Pat’s marketplace)
2-3 tablespoons Bel Gioioso Asiago, thinly shaved (though regular Asiago is also fine to use)
1-2 tablespoons Locatelli Romano (regular Romano cheese is also fine to use)
Fresh chopped Italian parsley
Sea Salt and fresh cracked black pepper to taste
Dash of Cayenne pepper

Directions:
1. Pre-heat oven to 350 degrees, wrap the outside of a tart pan (if it is one with a removable base) tightly in foil and spray inside with cooking spray..
2. In a separate skillet, cook diced pancetta until it begins to crisp and place on paper towels to drain..
3.
In same skillet heat the olive oil over medium high heat and cook the onions and mushrooms until they begin to brown, 10-20 minutes. (Add a teaspoon of butter if necessary)
4. Meanwhile slice and chop all other vegetables as needed, then crack eggs into a bowl and continue to let them reach room temperature. (cold eggs take longer to cook and will cause the melted butter to solidify)

5. Remove Onion and Mushroom from skillet and set aside, then add a touch of butter to pan and cook thin sliced potatoes for 5-10 minutes until lightly browned. Remove and set aside, then finish by cooking the Asparagus in the same skillet for 5 minutes, till crisp tender..
6. Add half or more of the various vegetables (tomatoes, potatoes, etc.) and pancetta to the tart pan, then sprinkle with 2-3 tablespoons of the cheeses..
7. Now prepare the eggs by just barely melting the room temperature butter and adding it to the eggs along with 2-3 tablespoons of cream, salt, pepper and cayenne. Whisk gently, but be careful not to overbeat the eggs-then pour into your tart pan..
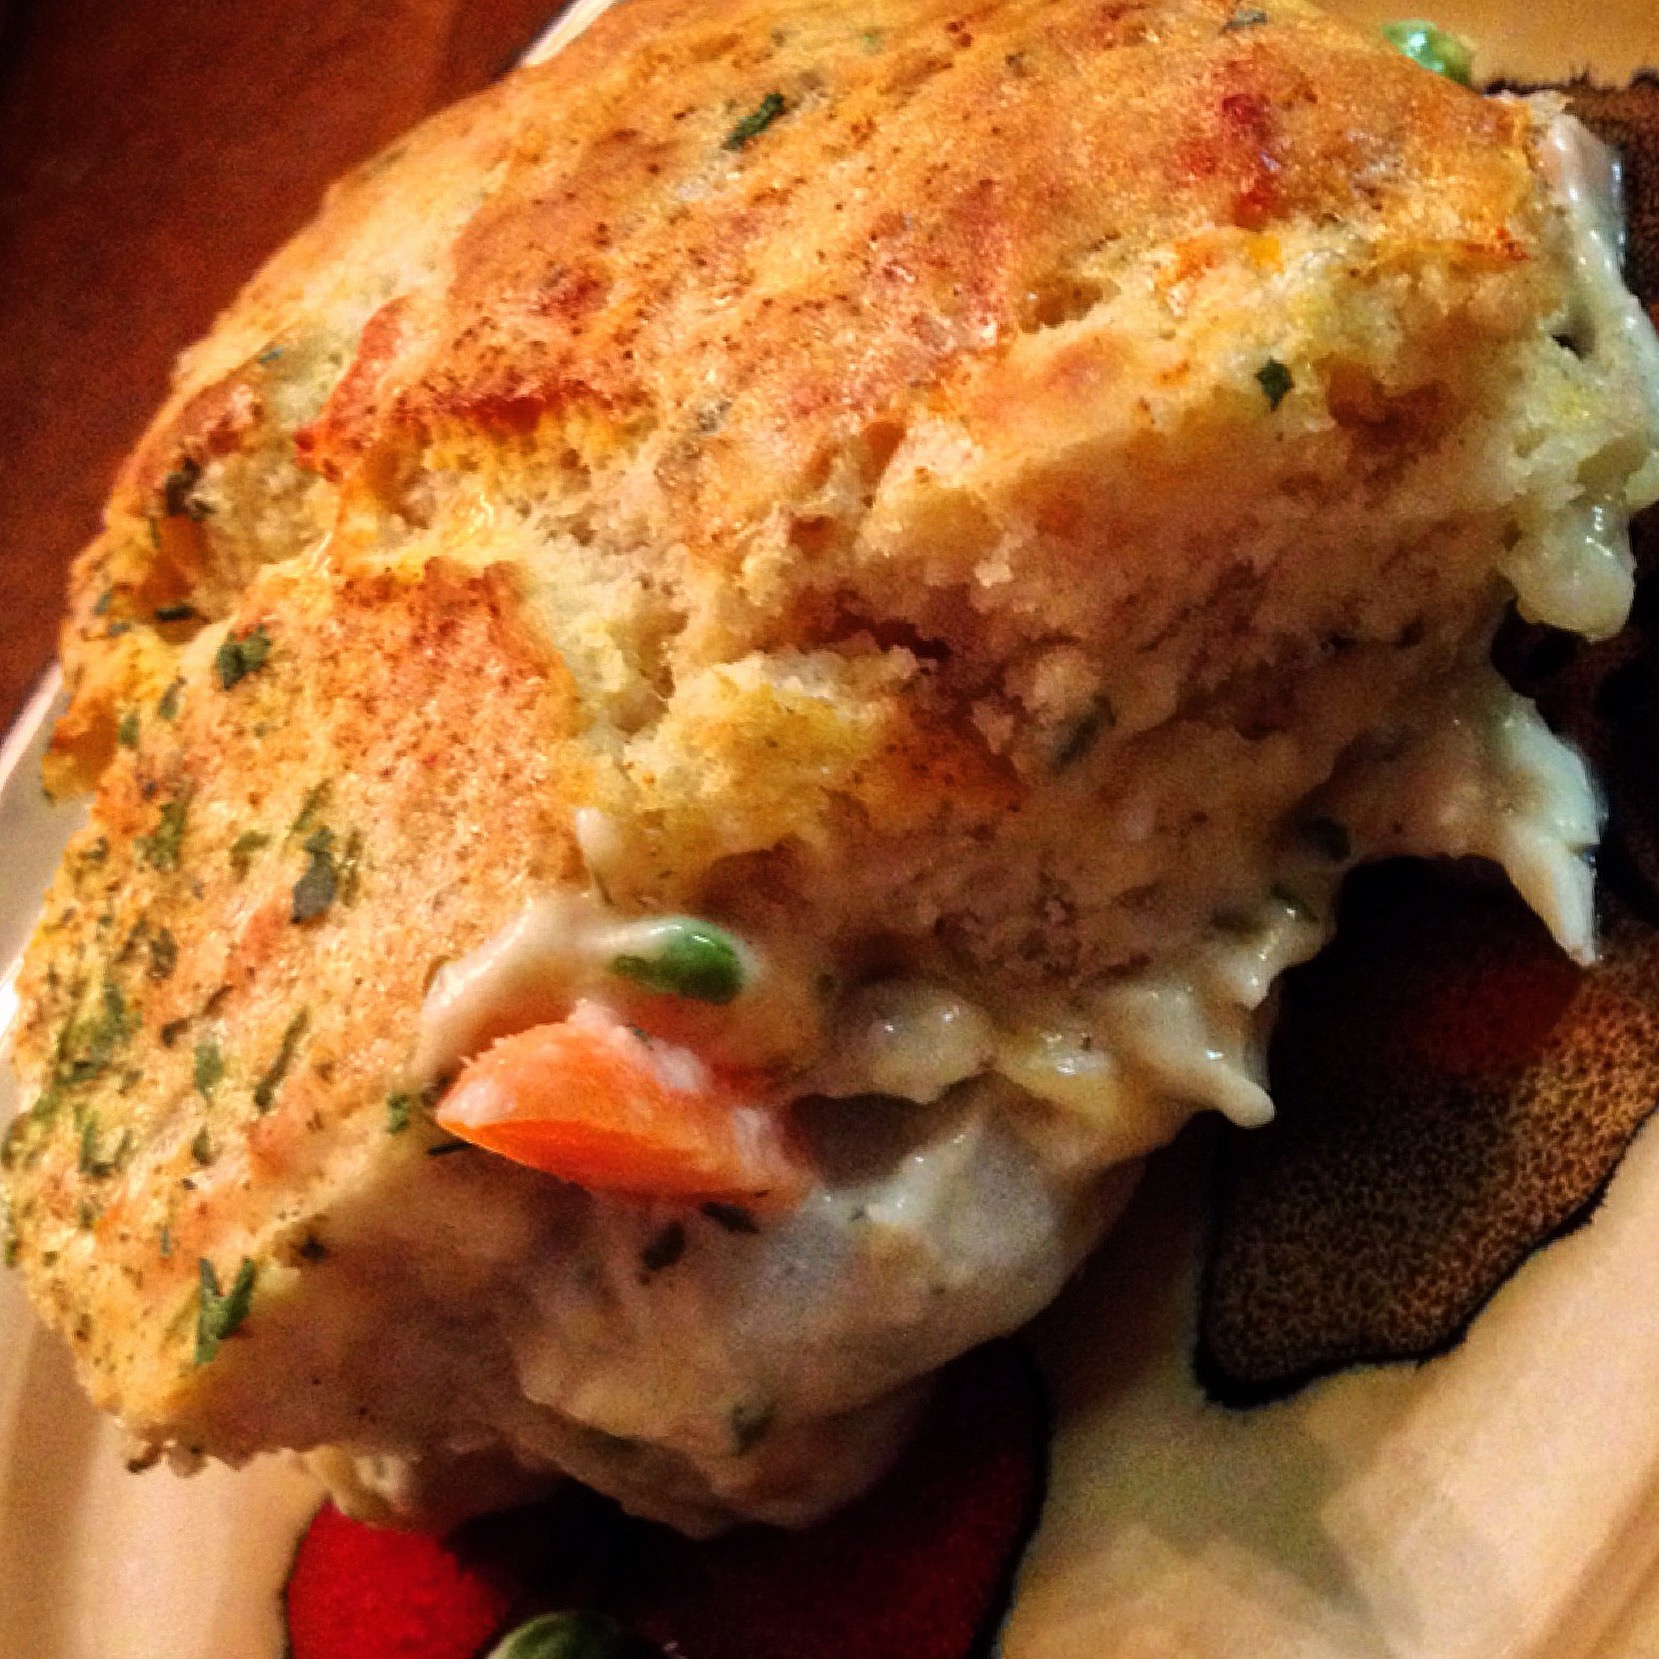
8. Finish by adding more of your cooked ingredients, as well as a few sliced tomatoes and a last sprinkling of cheese-then place into the oven to bake for 20-25 minutes (or until just set, but be careful not to overcook). Let the frittata cool for a few minutes before unwrapping foil and removing it from the pan..

Garnish with fresh chopped parsley and enjoy..

"Cajun-Creole Jambalaya"

It's been a long break from cooking or blogging recently..

I've been away these past few weeks on a much needed vacation to New Orleans and the Mexican Riviera..

New Orleans is one of my most favorite places in all the world to be..

I love the history, the atmosphere, the sights and sounds of this Southern U.S. city—and don't even get me started on their cuisine..

I could go on forever and a day about the food—from the coffee & chicory with beignets, the étouffée's and gumbos, the seafood and the down home southern food..

There's a never ending supply of variety and an endless parade of new food experiences to explore inside Nawlin's.. 

It's because of this wonderful mix of French, Spanish, American, African, Island and Native influences thrown together with all of the new culinary discoveries and imports from around the world that makes it such a special "Foodie" city..

Now though, after thoroughly devouring the streets and food scene in the Big Easy, I'm back home..

An though sadly my journey to New Orleans is over, it didn't take long before I felt the need to do a little culinary invention of my own and get back into my favorite room in the house—the kitchen..

An what better dish to make on my return from NOLA, then my own version of a Cajun-Creole standard—"Jambalaya"

Using a mix of chicken, andouille sausage and slow cooked beef stew meat with my peppers, tomatoes, onions, herbs & spices to create this "just spicy enough" version of a tasty jambalaya was the result..

Came out perfectly and such a nice addition with the beef—was practically ready to fall apart as soon as you put it in your mouth. An the heat, just perfect—spicy enough to enjoy but not so hot as to wake the dead down in Louisiana..

Just be sure leave a bottle of hot sauce on the table for those in your home that will only settle for a "Four Alarm Fire" in their mouth and nothing else..

"Definitely Delish" an definitely a dish that you, and your family, will absolutely enjoy—trust me...


"Cajun-Creole Jambalaya"

Ingredients:
For Jambalaya:
1 tablespoon extra-virgin Olive Oil
1 tablespoon Butter
1 1/2 pounds boneless, skinless white meat Chicken cut into pieces
3/4 pound andouille, sliced or diced (pre-cooked is easier to slice)
1 medium Sweet Vidalia Onion, chopped
2 ribs Celery, chopped
2 Bell Peppers, chopped (I used a mix of yellow, orange and green for color)
1 Bay Leaf, fresh or dried
1/8 teaspoon hungarian Paprika
2 to 3 tablespoons (a handful) all-purpose Flour (plus more for coating chicken and beef)
1 (14-ounce) can diced Fire Roasted Tomatoes in juice
1 (14 ounce) can crushed San Marzano Tomotoes
2 cups low sodium Chicken Stock or Chicken Bone Broth
1 teaspoon (1/3 palmful) Cumin
1/4 to 1/2 a teaspoon Chili Powder
1 teaspoon (1/3 palmful) Poultry Seasoning
1 teaspoon Worcestershire sauce
Coarse Sea salt and Black Pepper
Chopped Scallions(green onions), for garnish
Chopped Chives, for garnish
Chopped fresh Italian Parsley, for garnish
Fresh Thyme, chopped for garnish

For Beef:
1 pound Beef Sirloin, cut into a mix of 1 or 2 inch cubes
2 cups of Beef Broth
1/4 Red Wine
pinch of dried Thyme and Sage
enough Water to cover meat
1 tablespoon Butter & Olive Oil
2/3 cup Flour, 1 tsp. Sea Salt and Black Pepper for coating

For Risotto:
2 cups of Risotto rice
2 cups of Chicken Bone Broth or Stock
2 cups of Water
1 teaspoon of Sea Salt
1 tablespoon of Butter

Directions:
For Beef:
1. Mix 2/3 of a cup of flour (or gluten free alternative) with a teaspoon of sea salt and black pepper. Then slice your beef sirloin into cubes of about 1 or 2 inches in size. Toss together to coat all sides of your beef with the flour mixture..
2. Add beef broth, red wine and herbs to a small pot with butter and bring to a low boil on medium heat..
3. In your main chef's pot or saute pan with deep sides, heat a tablespoon of butter and olive oil on medium high heat--then add your beef, in batches if necessary, searing/browning all sides of your beef stew meat..
4. Remove from the beef from the pan and transfer to the simmering broth and add water, if needed, to cover completely. Bring the small pot to a boil, cover and reduce temperature to simmer. Cook for 1 1/2 to 2 hours or till almost ready to shred, then remove from heat--be sure not to over cook as we want it to retain it's shape and not have the beef falling apart..

For Risotto Rice:
1. Add two cups of risotto, 1 tablespoon of butter, 2 cups of chicken bone broth, 2 cups of water and sea salt..
2. Bring to a boil, stir and then cover. Reduce the heat to a simmer and cook on a low boil/simmer for 20 to 25 minutes, or until the rice is done and the liquid is absorbed. Remove from heat and leave covered till needed..

For Jambalaya:
1. Slice and chop your andouille sausage, chicken (small 1 to 2 inch pieces), vegetables, onions and garnish in preparation. Take several tablespoons of flour, or leftover from the beef, and toss your sliced chicken in it to coat..
2. Heat a tablespoon of butter and olive oil on medium high heat in your deep sided saute or chef's pan. Add chicken in a layer and let sit for 2 minutes before flipping to sear, cook for an additional minute to brown slightly before adding the slice sausage and cooking for 2 more minutes..
3. Add the chopped onion, celery,bell pepper, bay leaf and paprika (can sub cayenne for a spicier flavor). Saute the vegetables with meat, stirring the pan occasionally, for 5 minutes. Sprinkle 2 to 3 tablespoons of flour over the pan and cook for 1 to 2 more minutes, stirring..
4. Stir in your tomatoes and chicken bone broth(stock), then season with cumin, chili, poultry seasoning and worcestershire sauce. Bring everything to a low boil, adjusting heat if necessary..
5. Strain liquids out of the small pot of beef, then transfer beef to the main saute pan and stir to mix. Cover loosely and reduce heat to a simmer, cooking for 10 to 15 minutes..
6. Ladle servings into your serving bowls and using a small ice cream scoop, place a scoop or two of rice onto the center of the bowlfuls of jambalaya. Sprinkle with coarse sea salt, black pepper, chopped scallions, chives, minced parsley and thyme to garnish..

Notes:
1. For thicker jambalaya you can add additional flour or "Wondra" to the pan as a thickening agent near to the end of cooking..
2. I enjoy the low sodium Chicken Bone Broth for the extra nutrients, but Chicken Broth or Stock is fine as a replacement..
3. For a spicier version use a whole teaspoon of chili powder with 1/8th of a teaspoon of cayenne instead of the paprika and smaller amount of chili powder..
4. I like the sticky, creamy texture of the risotto but you can sub in plain enriched white rice. You want it to be sticky for the effect of scooping it on top, but it's not a deal breaker if it's not..
 

"Fried Hot-Water Cornbread Bites"

It has been a busy few days or more of work on a cake for a baby shower along with all of the work me and my Sweetie are doing on the new Travel Business we started at "Superior Travel Destinations"

Everything has been coming along great but between the two projects, I haven't had the extra time or energy leftover after work for my regular cooking, let alone my blog..

So it's not every day that you have time to make some over intricate or "wow" meal; but sometimes, just sometimes, you get to wanting something simple and delicious..

When I think of that I think of Southern Comfort Style cuisine; ribs, pulled pork, red beans & rice, and cornbread..

Mmm, cornbread...

I don't know what it is about it but something in the taste of that buttery sweet goodness of cornbread makes it something I rarely pass up-no matter what kind of health or diet kick I might be on at the time..

It's really kind of funny if you think about it, but a boy from New York could live on southern comfort food for life-must've been New Orleans, the tastes, the sounds, the smells. I just can't get it out of my soul..

So enjoy these little bites of cornbread heaven and serve them next to your Jambalaya, Pulled Pork, Country Ribs or heat them up for breakfast with some Coffee & Chicory, Eggs and Andouille Sausage..

If you do, I'm sure that you'll find them "Definitely Delish"


"Fried Hot-Water Cornbread Bites"

Ingredients:
2 cups fine fresh Cornmeal
1/2 cup White Sugar
2 tablespoons of Baking Powder
1/3 cup of melted Butter
1 teaspoon Vanilla extract
1 1/2 teaspoons of fine Sea Salt or Himilayan Salt
2 cups, or more of Boiling Hot Water (as much as is needed to reach a batter like consistency)
Vegetable Oil for cooking

Directions:
1. In a large bowl combine the corn meal, baking powder, sugar, salt and stir to combine. Add melted butter and vanilla; then add boiling water, starting with about 1 1/2 cups of boiling water. Carefully stirring to combine..
2. Continue adding additional boiling water until a batter like consistency is reached. It should be pour-able, like pancake batter. (Different corn meals will require different amounts of water. Start with less and add more if you need it.)
3. I used an ebeliskiver pan to make small rounded bites. Heat on medium to medium high, brush with vegetable oil and pour batter into the rounded circles, as it starts to set gently flip the individual bites and cook till done.. 4. Should only take 4 to 6 minutes cooking time total depending on stove-top. If needed start with one to test your timing to completion before making an entire batch. (See Notes for Options)

Notes:
1. If you do not own an ebelskiver pan, add approximately a 1/4 inch of vegetable oil to a pan and heat to around 350 degrees Fahrenheit. Add about a 1/4 cup of batter to heated oil and cook till browning (3-4 minutes) then gently flip and cook and additional 3 minutes working in batches to retain oil temperature..
2. An option for the ebelskiver pan version is to cut out marble size squares of butter and freeze them for 30 minutes inside the freezer. Partially fill the ebelskiver pan with batter and as it cooks add frozen butter to center, gently pressing it into cooking batter--then covering with more batter before flipping, to add a kick of melty butter flavor to the center of each bite. (I did this myself, and it was delicious.)

"Gluten-Free Copycat Nabisco Chocolate Snaps"

Every once in a while, I'll have this—I don't know, this deep seeded sense of nostalgia..


It doesn't happen too much, I'm not that old yet, but when it does I can get to reminiscing about the things of my youth—when things seemed fresh, new and so much simpler by far..

Often it'll be food that gets me to dreaming about days gone by—when TV Dinners were in aluminum trays you heated in the oven, Ring Dings came in foil wrappers and Nabisco made their Snap cookies..

It was this last one that hit me recently. First, I wistfully thought of the cute little box with the tiger on the cookie and then it was trying to remember that taste—there was really no other cookie like it and I can remember eating them for years growing up..

Sadly, like so many things from my childhood, these had disappeared long ago from store shelves..

Being somewhat handy in the kitchen and after imagining the wonderful simple plain chocolate cookie taste with just the tiniest bit of snap to it—I decided I could wait no longer, so I set about attempting to discover again that sweet memory of flavor..


As I gathered myself to bake, and after tweaking a few ideas to fit my thought of what it would take to create this long gone snack, I decided that since I have been on such a Gluten-Free cooking kick lately—well, I would just try and continue with this recipe..


I'm not exactly sure why, I don't have Celiacs or a gluten intolerance, but I know some who do—so I guess I've been wanting to see what I can make for them that isn't out there like it should be..

A few ingredients, just a little bit of work and before you know it they started flying out of the oven needing a quick squish—then set aside to cool till done..

They were perfect..

Just like I remember..

Thin, chocolatey and with just a little snappy bite to them..

So if you, like me, remember that tiny rectangular box with the tiger face drawn on the cookie from the 70's and 80's then you will fall in love with these simple, plain, wafer'ish cookies—because without a doubt they are "Definitely Delish"


"Gluten-Free Copycat Nabisco Chocolate Snaps"

Ingredients:
1 1/2 cups shortening
1 1/2 cups Light Brown Sugar
1 cup White Sugar
2 Eggs
1/2 cup Cocoa
1/4 cup Special Dark Cocoa
1/3 cup Milk
3 tsp. Vanilla
2 tsp. Baking Powder
2 tsp. fine Pink Himalayan Salt
1/4 tsp. Cinnamon
1/4 tsp. Baking Soda
4 cups Gluten Free Baking Flour (I use King Arthur Brand)

Directions:
1. Preheat oven to 375 degrees.
2. Cream 1 1/2 cup shortening, 1 1/2 cup light brown sugar and 1 cup white sugar. Add 2 eggs and beat..
3. Add 3/4 cup cocoa, 1/3 cup milk and 3 tsp. vanilla and beat.
4. Add remaining ingredients of 2 tsp. baking powder, 2 teaspoons of Himalayan salt, cinnamon, 1/4 tsp. soda and 4 cups of gluten free baking flour..
5. Form in balls size of walnut and place about 2 inches apart on a cookie sheet..
6. Bake 12 minutes. Smash flat when they come out of the oven while still warm. 
7. Repeat until all dough is used up. Makes about 100 cookies, or more, depending on how big you make them..
 

"Gluten Free Quinoa Coconut Flour Crust Pizza"

Who doesn't love pizza, I know I do—and when I get to craving, especially now that I'm older, I try my hardest to figure out ways to enjoy it without regretting it almost immediately..

This is one of them, and one of my favorite fit and healthy alternatives to the oh so tasty pizza crust—and I think you'll find that you enjoy it to..

Deciding, though, that I missed pizza was only the first hurdle and then after seeing so many of those cauliflower, and other, crusts floating around out there —well I just had to give it a try myself..

So after messing around with a recipe or two, I decided to try a completely different take on the pizza crust myself..


So after a quick mixing together of all the various ingredients; I dumped it all out onto oiled parchment paper, and using the ring of the spring form pan, formed it into a circular shape..

Into the oven, for a few minutes, on the paper till just golden brown and then time to slather with sauce and cover with toppings..

I decided to go with one of my favorite pizza styles, the "Hawaiian Pizza"—fresh cut pineapple, sliced prosciutto, shredded and fresh mozzarella with a few torn fresh basil leaves..

Back in for five or so minutes more, until the cheese has melted and then it's almost time to dig in..

Just let it sit for a minute or two; sprinkle it with shaved Parmesan if desired and some extra basil, a little salt & pepper or red pepper flakes—if that's suits your tastes..

Now time to jump in and start eating; cut up a few slices for me and my Baby—then devoured this terrifically tasty treat..

So very good and healthier for you as well..

Will be playing around more with this one in the future, from toppings to sauce—you should too..

"Definitely Delish" and definitely a dish to make again and again..


"Quinoa and Coconut Flour Pizza Crust"

Ingredients:
Crust:
1/2 cup Quinoa Flakes
1/4 cup +2 tablespoons Coconut Flour
3 Eggs, room temperature
2 tablespoons of Water
2/3 tsp Baking Soda
1/2 tsp Baking Powder
3 tablespoons Extra Virgin Olive Oil
2/3 tsp Sea Salt
1/2 tsp Garlic Powder
1/2 tsp dried Oregano and Basil, crushed between fingers
2 cloves fresh Garlic, minced
2 heaping tablespoons shredded Parmesan cheese
1/4 cup shredded 2% Mozzarella

For Toppings:
Pizza sauce, homemade or store bought
Shredded or fresh Mozzarella, or mix
2-3 fresh torn Basil leaves
Any other toppings you enjoy (I did prosciutto and pineapple with fresh basil)

Directions:
1. Place a pizza stone in the oven, or baking sheet if you don't have a pizza stone. Preheat oven to 450 degrees..
2. On a cutting board, place a large piece of parchment paper and spray it with nonstick cooking oil..
3. Dump quinoa flakes and coconut flour into a bowl. Now add Parmesan cheese, 1/4 cup mozzarella cheese, 2/3 teaspoon sea salt, 1/2 teaspoon dried basil (crush up the leaves even more between your fingers before adding), 1/2 teaspoon dried oregano (crush up the leaves even more between your fingers before adding), 1/2 teaspoon garlic powder (not garlic salt), minced fresh garlic, baking soda, baking powder and a dash of red pepper if you want..
4. Now add your egg and mix away. Hands tend to work best, I'll wear those throw away gloves sometimes so as to be able too have clean hands again when needed..

5. Once mixed together, use your hands to form the dough into a crust on your oiled parchment paper. Pat it down thoroughly, you want it nice and tightly formed together. Don't make it too thick or thin either. (I used the outer ring of a spring-form pan to ensure a nice circular crust)
6. Using a cutting board slide the parchment paper onto your hot pizza stone or baking sheet in the oven. Bake for 7-10 minutes, until it starts to turn golden brown. Remove from oven... (Just eye the crust the last few minutes to ensure you don't under or over cook it)
7. Add however much sauce, cheese, and toppings you want. I'm not gonna give you measurements for this. You should know how you like your pizza - this is your personal taste that matters.!
8. Slide parchment with topped pizza back in the hot oven and cook for another 5 to 7 minutes until the cheese is melted and slightly golden..
9. Test your patience and allow it to cool for a minute or two. Probably closer to two. Then using a pizza cutter and a spatula serve up your delicious gluten-free quinoa coconut flour crust pizza!

Notes:
1. It makes a big difference oiling the parchment paper before forming the crust on it and using a pizza stone in the oven..

2. You'll want to have the oven pre-heated well ahead to allow the stone to be heated completely..

"Skinny Orange Chicken"

I love finding fun ways to create low calorie healthier alternatives to some of my favorite dishes..


Through experience, and experimentation, I've gotten pretty good at it with some recipes—such as this incredibly tasty "Skinny Orange Chicken"


Using "Tamari" lite Japanese soy sauce, natural coconut oil spray and my favorite brown sugar substitute by Truvia—I'm able to create these wonderful skinny dishes that are amazingly flavorful and with near none of the regret..

For this one, this time, I used a mix of quinoa and low glycemic rice—but I'm just as likely to serve it with roasted riced cauliflower or Shirataki rice by "Miracle Noodle" to cut the carb calories even more..

The depth of citrus orange taste along with spicy tang of red pepper and ginger gives this dish a wonderfully sweet and zesty taste that's sure to please the people in your home..

Add in the fact that you can't tell the difference between this and the high calorie, high sodium version, for me anyway, and this is a win-win as far as I'm concerned..

Tasty, filling, healthy and guilt free—this is another dish that's sure to help you fulfill your desire for a healthier you; and it is, most assuredly, oh so "Definitely Delish"

"Skinny Orange Chicken"

Ingredients:
2 lbs. boneless, skinless Chicken Breast
1 cup fresh Orange Juice (low sugar, no pulp, pulp-up to personal taste)
2 tablespoons fresh Lemon juice
2 tablespoons Sushi Vinegar (rice wine vinegar)
2 tablespoons Tamari lite soy sauce
4 tablespoons of Truvia Brown Sugar Blend (equal to 1/3 cup of brown sugar)
2 cloves of Garlic, minced
1 tsp. Ginger
1 Orange, zested (aprox. 1 tablespoon or more)
1/4 tsp. crushed Red Pepper
1/2 c. Water
1 1/2 tablespoons Corn Starch (according to desired thickness)
3 Green Onions, sliced
1 tablespoon fresh chopped Italian Parsley
Sea Salt and fresh ground Black Pepper (for sprinkling on chicken before browning)
3 to 4 cups cooked Rice, Quinoa, blend or low carb alternative..

Directions:
1. Rinse off and pat dry chicken; slice into smaller pieces and season with salt & pepper, then set aside till ready. (Begin cooking your rice or substitute at this time)
2. Pre-heat your skillet, wok or deep sided saute pan on medium high heat. Spray the inside with coconut oil spray and add chicken pieces, browning until lightly golden on all sides—about 10 minutes..
3. Remove the chicken with a slotted spoon to a plate and cover with foil to keep warm. It will not be finished cooking yet..
4. Lower heat to medium and add the sauce ingredients by combining the orange juice, lemon juice, sushi vinegar, Tamari soy sauce, Truvia brown sugar, minced garlic, ginger, orange zest, and crushed red pepper flakes..

5. Cook, stirring regularly, over medium heat until very slightly thickened and bubbly—about 5 minutes..
6. Add the chicken pieces back to the pan with juices and mix together to coat and then covering to simmer for about 5 to 10 minutes more—adjusting cooking temperature if necessary..
7. In a small bowl or measuring cup, combine water and corn starch and stir until corn starch is dissolved..
8. Add corn starch mixture to skillet and continue cooking, stirring regularly, until sauce is thickens completely—about 2 minutes..
9. When ready to serve spoon chicken over your rice, quinoa or substitute and garnish with sliced green onions, chopped parsley, additional orange zest, and red pepper flakes as desired..

Eat Hot and Enjoy!!


"Roasted Cauliflower, Broccoli & Brussel Sprout Soup"

I love roasting and eating vegetables..

I mean, if I can throw it onto sheet pan and drizzle it with oil—I will..

This recipe takes a simple side dish at dinner and adds in a few ingredients to create a perfect lunchtime or supper meal that's wonderful during these cold northeastern winters..

One of the first things I started with here is deciding on a mix of vegetables—so taking two recipes from my Thanksgiving side dish post, back in October, I got to work on what would become this delish soup recipe..

Going almost half Brussels sprouts and half cauliflower, with some broccoli thrown in for good measure—I tossed it all down onto my sheet pan and drizzled it with quality extra virgin olive oil with a little fine sea salt & pepper to finish. Then into the oven it went..

Truly I love simple recipes like this with just a few dishes needed; one pan, one pot a knife and a spoon—what could be simpler and leave less work for you afterwards then that. Well a skillet meal like my frittatas, and mexi-skillet recipe, but I digress..

While my veggies went about becoming all roasty browned and tasty; I prepped the base for my soup which included some lean prosciutto, shallots, garlic & chicken stock..


Quicker than you'd think it was time to pull my roasty toasty vegetables out of the oven and spoon them into the pot with the soup base and bring it up to a nice low simmer for about 10 minutes..

Here is where an immersion blender is key if you want to save on spatters, dribbles, spills and sloshing as you attempt to blend a little of the soup at a time and then dumping into another dish—you're guaranteed to add to your after cooking clean up; and really, who wants that, right!


A few minutes of immersion blending later and you have a supremely thick soup that just needs a little seasoning for taste before it's ready to serve..

Garnish each bowl with some reserved roasted veggies, the slightly crispy cooked prosciutto and some shredded Manchego cheese an you'll have a beautiful dish that's sure to please..

I loved it and I'm sure if you try it for yourself that you will to; because it is, oh so "Definitely Delish"

"Roasted Cauliflower, Broccoli & Brussels Sprout Soup" 

Ingredients:
16 oz cauliflower florets
16 oz Brussels sprouts, halved
8 oz. Broccoli florets
4 oz. lean Prosciutto, cut into small pieces (see notes for vegan options)
3-4 tbsp Extra Virgin Olive Oil
2 tablespoons Butter (see notes)
1/4 cup Shallots, chopped
2 cloves of Garlic, minced
3 1/2 cups low sodium Chicken Stock (see notes)
1 cup Vegetable Broth
1/2 teaspoon fine Sea Salt, plus more to taste
White Pepper, to taste
1 tablespoon fresh chopped Italian Parsley
Natural Olive Oil Spray

Directions:
1. Preheat oven to 450 degrees Fahrenheit..
2. Spray a large baking sheet with the Olive Oil Spray. Place the cauliflower, broccoli and Brussels sprouts cut side down on the baking sheet, drizzle with 2 tablespoons of olive oil and sprinkle with sea salt—then roast on the bottom third of the oven 25 minutes, tossing half way until slightly browned..
3. Meanwhile, add 1 tablespoon of oil to your soup pot on medium heat and add your pieces of prosciutto—cooking until browned, then remove from the pot and reserve for later..
4. Now lower the temperature of the pot to low heat and melt the butter, then add the shallots & garlic. Cook until translucent, about 5 minutes..
5. Add the chicken stock and simmer 5 minutes..

6. Shut the oven, reserve about 1 cup or more of the roasted vegetables and keep warm on the baking sheet..
7. Transfer the rest to the pot and simmer for 5 minutes, covered..
8. Now, using an immersion blender, blend until a thick even consistency is reached. You may also enjoy it chunkier, so can stop when it reaches the style you enjoy..
9. Now simmer on low heat for 5 to 10 minutes, adding up to 1 cup of vegetable broth if thinning of the soup is needed. As well as adding sea salt and white pepper to taste. (Any last minute additions such as fresh herbs, rubbed sage, etc can be added to enhance the flavor if you desire)


Notes:
1. Serve in bowls topped with the some of the roasted vegetables, cooked prosciutto, chopped parsley and a drizzle of extra virgin olive oil..
2. You can also add a bit of fresh shredded 8 month Manchego cheese, which I did. (Optionally Romano or another cheese could be substituted) Serve immediately..


3. You can remove the prosciutto (or use vegan/vegetarian friendly option if available), substitute the butter for a non dairy version (Olio olive oil spread, or another) and replace the chicken stock with vegetable broth to make this soup Vegetarian or Vegan friendly....

"Protein Packed Belgian Waffles"

Every once and awhile I get to wanting something I just don't eat anymore—usually..

When this happens; sometimes, just sometimes, I'll get creative and try to figure on how in creation I can achieve this without regretting almost immediately indulging in a treat of this kind..


Of course when I say this kind; what I'm referring too, as you can see from the photos, is nothing short of a stack of protein packed "Belgian Waffles" with "Gelato" and "Whipped Cream"

Today I was successful (though that's not always the case when trying a new technique) by using a mix of protein powder, flapjacked pancake mix, egg & egg whites, stevia, coconut oil, vanilla & almond extracts, cinnamon and almond milk..

An with a little wrangling, and a very short amount of time, I was able to create perfectly fluffy and delicious waffles..

Topped with a little low fat, no churn chocolate protein gelato made with cool whip and finished with whipped coconut cream—this delectably tasty dish was just full of protein, with none of the heavy carb regrets..

Definitely happy with this for a little "Breakfast for Dinner" after hitting the gym; because it was,
most assuredly, oh so "Definitely Delish"


"Protein Packed Waffles"

Ingredients:
2 scoops of Protein Powder (I use Quest Baking Protein-Unflavored)
1/4 cup FlapJacked Protein Pancake Mix (Any protein pancake mix, or gluten free substitute can be used)
2 Eggs, room temperature
1/2 cup of Unsweetened Almond Milk
1 teaspoon Baking Powder
1 teaspoon Baking Soda
1/4 teaspoon fine Sea Salt
1 teaspoon Vanilla Extract
1/2 teaspoon Almond Extract
1 teaspoon Sweetener (stevia, truvia, splenda, etc)
1 tablespoon Coconut Oil, liquified
Natural Cooking Spray
See Notes for Options & Additions

Directions:
1. Pre-heat waffle maker on medium high temperature. (Temperature and time may need adjustment due to differences in waffle makers)
2. Mix all dry ingredients together in a deep bowl with whisk adding any additional dry ingredients such as cinnamon..
3. Add cool liquid coconut oil (if heated to melt or another oil substitute), eggs, Almond milk, vanilla & Almond extracts..
4. Whisk ingredients together adding additional tablespoons of Almond milk if necessary and the batter was too dry. Let sit for a minute..
5. Using a spatula, gently fold any optional ingredients such as mini chocolate chips, blueberries or diced banana if so desired..

6. Spray the inside of your waffle maker with natural oil sprays (I use Pompeian brand natural grapeseed or coconut oils with no propellants)
7. Pour 1/4 to a 1/2 cup (depending on size) of batter out onto your waffle maker and close lid..
8. Cook for 1 to 2 minutes and check. (Some waffle makers are cooler on top like mine, so halfway through I'll flip my waffle with help of a small rubber spatula) Cook for another 30 seconds to 1 minute, till done..
9. Repeat with remaining batter till all waffles are finished..
10. Top with your choice of toppings or additions and enjoy..

Options:
1. Mix and match add ins such as more vanilla extract and blueberries, banana extract and diced banana, mini chocolate chips, cinnamon, pumpkin pie spice—use your imagination..
2. When I'm looking for extra protein on gym day I will substitute out some Almond milk for additional egg whites (or carton egg beaters) I'll add the 2 eggs, 1/4 cup of carton egg beater eggs (or more) and then add Almond milk till a nice batter like consistency is reached..
3. Toppings can include butter (or substitute, I use Olio light spread) pure maple syrup (or low sugar substitute), homemade whipped cream, fat free gelato (I make a fat free, naturally sweetened protein gelato) or a scoop of "Halo Top" Protein ice cream (which I love, yum)—fresh fruit, preserves or a variety of other options can be added, it's all about personal tastes..

"Herb and Cheese Frittata with Vegetables"

"Herb & Cheese Frittata with Veggies"

It's been a little bit of a skillet meal kick that I've been on recently, but who doesn't love the ease and variety of simple one pan dishes such as these—now let's get down to business..

Last night I decided to make me and my Baby some "Brinner"

You know, a little "Breakfast for Dinner"

What I ended up throwing together was a wonderfully yummy "Frittata"

Had to do a bit of scrounging, the cupboards were a little more bare then usual..

"Asparagus Cheese & Herb Frittata"


First I wanted to have some cheese to add, but lacking any beyond some Parmesan, I ended up having to make my own from scratch..

A little heavy cream, milk and lemon juice later and I had my homemade "Ricotta" draining thru some cloth..

Next I prepped some garlic, shallots, grated Parmesan, fresh herbs and grape tomatoes; along with some leftover steamed broccoli I had..

"Zucchini, Squash & Ricotta Cheese Frittata"

A little sautéing later; followed by pouring in the eggs and egg whites, then it was time to add a few dollops of fresh cheese and the seeded an halved tomatoes..

Under the broiler it went; and a few minutes later we had this wonderfully tasty and beautifully golden "Herb and Cheese Frittata" with vegetables...

I sprinkled on a pinch of pink salt and black pepper and then it was all ready to serve..

So very good with just the right amount of each ingredient and with nothing overpowering anything else..

"Definitely Delish" and definitely a dish to be had for dinner, for breakfast, or for both...


"Herb and Cheese Frittata with Vegetables"

"Herb & Cheese Frittata with Tomato"

Ingredients:
8 Eggs (Or a mix of Eggs and Egg Whites-more egg or whites may be needed depending on pan size)
Fresh Herbs—Rosemary, Thyme, etc...
Tablespoon Olive Oil or Coconut Oil
Homemade or Store bought Ricotta Cheese (Goat Cheese, Feta, Fontina, etc)
Himalayan Pink Salt or Sea Salt
Fresh ground Black Pepper
Grape Tomatoes, halved and seeded (Other Vegetables can be used)
Broccoli or Asparagus or other Vegetable

"Zucchini, Squash & Ricotta Cheese Frittata"


Directions:
1. Mix eggs (plus egg whites if cutting down on whole eggs) with whisk in bowl with pinch of pink salt...
2. Turn broiler on to 500 degrees..
3. Heat Oven Proof Pan on stove on just below medium heat. (I like using an oven proof oval pan)
4. Add Coconut Oil and Sauté Vegetables with a pinch of salt and pepper till tender. (You can add some herbs at this point if desired)

"Herb & Cheese Frittata with Tomato"


5. Pour Eggs over top the veggies and cook on medium low, till eggs begin to set—will vary depending on size of pan, depth and whether eggs are at room temperature, check with spatula if needed. (You want them to be at least halfway cooked through or more but be careful not to burn the bottom, adjust temp if needed)
6. Add Tomatoes, a few dollops of Cheese and some of the fresh Herbs...
7. Transfer pan under broiler on middle wrack of oven; cook till nice and golden with eggs being completely set. (Careful not to burn by checking often)


Notes:
There are so many options and changes available that it is not even worth listing them. Suffice it to say, pick a mix of cheeses, herbs, seasonings, vegetables and go with it—experimentation and imagination is all you need for a delicious meal the entire family will love, whether its for Brinner or Dinner...

"Mexican Skillet Dinner"

"Mexican Skillet Dinner" with "Spanish Rice"

I am kind of in love with Skillet dinners lately...

They are so quick and easy to make and
you can change them up in so many different ways...

From "Frittatas" galore, to "Skillet Pizzas" and on to the recent "Oatmeal Bake"  I've concocted—I just can't get enough of them..

Now with the stress of holiday cooking, presents and parties temporarily abated till this weekends New Years revelry; what better way to simplify your evening then a "Mexican Skillet Dinner"

Skillet dinners are great because you generally only get one pan dirty, and dinner can be ready in about a half an hour..

On busy weeknights when getting dinner on the table, for me and my baby, can be a struggle you don't want to have a lot of excess clean up to do afterwards—leaves more time for snuggling watching Netflix..

So, one pan dinners can be ideal and keeping a few easily customized ones that everyone likes is nice and can make for an easy night for the cook..

                                                                                                This "Mexican Skillet Dinner" is easy to play around with; from adding or changing the beans, type of meat, additional vegetables or variety of spices..

This one here is a pretty basic recipe for everyone but remember to be imaginative and creative in your own preparation because a meal should always be made to your own tastes..

Suffice it to say, there's an unending supply of alternatives for you to try out for yourself—to start, for the other night, I added an extra pot and cooked up some brown rice and quinoa into a healthy Spanish style rice mix separately as well as used a mix of black, pinto and dark red kidney beans in the skillet..

After a little cooking, then a sprinkling of cheese—it was under the broiler for all of two minutes and then time to dig in..

Me and my Baby loved it, and I especially love that I can change it up so easily to make an entirely different meal out of it each time..

"Definitely Delish" and definitely a dish to make again and again..

"Mexican Skillet Dinner"

Ingredients:
12 ounces Chorizo or Spicy Pork Sausage (I used lean spicy turkey sausage)
1 cup frozen Corn
1 (14 1/2 oz.) can diced Tomatoes, un-drained
1 cup uncooked Rice
1 cup Water
1 tablespoon Lime juice
1/2 small Red Onion, diced
1 1/2 teaspoons Chili Powder
1/2 teaspoon Paprika
1/2 teaspoon ground Cumin
1 (15 oz.) can Pinto beans, rinsed and drained (I used a mix of beans)
3/4 cup shredded Mexican-blend cheeses or Colby and Monterey Jack cheese 

Directions:
1. If present, remove casing from sausage. In a large skillet cook sausage over medium  to medium-high heat for 10 to 15 minutes or until brown..
2. Drain in a colander; set aside..
3. Add corn, tomatoes, uncooked rice, the water, chili powder, paprika and cumin to skillet..
4. Bring to boiling; reduce heat. Cover and simmer about 15 to 18 minutes or until liquid is absorbed and rice is tender..
5. Stir in beans, onion, lime juice and cooked sausage; heat through for several minutes..
6. Sprinkle with your cheese choices; cover and let stand for 2 to 3 minutes or slide under the broiler until cheese is nice and melted..

Notes
1. I changed my skillet to spicy turkey sausage, as well as adding a variety of beans (Red Kidney, Pinto and Black). Also I added onion and a few flavorful ingredients to liven things up..
2. I cooked my rice separately, so drained the tomatoes and didn't add the water to skillet..
3. You can slide the skillet under a broiler for a minute or two to melt the cheese quickly and lightly brown, I've done this myself..
4. Experiment, changing up spices, beans, meats, cheeses, vegetaables to make whole different varieties of skillets—from shredded chicken to short ribs, use your imagination..
There's so much you can do with a little experimentation and imagination...

"Chocolate Chip Oatmeal Bake For Breakfast"

Have you ever baked your oatmeal? If you haven’t, you’re in for a real treat. Up until just the other day, my only experience with oatmeal was either in a powdery packet or over a simmering stove-top...

But it turns out, throw some oats in a cast-iron skillet with milk, eggs, and a few other ingredients, and what you get is an oatmeal that is almost completely hands-off (with no risk of bubbling over!) but also completely delicious...


What's really appealing to me about baked oatmeal is its texture — unlike the traditional version, baked oatmeal is sturdy and dense more like a sweet breakfast casserole or a giant soft cookie than a porridge...

Plus, this makes it perfect for dressing up with a multitude of various cookie flavors...


Like I did this time; just throw in some chocolate chips and a hefty dose of vanilla for a chocolate chip oatmeal “cookie” for breakfast, dried cranberries, orange zest, and almond extract for a holiday take, or a few teaspoons of cinnamon and some plump raisins for an oatmeal raisin cookie version...

You're only restricted by your imagination when it comes to this dish. I'll be trying a mix a vanilla chips and toasted nuts (perhaps macadamia) next time I cook this one up for me and my Baby...

It really is a quick and simple dish that's easy to prepare; a few minutes of prep toasting the oats and mixing up the eggs and cream, then into the oven it goes...

What's great too is that all the leftovers can be saved in Tupperware containers for a quick meal on the way to work, or even a late night snack-it kind of really is like a giant breakfast cookie, Yum...

"Definitely Delish" and definitely a dish to try again and again...


"Cinnamon Raisin Cookie Baked Oatmeal"

Ingredients:
2 tbsp butter (optional)
2 cups rolled oats (use certified gluten-free if needed)
3 tbsp brown sugar
3 tbsp granulated sugar
2-3 tsp ground cinnamon
1 1/4 tsp baking powder
1/4 tsp kosher salt
2 cups whole milk (or non-dairy milk of choice — any will work!)
1 tsp pure vanilla extract
2 eggs
1/2 cup raisins (or more or less, to taste)

For serving:
Yogurt
Honey or pure maple syrup (I used a low sugar syrup)
Cinnamon
Homemade Whipped Cream 

Directions:
1. Preheat oven to 350 degrees.
Optional: Toast your oats first. In a 10-inch cast-iron skillet, melt the butter over medium heat. Add the oats and stir to coat evenly, then continue to cook, stirring every few seconds to prevent burning, until oats smell toasty, like popcorn. This should take only 2-4 minutes, but gives the oatmeal a deeper flavor and makes it taste a little more cookie-like, in my opinion.
2. Mix together oats, both sugars, ground cinnamon, baking powder, and salt in a 10-inch cast-iron skillet. You can also use an 8×8-inch baking dish — in that case, you may want to line it with parchment paper to prevent sticking.
3. In a bowl, whisk together milk, vanilla, and eggs. If you didn’t toast your oats, you can add a tablespoon or two of melted butter here, if you’d like. 
4. Pour the wet ingredients over the dry and give the dish a shake or stir it to evenly moisten. 
5. Scatter the raisins (or chips if doing optional recipe, which I made this time) evenly across the mixture and stir again to incorporate.
6. Bake for 30-35 minutes, or until golden on the edges. Oatmeal should still be soft in the center when removed but will set as it cools.
7. Serve while warm with whipped cream, syrup or whatever various toppings you enjoy....

Recipe options:
For a chocolate chip oatmeal cookie version:
Up the vanilla to 2 tsp, omit the cinnamon, and swap out the raisins for chocolate chips.
(This is the recipe I did, using a dash of cinnamon sugar and mini semi-sweet chips with the extra vanilla extract)

For a Cranberry Orange version:
Add one to two tablespoons of orange zest, half a teaspoon of almond extract, and swap out the raisins for dried cranberries.


Notes:
Serve with homemade whipped cream, syrup, vanilla ice cream or whatever else you think might go good alongside or on top if desired..

"Hoisin Pork Loin"

Recently while with my Mom, I had the opportunity to look through some of the old recipes and newspaper clippings she had put together over the years..

Some were family favorites I remember from childhood, some from friends of my parents, others were from cookbooks or articles from yesteryear and one was created by my Dad..

I had completely forgotten, and it was probably from fifteen or twenty years ago, but at one point my Pops had a recipe of his own published in a local New York newspaper—I thought that was beyond cool, especially since I have had the chance to be published too. Definitely shows how much we had in common..

So taking a trip down memory lane I try my hand at a recipe my Dad created decades ago; though I made a few tweaks of my own, considering that I would be feeding just two..

The flavor was amazing and I think you'll find it well worth the time and effort; and just in case, I'll be adding both my altered version and his original here for you..


Because no matter what I do believe that you will find them both, oh so "Definitely Delish"

"Hoisin Pork Loin"

11.jpg

Ingredients:
2 tablespoons Extra Virgin Olive Oil
2 pounds Pork Tenderloin, room temperature
1/2 cup Hoisin sauce
3 cloves Garlic, finely minced
2 Scallions, cut diagonally into 1 inch pieces
1/2 teaspoon whole Pink Peppercorns, hand crushed
2 Carrots, chopped
4 ounces fresh Shiitake Mushrooms, sliced
1/4 cup Scotch Whiskey (amber single malt)
1/4 cup Water
3 Green Onions (Scallions), sliced for garnish
Fresh chopped Parsley, for garnish
Sea Salt and Pepper, plus more to taste
 

Directions:
1. Pre-heat oven to 350 degrees Fahrenheit and season all sides of your pork with fine sea salt and fresh ground pepper after sitting it out on the counter to come to room temperature..
2. Heat a cast iron skillet for 2 minutes on high heat, drizzle with olive oil and place tenderloin into skillet turning to brown on all sides-approximately 3 to 4 minutes..

3. Mince your garlic and mix into the Hoisin sauce; remove skillet from heat and then coat the pork with your Hoisin sauce mixture on all sides. Sprinkle with sliced scallions and crushed peppercorns, then place inside the top third of your oven to bake uncovered for 20 minutes until cooked through..
4. Quick steam cook your carrots in a microwave safe dish for 3 minutes in the microwave, then in a separate dish microwave the sliced mushrooms and green onion for 45 seconds..
5. When the pork is done; remove from skillet and tent with foil on a cutting board till ready..
6. Using protective oven mitts, return the skillet to the stove-top and add the Scotch Whiskey, 1/4 cup of water, carrots, mushrooms and scallion pieces—bring mixture to a boil and cook until slightly thickened. (Add water by the tablespoonful if too thick, or boil longer if to thin)
7. Remove sauce from heat. Slice the pork into one inch pieces, season with salt and pepper if desired, then pour over with sauce and vegetables—garnish with chopped parsley, sliced green onion and enjoy immediately...


"Pops Hoisin Pork Shoulder"

Ingredients:
2 tablespoons Olive Oil
1 (6 1/2 pound) Pork Shoulder
3/4 cup Hoisin sauce
3 bunches of Green Onions, cut into 1 inch pieces
1 teaspoon whole Peppercorns
3 medium Carrots, chopped
1/4 cup Scotch Whiskey
3/4 cup Water
1 (4 oz) can sliced Mushrooms
sliced Green Onions, for garnish

Directions:
1. Pre-heat oven to 300 degrees Fahrenheit.
2. Heat oil in a heavy, ovenproof pot over high heat. Add pork shoulder, fat side down, and brown all sides, turning often, about 12 minutes..
3. Remove pot from heat. Spread Hoisin sauce over pork. Sprinkle with green onion pieces, carrots and peppercorns..
4. Cover and place in oven. Cook until pork is very tender when pierced with a fork, about 2 3/4 hours. Add water to pot by the 1/4 cup fills if mixture is dry while cooking..
5. Remove pot from oven. Transfer pork to a cutting board and tent with foil. Let stand for 20 minutes..

6. Spoon off fat from pan juices. Stir in mushrooms and whiskey, along with 3/4 cup of water and bring to a boil for 2 minutes. Add water by tablespoons if sauce is to thick, or boil longer to reduce sauce if to thin..
7. Cut pork into 1 inch thick slices. Garnish with green onion slices. Pour sauce over pork and serve..

"Iron Skillet Chicken Pot Pie" With "Cheesy Beer Bread Biscuits"

It being such a cold and wet day in New York, with the damp chill soaking into my bones and making it one of the ickier days this month so far—I decided that what was needed here was some good old comfort food...

Taking out an oldie but goody of a recipe, I decided to play around and see what I could do to liven it up a little and truly make it a "stick your bones" dish to warm the soul on a blustery winters day...


126.JPG


Grabbing an armful of staples floating in fridge and freezer, I got down to work; from the rotisserie chicken (always try to keep one on hand) and the variety of fresh and frozen vegetables, I proceeded to shred, chop, slice and dice to my hearts content...

Making a simple gravy, I tossed it all together with some seasonings and poured it into my trusty cast iron skillet...

Time for the all important top to my take on the classic chicken pot pie. For this I decided on a cheesy beer bread biscuit dough, full of ale and yummy cheddar cheese...

Taking the basics of a beer bread mix, throwing in the cheese, beer and seasonings—I then scooped it into little biscuit shapes and dropped it on to the filling inside the skillet...

In the oven to bake and before long the wonderful smells start to permeate the house and then—lunch...

Definitely a perfect, quick and easy meal to make and serve on a cold day using what's on hand—and, oh so, "Definitely Delish


"Iron Skillet Chicken Pot Pie" with "Cheesy Beer Bread Biscuits"

Ingredients:
Filling:
1 rotisserie chicken, meat removed & shredded
1/2 cup frozen pearl onions, more if desired
1 cup frozen peas & carrots (can mix and match vegetables, add corn, etc.)
1 cup reduced sodium chicken broth
1 cup low fat milk
2 tablespoons cornstarch
1/2 teaspoon sea salt
1/4 teaspoon white pepper
1/4 teaspoon poultry seasoning blend
1 teaspoon fresh chopped Italian parsley
1 tablespoon of olive oil

FullSizeRender[1].jpg

Biscuit:
2 1/4 cups Bisquick mix (If you have beer bread mix, then use)
2/3 cup brown ale (I used Newcastle ale)
1/2 teaspoon fine minced garlic
1/2 teaspoon minced onion
1/4 teaspoon fine sea salt
1/2 teaspoon finely chopped chives
1/4 teaspoon garlic powder
1 cup shredded cheddar cheese
1 stick of softened butter
2-3 tablespoons milk or cream, as needed (optional)
1 tablespoon of melted butter, separate

Directions:
1. Pre-heat oven to 400 degrees Fahrenheit...
2. To make the filling; whisk together broth, milk, cornstarch, sea salt, poultry seasoning and pepper...
3. Bring to a boil, stirring, until sauce thickens. Stir in your shredded chicken and mixed vegetables—return to a boil, then remove from heat...
4. To make the biscuits add all of the ingredients to a bowl except for the milk and ale. Mix together well, then slowly add the ale until fully incorporated. If mix is to dry, add 1 tablespoon of milk or cream at a time till desired consistency is reached...
5. Take a cast iron skillet and add 1 tablespoon of olive oil and using a brush or paper towel coat the inside of the skillet...
6. Add the fresh parsley to the filling and stir, then pour the heated filling ingredients inside your prepared skillet (or baking dish)
7. Next drop small biscuit sized amounts of the dough on top of the chicken mixture, making around 12 biscuits (I did slightly more, you can do slightly less as well)
8. Using a basting brush, brush tops of biscuit dough with the melted butter—and then place into the oven to bake...
9. Bake for approximately 18 to 22 minutes, until tops of the biscuits are a nice golden brown color and the filling is bubbly...
10. Remove for the oven and let sit for 10 minutes before serving...

Notes:
1. Any leftover biscuit dough can be dropped onto a parchment lined baking pan and cooked separately and saved in the fridge for up to 5 days...
2. You can mix and match vegetables, add corn, green beans, more onions, fresh or frozen—truly whatever you desire, or find in your fridge, freezer or cupboards...

"Pan Fried Gnocchi In Brown Butter Sage Sauce With Pumpkin"

Not quite ready to let go of the Fall season after the Thanksgiving holiday here in the U.S.

I know, I know. We all look forward to those Winter holidays; whether it's for the presents, the snow or the camaraderie—me though, I love Fall and this year it seemed to pass all to quickly...

So as the months prepare to change and all the craziness of December shopping, cooking and running around gets prepared to start—I decided to treat myself to one more dish full of pumpkin, an spice and everything nice...

Hope you'll enjoy it and hope as well that you all have a very blessed and happy holiday season whatever you and yours may celebrate...


"Pan Fried Gnocchi" in a "Brown Butter Sage Sauce" with "Pumpkin"

Ingredients:
For the Gnocchi:
1 pound Gnocchi (Store bought or see Recipe in Notes)
3 Tbs. unsalted Butter, cut into 3 even pieces
2 tablespoons of Extra Virgin Olive Oil
1 teaspoon Sea Salt
For the Sauce:
12 Tbs. unsalted Butter, cut into 1-inch cubes
10 large fresh Sage leaves, half of them minced
1 cup Pumpkin Puree
2 tablespoons Dark Brown Sugar
1/2 teaspoon of Pumpkin Spice
Fine Sea salt & freshly ground White Pepper to taste
For the Garnish:
Fresh Pumpkin Seeds
1 tablespoon of Cinnamon Sugar
1-2 teaspoons of butter or oil-optional
Fresh chopped parsley or sage for garnish-optional

Directions:
Cook the Gnocchi:
1. Bring a large pot of well-salted water to a boil over high heat. Add about one-third of the gnocchi..
2. To get the gnocchi into the boiling water, fold the parchment ends to form a chute and gently shake the gnocchi out, taking care not to clump them together as you drop them in..
3. Give one gentle stir, wait until the gnocchi all float to the surface of the water, and then cook them for 1 minute..
4. Meanwhile, heat 1 Tbs. of the butter, and 2 teaspoons olive oil in a 12-inch nonstick skillet over medium-high heat..
5. When the butter is completely melted, use a large slotted spoon or a strainer to transfer the cooked gnocchi from the boiling water to the skillet, shaking off as much water as possible first. The gnocchi should form a single layer in the skillet. (If the butter is melted before the gnocchi cook, take it off the heat; if the gnocchi cook before the butter is fully melted, it’s fine to add the gnocchi.) Sprinkle with 1/4 tsp. salt and cook, shaking the pan occasionally to turn the gnocchi, until they’re lightly browned, about 2 minutes..
6. Transfer to a large plate. Repeat with the remaining gnocchi..
Make the Sauce:
1. Wipe the skillet clean if necessary. Put it over medium-high heat and add the butter..
2. When the butter has almost completely melted, stir in the sage leaves. 3. Cook, stirring occasionally, until the butter turns a light brown color (be careful not to let it burn) and the sage leaves darken and crisp up slightly, 2 to 3 minutes..
4. Stir in pumpkin, pumpkin spice and brown sugar then remove from heat..
5. Add the reserved gnocchi and toss to coat well. Season to taste with salt and pepper. Serve immediately.
Garnish:
1. Toast pumpkin seeds in a skillet over medium heat for several minutes, toss with cinnamon sugar and allow to cool on a piece of parchment paper till ready to use. (May add a small amount of butter or oil with the seeds when toasting to allow the cinnamon sugar to stick more, but seeds will be tacky to the touch)

Notes: "For Gnocchi Recipe"
Ingredients:
3 large baking (Idaho) Potatoes (about 1 3/4 pounds), scrubbed
1 large Egg
1 teaspoon Sea Salt
1/4 teaspoon freshly ground White Pepper
Pinch of freshly grated Nutmeg
1/4 freshly grated Parmigiano-Reggiano cheese
2 cups unbleached all-purpose Flour, or as needed

Directions:
1. Place the potatoes in a large pot with enough cold water to cover. Bring the water to a boil and cook, partially covered, until the potatoes are easily pierced with a skewer but the skins are not split, about 35 minutes. (Alternatively, the potatoes can be baked in a preheated 400 degree oven until tender, about 40 minutes.)
2. Drain the potatoes and let them stand just until cool enough to handle. (The hotter the potatoes are when they are peeled and riced, the lighter the gnocchi will be.)
3. Working quickly and protecting the hand that holds the potatoes with a folded kitchen towel or oven mitt, scrape the skin from the potato with a paring knife..
4. Press the peeled potatoes through a potato ricer. Alternatively, the potatoes can be passed through a food mill fitted with the fine disc, but a ricer makes fluffier potatoes and therefore lighter gnocchi..
5. Spread the riced potatoes into a thin, even layer on the work surface, without pressing them or compacting them. Let them cool completely.
6. In a small bowl, beat the egg, salt, pepper, and nutmeg together. Gather the cold potatoes into a mound and form a well in the center. Pour the egg mixture into the well..
7. Knead the potato and egg mixtures together with both hands, gradually adding the grated cheese and enough of the flour, about 1 1/2 cups, to form a smooth but slightly sticky dough..
8. It should take no longer than 3 minutes to work the flour into the potato mixture; remember, the longer the dough is kneaded, the more flour it will require and the heavier it will become..
9. As you knead the dough, it will stick to your hands and to the work surface: Repeatedly rub this rough dough from your hands and scrape it with a knife or dough scraper from the work surface back into the dough as you knead..
10. Wash and dry your hands. Dust the dough, your hands, and the work surface lightly with some of the remaining flour. Cut the dough into six equal pieces and set off to one side of the work surface. Place one piece of dough in front of you and pat it into a rough oblong..
11. Using both hands, in a smooth back-and-forth motion and exerting light downward pressure, roll the dough into a rope 1/2 inch thick, flouring the dough if necessary as you roll to keep it from sticking. (When you first begin making gnocchi, until your hands get the feel of the dough, you may find it easier to cut each piece of dough in half to roll it.)
12. Slice the ropes into 1/2-inch-thick rounds. Sprinkle the rounds lightly with flour and roll each piece quickly between your palms into a rough ball, flouring the dough and your hands as needed to prevent sticking..
13. Hold the tines of a fork at a 45-degree angle to the table with the concave part facing up. Dip the tip of your thumb in flour. Take one ball of dough and with the tip of your thumb, press the dough lightly against the tines of the fork as you roll it downward toward the tips of the tines. As the dough wraps around the tip of your thumb, it will form into a dumpling with a deep indentation on one side and a ridged surface on the other..
14. Set on a baking sheet lined with a floured kitchen towel and continue forming gnocchi from the remaining dough balls. Repeat the whole process with the remaining pieces of dough. At this point the gnocchi must be cooked immediately or frozen..

"Fall Colors"

"Skinny Bourbon Chicken"

I love food that's bad for you...

  I mean who doesn't, right?

  But as I've gotten older I've found that I just can't eat like I used, not on a regular basis anyway...

  Though I'll still on occasion make something sinfully delicious as you can plainly see from some of my other posts...

  This, though, just happens to be one of those happy creations where I discover a way to create that unbelievably delectable experience without the sin...


  Taking the wonderful flavors of a "New Orleans Style Bourbon Chicken" and tweaking the ingredients, measurements and cooking to create something that tastes, in essence, so incredibly close to the original but with less than half the calories amazes me...

"Blues on Bourbon" by R.Fisher


  That is what we have here; a scrumptious melding of Southern Comfort and other ingredients brought together in harmony to compose a sweet and slightly spiced melody that'll have you singing the Blues when it's all gone...

  I served mine with a sticky risotto rice this time but next time for an even healthier version I think I'll be using some riced cauliflower instead; either way I think you'll find this dish is perfect—because it is, oh so "Definitely Delish"

"Skinny Bourbon Chicken"

Ingredients:
2 tbsp coconut oil
3 lbs boneless, skinless Chicken, cut into bite size pieces
1 cup Water
1 cup brown sugar, packed (less using Truvia brown sugar blend-6 tblsp's)
3/4 cup low-sodium Chicken broth
1/2 cup soy sauce (Tamari-lite Japanese Soy)
1/4 cup Ketchup (low sugar)
1/4 cup Southern Comfort
2 tbsp Apple Cider vinegar
5 cloves Garlic, minced
1/2 sweet Onion, minced
1 Shallot minced
1/4 tsp crushed Red Pepper flakes (more if you like it spicy)
1 1/2 tbsp freshly grated Ginger
1/2 cup Apple Cider
1 tbsp Corn Starch
Fresh Chives, Scallions and Parsley for garnish
White Rice (I used 1 cup Risotto Rice cooked with 3 cups of water till done and sticky)

Directions:
1. Heat the oil in a large heavy bottom pot. Add the chicken pieces and brown until lightly golden on all sides. This will take about ten minutes. Remove the chicken with a slotted spoon to a plate and tent with foil to keep warm. It will not be fully cooked yet...

2. In the now empty pot, add the water, sugar, chicken broth, soy sauce, ketchup, Southern Comfort, apple cider vinegar, garlic, onion, red pepper flakes, and ginger. Bring to a boil, and use a wooden spoon to scrape all the browned bits off the bottom of the pan...

3. Add the chicken pieces back into the pan with the sauce, along with any accumulated juice on the plate. Reduce the heat to medium-low and let simmer for 20 minutes, until the chicken is cooked through, and the sauce has started to thicken...

4. In a small bowl, whisk together the apple juice and corn starch. Stir into the pot with a wooden spoon, then turn up the heat to medium-high and bring to a boil for 1 minute, stirring constantly, to thicken up the sauce. Add 1 tablespoon of Southern Comfort at the end before serving...

Serve while hot, and remember, this goes great with rice (and a glass of bourbon)

"Easy like a NOLA morning" by R.Fisher

Notes:
1. Slow Cooker Directions: Whisk together everything except for the chicken, apple juice, and corn starch. Pour into the bowl of your slow cooker. Add the chicken pieces, toss with a wooden spoon to coat, then cook over low for 6-7 hours, or high for 3 hours. Stir in the apple juice and cornstarch mixture at the very end to thicken up the sauce more if needed...

2. I used sticky white risotto rice this time but to cut the calories even more you could use riced Cauliflower or another alternative. (I'll be trying this next time I make it)

"BLT Sandwich Casserole"

"BLT Sandwich Casserole"

I always enjoy finding or creating recipes that can be made to fit any day or occasion...

This is one of those...

Whether it's breakfast or brunch, dinner or lunch—this "BLT Casserole" is just perfect for serving for family or friends...

Mine was made with a mix of homemade and locally sourced ingredients; but, of course, you could save yourself time by just going to your local supermarket for the bread and other ingredients—absolutely nothing wrong with that, I do it myself when I need too...

"Sourdough BLT Casserole"


This time though I decided to go the extra mile by making my own Sourdough from scratch (see the recipe in the Recipe Redux section of the Blog) as well as going to local farms for the fresh eggs, lettuce, tomatoes and bacon—nothing quite like farm fresh if you ask me...

After taking out some of my frozen chicken stock to thaw, I then whipped up some of Julia Child's foolproof mayonnaise—then it was time to work...


Cutting, toasting, slicing, chopping and then oven baking some bacon later—it was time to toss everything together and dump it into my oval roaster to bake for Brunch...

Already the house was smelling divine from all of the various parts involved in creating this dish; but after 45 minutes more of it all in the oven, my mouth was truly salivating at the thought of digging in...


A last couple of minutes under the broiler after brushing it down with some bacon fat (Mmm, bacon) and it was finally time to eat...

So good and so filling; truly a scrumptious, salty, savory dish for anytime of day or night and oh so "Definitely Delish"


"Bacon, Lettuce & Tomato Sandwich Bake"

"BLT Casserole

Ingredients:
12-16 ounces crusty Sourdough bread cut into 1" cubes (about 8 cups)
1 pound thick-cut applewood smoked bacon, cut crosswise into 1" pieces
3 large farm fresh eggs
1 1/4 cups low-sodium organic chicken stock
1/2 cup organic Mayonnaise
1 teaspoon Himalayan salt or Sea salt
3/4 teaspoon freshly ground white pepper
1 pint grape sized heirloom tomatoes, halved
1 head local farmed butter lettuce, washed, dried very well, cut into 1" slices
1 tablespoon chopped chives, for garnish
1 tablespoon chopped Parsley, for garnish 

"Great For Anytime, Day Or Night"

Directions:
1. Preheat oven to 350°F. Spread bread in a single layer on a rimmed baking sheet. Bake, tossing once, until dry to the touch and slightly toasted, about 10 minutes. Let cool slightly....
2. Meanwhile, cook bacon in a large skillet over medium-high heat, stirring occasionally, until fat starts to render and bacon browns, about 15 minutes. Using a slotted spoon, transfer bacon to a small bowl, reserving 3 Tbsp. fat.
3. Whisk eggs, stock, mayonnaise, salt, pepper, and 2 Tbsp. bacon fat in a large bowl...
4. Add bread and gently toss to combine. Add bacon and tomatoes and stir to combine. Let sit until bread has absorbed most of the liquid, about 15 minutes...
5. Reduce oven temperature to 325°F. Add lettuce to bread mixture and stir to combine. Transfer the mixture to a 13 x 9 inch baking dish and bake until top is golden brown, about 45 minutes...
6. Brush surface with remaining 1 Tbsp. bacon fat, turn broiler on, and continue baking until tops of bread are glistening and well toasted, 3–5 minutes more...
7. Garnish with parsley & chives, if using, and serve immediately...

"BLT Sammie Casserole"

Notes:
1. For the Bacon I used the oven cooking method; place bacon inside of a baking dish or on a rack inside of one and cook in a pre-heated 400 degree Fahrenheit oven for 20 minutes-or until nicely browned. (Alternatively you can cook inside of a pan on the stove top)
2. If you want you can use any bakery bread you prefer, from wheat to pumpernickel- it's up to your own personal preference...

"Sweet & Creamy Polenta" with "Roasted Vegetable Sauce"

"Polenta with Roasted Vegetable Sauce"

I can't believe it, but it's been only just a little over a year now since I started playing around with the idea of blogging online...


It certainly has felt like so much longer to me...


Now between all of the cooking, photographing and sharing of my recipes I've been blessed to have met some of the kindest, sweetest and most supportive "Foodies" from just about every corner on Earth...


"Venice" by R.Fisher


They really have been beyond wonderful and I've cherished the friendships I've made with each of them...

One of the very first good friends within the "Foodie" community that I made was Lizzy, from A Tasty Mess...


"Farm Fresh and Organic"

"Farm Fresh and Organic"


An at home Chef, much like myself, from Houston Texas—who beyond just the incredible encouragement she always gave me, and my early endeavors, was also kind enough to invite me to write, and create, a guest post on her blog—a post that amazingly enough even made it onto the The Daily Meal...

"Sweet Polenta with Sauce"


For someone like myself who hadn't ever even shared a recipe, let alone write & photograph for a website, this was an opportunity that I've always been grateful for...

So in honor of the recipe that started it all, I've decided to take most of the same wonderful ingredients to create this dish—a mix of farm fresh and organic, brought together to give you a scrumptious "Sweet & Creamy Polenta" with a "Roasted Vegetable Sauce"

Try it out for yourself. I'll think you'll find it, oh so "Definitely Delish"


"Freshest Ingredients"

"Freshest Ingredients"

"Sweet & Creamy Polenta" with "Roasted Vegetable Sauce
(serves about 4)

Roasted Vegetable Sauce:
Ingredients:
1/3 cup Kalamata Olive oil
1-2 Japanese eggplants, cut into 3/4 to 1 inch pieces
1 medium Zucchini, cut into 3/4 inch pieces
1 yellow squash, cut into 3/4 inch pieces
2 teaspoons tomato paste
1/4 cup white wine (Sauvignon blanc or Pinot Grigio)
1 cup chopped fire roasted tomatoes (fresh or canned)
6 tablespoons water
1/4 teaspoon sea salt
1/4 teaspoon organic sugar
1/2 tablespoon Shallot, minced
1 tablespoon fresh oregano, chopped 

Directions:
1. Heat the oil in a large deep sided sauté pan on medium heat—add the various sliced vegetables (zucchini, eggplant & squash) and pan roast for 10 minutes, or until nicely browned...
2. Now add the shallots and cook for one minute more before draining off any excess oil if necessary...
3. Follow by adding the tomato paste to the pan and stir, cooking for 2 minutes, before then adding the wine and cooking for 1 more minute...
4. Add the chopped tomatoes, water, sea salt, organic sugar and fresh oregano and cook for a further 5 minutes to get a deep-flavored sauce. Set aside or save; warm it up when ready to serve...

"The Grand Canal" by R.Fisher

Polenta:
Ingredients:
6 ears of Farm Fresh Corn
2 cups Water
3 tablespoons unsalted Irish Butter, diced
7 ounces Bulgarian Feta, crumbled
1/4 teaspoon Sea Salt
Fresh ground White Pepper


"Polenta with Roasted Vegetables"

"Polenta with Roasted Vegetables"

Directions:
1. Remove the leaves and "silk" from each ear of corn, then chop off the pointed top and stalk. Using a sharp knife to shave off the kernels by either standing each ear upright on its base and shaving downward, or lay each ear on its side on a cutting board to slice off the kernels...
2. You want to have about 1 pound of corn kernels...
3. Place the kernels in a medium saucepan and barely cover them with the water. Add one tablespoon of butter and a pinch of salt. Cook for 15 minutes on low heat simmering...
4. Use a slotted spoon to remove the kernels from the water and place them into a food processor; reserve the cooking liquid...
5. Process them for several minutes, to break as much of the kernel case as possible. Add some of the cooking liquid if the mixture becomes too dry to process...
6. Now return the processed corn to the pan with the reserved cooking liquid and cook, while stirring, on low heat for 10 to 15 minutes, or until the mixture thickens to an almost mashed potato consistency. (If you have a lot of liquid left in the pan, it can take longer to cook down the polenta, and it will sputter)
7. Fold in the remaining butter, the feta, sea salt and some pepper and cook for another 2 to 3 minutes. Taste and add more sea salt & white pepper if needed...

"Porto'Fino At Night" by R.Fisher

"Dark Chocolate Popcorn Granola Bars"

"Dark Chocolate Granola Bars"

I'm always fiddling around the kitchen playing with this or that recipe and though not everything is a home run the first time out, more often than not, I will still make something worthwhile and delicious to nosh on...

This one though was a definite hit; mixing the slightly buttery & salty taste of fresh made popcorn with the crunch of granola, the sweet tang of dried cranberries and nuttiness of chopped pecans enrobed in dark chocolate and honey to create something not unlike but so much better than a rice crispy treat...

"Streets of Salem in Fall"

Decadent, Delectable & Delicious—truly this on the go snack, or late night treat, tastes almost to sinful to eat—but it's full of so much organic, healthy and natural goodness that you can most definitely give yourself a pass and enjoy it no matter whether you're in full on fit mode or not...

I know I'm going to love snacking on this in the days ahead and I think you would too; because it is, oh so "Definitely Delish"

"Dark Chocolate Granola Bars"


"Dark Chocolate Popcorn Granola Bars"

Ingredients:
7 cups Organic Popcorn, popped
1 cup Organic Pecans, chopped
1 cup Dark Chocolate Chips
1/2 cup Cinnamon Granola (I used an Organic fresh mix from a Organic Market, but Bare Naked and other brands are good too)
3/4 cup Dried Cranberries (natural no sugar added)
2/3 cup natural, unfiltered & organic Raw Honey
1/2 cup fresh made ground Almond Butter (Natural Almond Butter is okay as well)
2 teaspoons natural Vanilla extract
1 teaspoon ground Cinnamon
1/4 teaspoon ground Cloves
1/4 teaspoon Sea Salt, finely ground

"Dark Chocolate Granola Bars"

Directions:
1. Make the popcorn fresh and then mix together with the pecans, chocolate chips, granola and cranberries in a large bowl. Stir, then set aside...
2. Place a generous amount of raw honey in a medium-sized saucepan set over medium-low heat. Bring it to a gentle boil, adjusting heat if necessary... 
3. After the honey is boiling then stir in your almond butter, and let it bubble for 1 minute. Turn off the heat and stir in the salt, vanilla, ground cloves and cinnamon...
4. Carefully pour the hot mixture over top of the popcorn and other ingredients, then mix together thoroughly...
5. Line a 13x9 inch baking pan with parchment paper and spray with a nonstick butter spray, then scoop out and evenly press the mixture into the pan...
6. Let it cool in the fridge for 15 minutes or more (loosely covered); then, when ready, remove it from the pan and slice it into squares  or bars to serve...
7. Store in a covered container for up to 5 days—or up to a week, or more, when refrigerated... 

"NOLA at Night"

"The Monte Cristo-A Sandwich Classic"

"Monte Cristo"

Recently I've found myself greatly desiring sandwiches for dinner; I don't know what it is, perhaps I've just had an overwhelming hankering for bread—which I don't nearly eat as often as I used too...

Regardless of the reasoning behind my latest creation; you, my dear friends, get to enjoy the fruits of both my desires and labors—which this time have brought forth that delectable mix of sweet and savory ingredients, the "Monte Cristo"

"Porto'fino by Night"

Thought to have it's origins in a Paris cafés offering of a "Croque Monsieur"—which was gruyere cheese and lean ham between slices of crust-less bread, fried in clarified butter.

This sandwich is still a popular snack or casual meal throughout France and Switzerland in most bars and cafés. It is usually made in a special sandwich grilling iron consisting of two hinged metal plates, each with two shell-shaped indentations...

"Classic Monte Cristo"

At some point though in America, in the 30's and 40's, the sandwich began to pop up in cookbooks across the country as a "French Toasted Cheese" sandwich or "Toasted Ham" sandwich—shortly followed by it's appearances all across southern California and finally Disneyland in the 60's...

During this deliciously desirable sandwiches travels from the quaint riverside cafés of Paris to the restaurants of Disney and beyond it finally achieved the form we are all familiar with today...

"NOLA on my Mind"

So, for this "Monte Cristo" I took my tried and true traditional French Toast recipe, aged gruyere cheese, fresh roasted turkey, honey baked ham and a variety of accompaniments to create this wonderfully scrumptious and incredibly satisfying merging of the very best of both sweet and savory ingredients—I think if you try it you'll find that it is, most assuredly, oh so "Definitely Delish"

"Sweet & Savory Monte Cristo"


"Classic Monte Cristo Sandwich"

Ingredients:
8 slices firm bread, sliced 1 inch thick (I use Challah bread)
6 large Eggs
2 tablespoons Heavy Cream
3 tablespoons light brown sugar
1/2 teaspoon ground Cinnamon
1/4 teaspoon ground Cloves
6 tablespoons unsalted Sweet Cream Butter
2 teaspoon Vanilla extract
1/4 teaspoon Sea Salt
2 tablespoons Dijon or Deli Mustard
2 tablespoons Mayonnaise
12 ounces Baked Ham, sliced
8 ounces roasted Turkey, sliced
8 ounces Aged Gruyère cheese, shaved
Powdered Sugar for dusting

"Delish Monte Cristo Sandwich"

Directions:
1. Slice your bread into 8 pieces and then put them on the top rack of your oven at 225 degrees Fahrenheit for about 10 minutes to dry them out—you want to avoid toasting the bread beyond a light golden color...
2. Whisk together the heavy cream, eggs, brown sugar, vanilla extract, cinnamon, cloves and sea salt in a medium bowl. Pour the mix into a 9x13-inch baking pan for easy dipping...
3. Allow the butter to soften at room temperature then preheat a large skillet or grill plate at medium temperature...
4. Take 2 slices at a time and place them into the egg mixture for 20 seconds, then flip them over for another 20 seconds—add a tablespoon of butter to the skillet and your dipped bread then cook until golden brown (approx. 2 minutes to each side)
5. Repeat this process with the remaining bread slices, then set the skillet aside till ready to use again...
6. Now to assemble the sandwiches. Begin by spreading softened butter on the inside of each slice of French Toast; follow that with a thin layer (2 teaspoons) of mustard on 4 slices of toast, and a layer (2 teaspoons) of mayonnaise on the remaining 4 slices...
7. Top the 4 slices with mayonnaise with an equal amount of shaved Gruyere cheese, followed by roast turkey and then the baked ham—top with the final 4 slices of French toast, pressing them together gently...
8. Set your skillet back over medium-low heat and melt 1 tablespoon of the butter...
9. Brush the tops of your Monte Cristo sandwiches with a small amount of the remaining butter and place butter side down, two at a time, for two minutes
10. While cooking brush the top of the sandwiches with butter and when ready flip them over gently, and continue cooking for 2 to 3 minutes more...
11. Repeat with the final two sandwiches, slicing them in half and dusting with a small amount of powdered sugar...

"The Perfect Monte Cristo"

Notes:
1. Serve with real maple syrup or your favorite replacement...
2. Also can be served with Homemade Strawberry preserves (or small batch, farm stand quality) on the side, for a deliciously sweet addition. (Raspberry & Red Currant are also good choices)

"Pasta e Fagioli-An Amazing Italian Tradition"

"Pasta e Fagioli"

 "Pasta e Fagioli" is a typical Italian dish, which has its origins in the countryside tradition, and of which there are an endless supply of regional variations...

Indeed there is no actual "official" recipe for Italian pasta and beans, but there's practically a recipe for almost every area...

Maybe, in the end, it's the most "national" dish of Italy; present in all regions, from the Alps to the Mediterranean...

"Venice Canals by Gondola"


This is just my version, created over time and taking influences and ideas from a variety of sources and regions—in no way is this the definitive version...

Even so, though my "Pasta e Fagioli" recipe has a few personal touches outside of what you might consider the norm (the addition of arugula) - I still love it and any well made pasta and beans soup recipe...

"Italian Pasta & Bean Soup"

I hope that you'll give it a try—you may just find you enjoy it as much as me and my family does; because it is, oh so "Definitely Delish"


"Pasta e Fagioli"

Ingredients:
1 (32 oz.) can of Crushed Tomatoes
1 small can of Tomato sauce (14 oz.)
1 Sweet Vidalia Onion, chopped
9 cloves Garlic, sliced thin
1 can (14 oz.) of Cannellini Beans
1 can (14 oz.) of Butter Beans
1 can (14 oz.) of Dark Red Kidney
1 can (14 oz.) of Chick Peas
10 oz. of thick cut lean Prosciutto, diced
1 pound Ditalini pasta
2 tablespoons Olive Oil
2 cups low sodium Chicken Broth
1-2 cups of Arugula
Sea Salt & Pepper to taste
Fresh chopped Parsley
Fresh Grated Parmesan or Romano cheese

"Pot of Pasta e Fagioli cooking"

Directions:
1. Sauté onion, garlic and prosciutto in the olive oil for 4-5 minutes on medium heat, till onion begins to soften and prosciutto begins to brown...
2. Add crushed tomatoes and sauce and cover, reducing heat to a simmer...
3. Meanwhile rinse off canned beans in a colander, then add to the pot—simmering for 20 minutes...
4. While the soup simmers; bring a separate pot of salted water to a boil and cook the pasta till al dente, follow the box directions...
5. Reserve 1 cup of pasta liquid and drain; then add pasta & reserved cooking liquid to the beans and sauce mixture, stirring on low heat...
6. Add salt, pepper, parsley and arugula to the pot; adjusting the salt or pepper to personal tastes, also add 2-3 tablespoons grated cheese at this time and mix well...
7. Let stand on low heat for 5-10 minutes to meld flavors; if it's too thick you may add some Chicken broth, a little at a time, to reach your desired consistency...
8. Serve while hot with crusty Italian bread and butter...

"Bean Soup just as good the next day"

Notes:
1. I like to mix and match beans, sometimes using Roman or pink, small or large white etc—use what you enjoy best and be creative...
2. When I make Pasta e Fagioli; I prefer it nice & thick, then watery like a soup—an usually serve it as my main meal with hot crusty buttered bread and more grated cheese on the side...
3. Greens are optional, I'll occasionally add Arugula or fresh chopped Escarole for color and flavor—you could also mix the two, or add some chard or kale even but be careful it doesn't change the flavor to much...

"Portofino At Dawn"