"Linguine and Clam Sauce" with "Sun-Dried Tomatoes and Pepperoni"


It's been a very busy couple of months here at "Definitely Delish"

Not only has it been fourteen hour work days at my regular job, the travel company business, seeing my beautiful goddaughter as much as possible and birthdays..

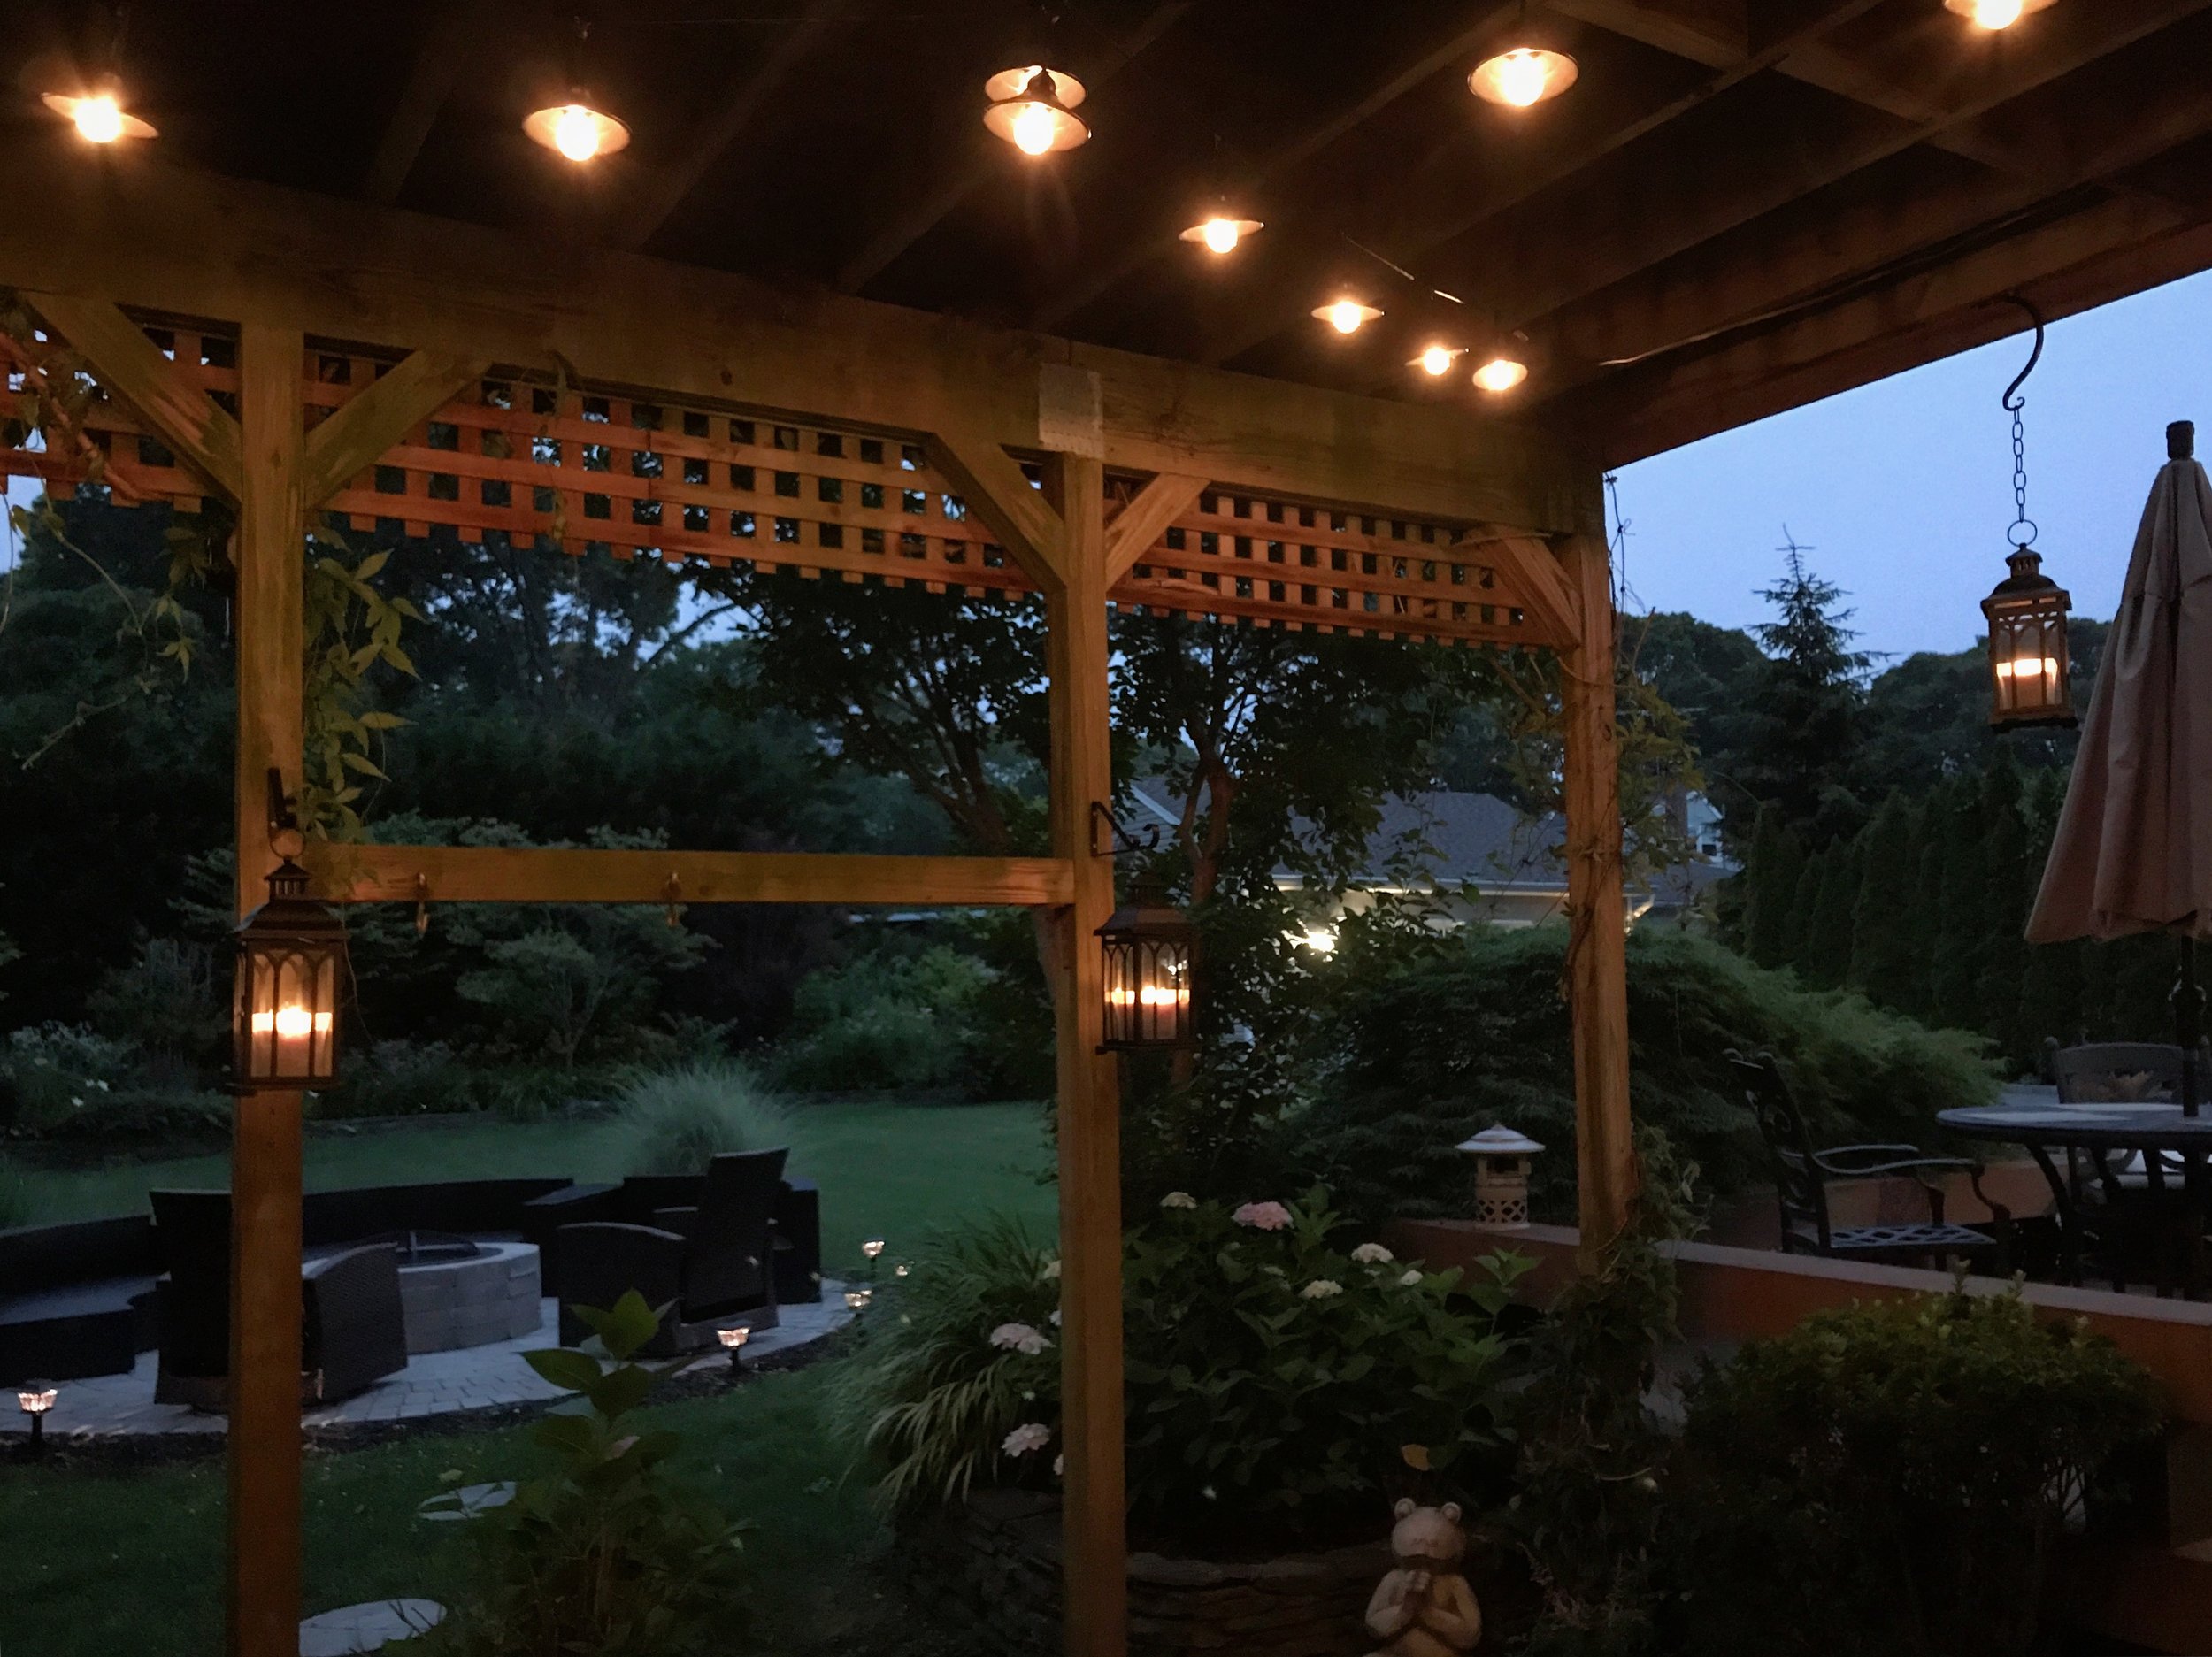
I've also been working in the little off time I have on creating a surprise for my sweetheart at home—an outdoor spa oasis with hot tub, hanging lights, lanterns and statues..

This took quite a bit of my little free time I had left, but the finished results looks great and I'm happy with it..


That's not to say I haven't on occasion been cooking but it's mostly just been dishes I've done a whole lot of times before or have already blogged about, so it wouldn't do to repeat..

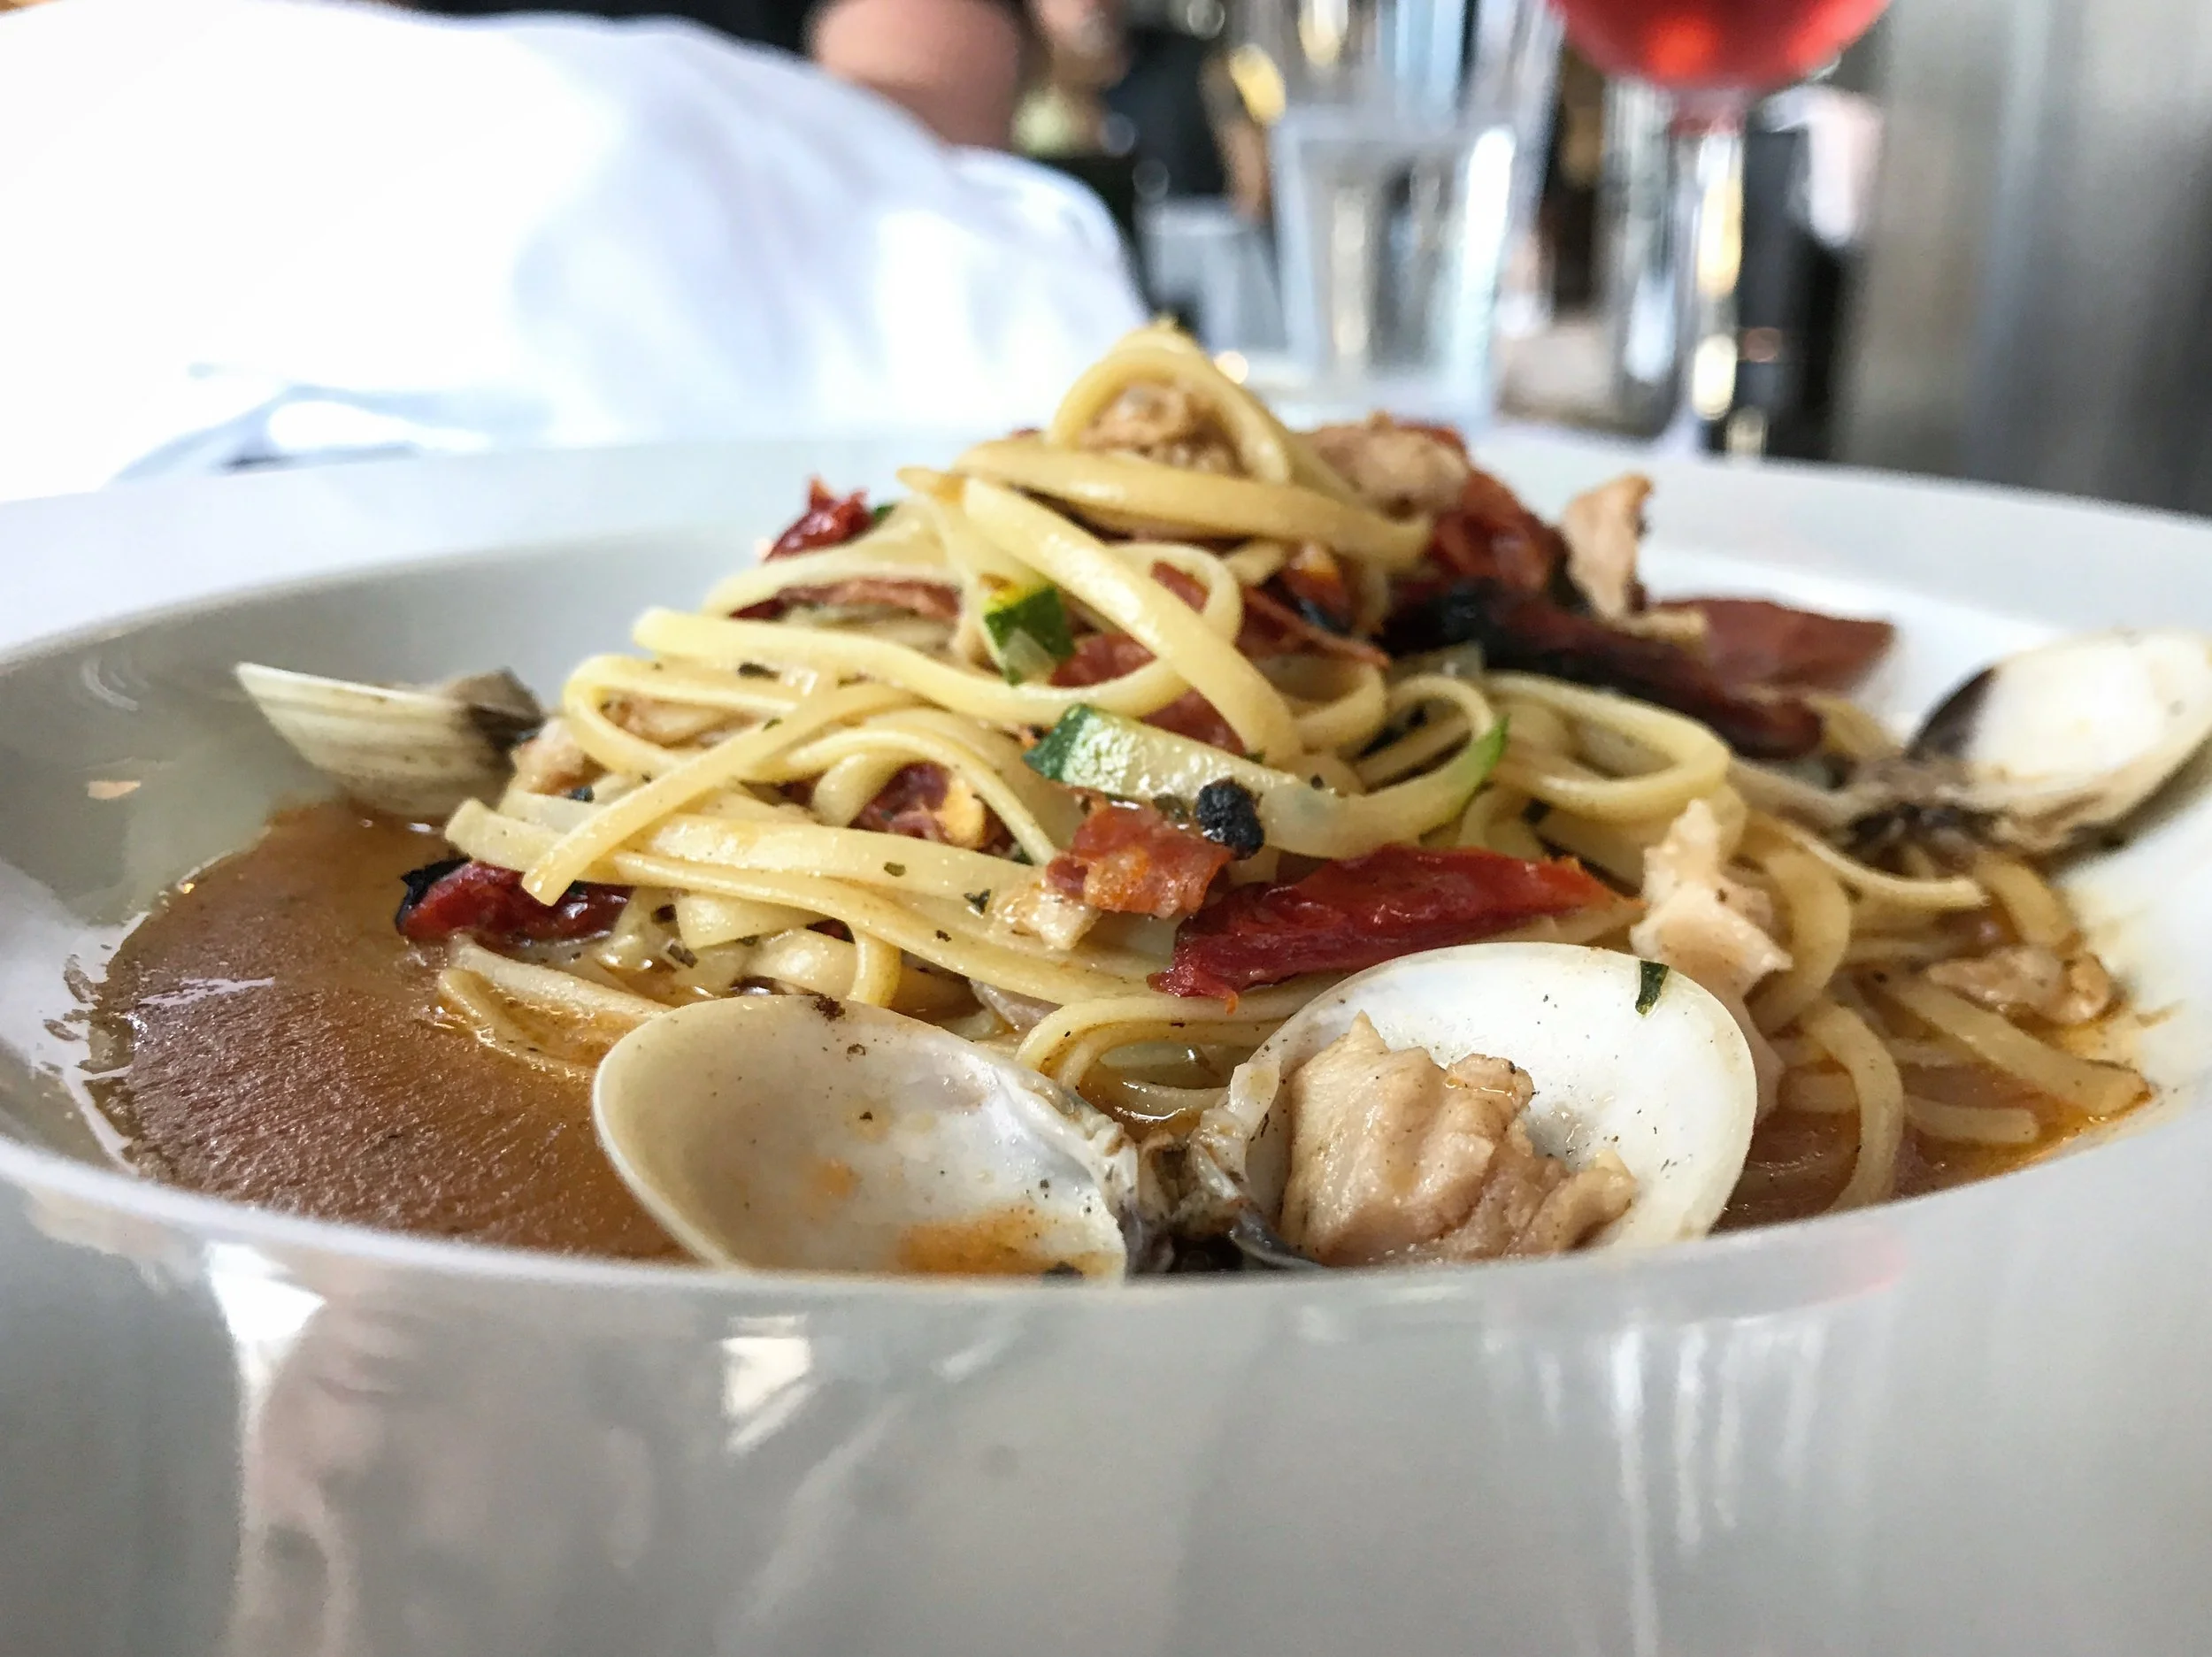
Now I've decided to get to you a new, long overdue recipe—an that is this delish dish..

A yummy, flavorful helping of "Linguine in White Clam Sauce" but with a kick—a extra dose of taste has been added with the addition of pepperoni and sun-dried tomatoes to the mix..

So sit back, enjoy and try it for yourself—because I think you'll find it is oh so "Definitely Delish"


"Kicked Up Linguine" with "White Clam Sauce" 

Ingredients:
1 pound linguine (I used GK-Skinny Pasta)
1/2 cup Olive Oil plus 1 tablespoon
1 tablespoon Butter
6 cloves Garlic, finely chopped
3/4 cup dry White Wine
2-3 tablespoons dry Sherry
18 Littleneck or Chowder Clams
1/4 cup Clam Juice
1/4 cup of Chicken Bone Broth
Sea Salt and freshly ground Black Pepper
1 tablespoon fresh Thyme
1/4 to 1/2 a cup Sun-dried Tomatoes in Oil (depending on personal taste)
1 small Zuchinni, matchstick cut with mandolin (or use big side of cheese grater for larger matchstick pieces)
2 ounces (or less) of sliced Pepperoni, cut into quarter wedges
1 tablespoon chopped fresh Italian, flat leafed Parsley (plus extra for garnish)

Directions:
1. Bring a large pot of salted water to a boil and cook the pasta, following the package instructions, until al dente..
2. Meanwhile, warm 1/2 cup of the olive oil, and tablespoon of butter, in a high-sided saucepan (big enough for your clams to rest in a single layer) set over  medium-high heat..
3. Add the garlic and cook until softened, about 2 minutes, until golden (Be careful not to burn)
4. Add the wine and sherry allowing it to cook away slightly, about 1 minute.. 
5. Add the clams, clam juice and chicken bone broth—an then season with sea salt and black pepper.. 

6. Add fresh thyme leaves and half the parsley—then cover pot and cook until the clams open. About 5 minutes..
7. Add drained sun-dried tomatoes (more or less depending on personal taste), pepperoni and zuchinni. Reduce heat to medium and stir to combine..
8. Remove from the heat and stir in the remaining parsley..
9. Drain the pasta (reserving a 1/2 cup of cooking liquid) and toss in a serving bowl with the remaining 1 tablespoon olive oil—adding reserved cooking liquid if needed..
10. Distribute the pasta evenly among six pasta bowls. Top each with equal portions of the sauce, and serve immediately garnished with parsley..

Notes:
1.
You can also toss the sauce with the pasta before distributing it to your pasta bowls..
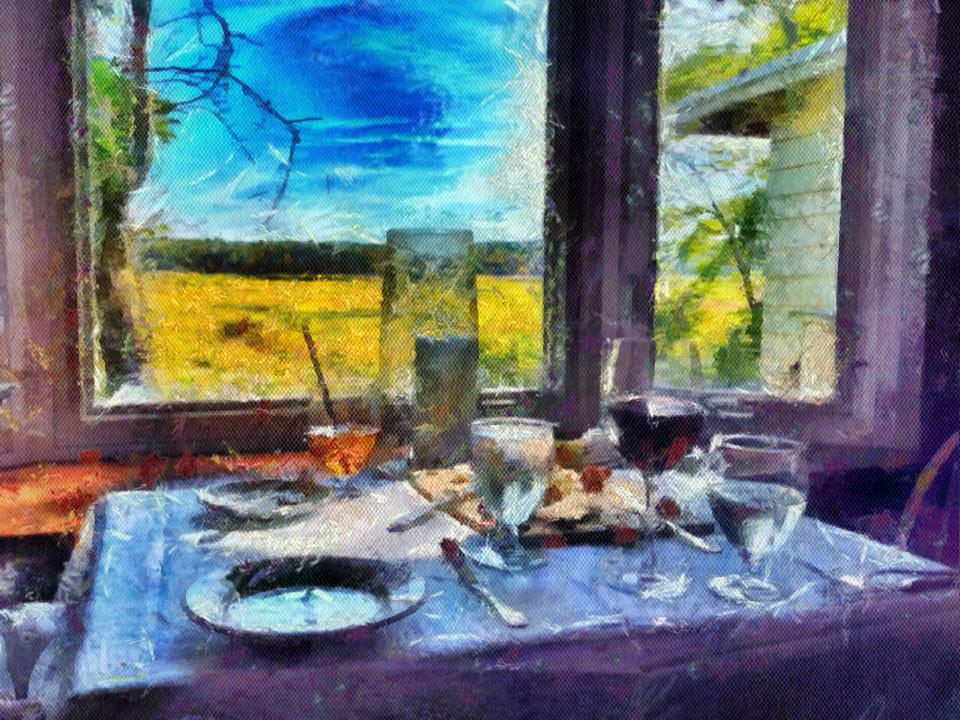
2. Goes well with a nice light white wine, a Sauvignon Blanc or Chateu St. Michelle Reisling is nice..
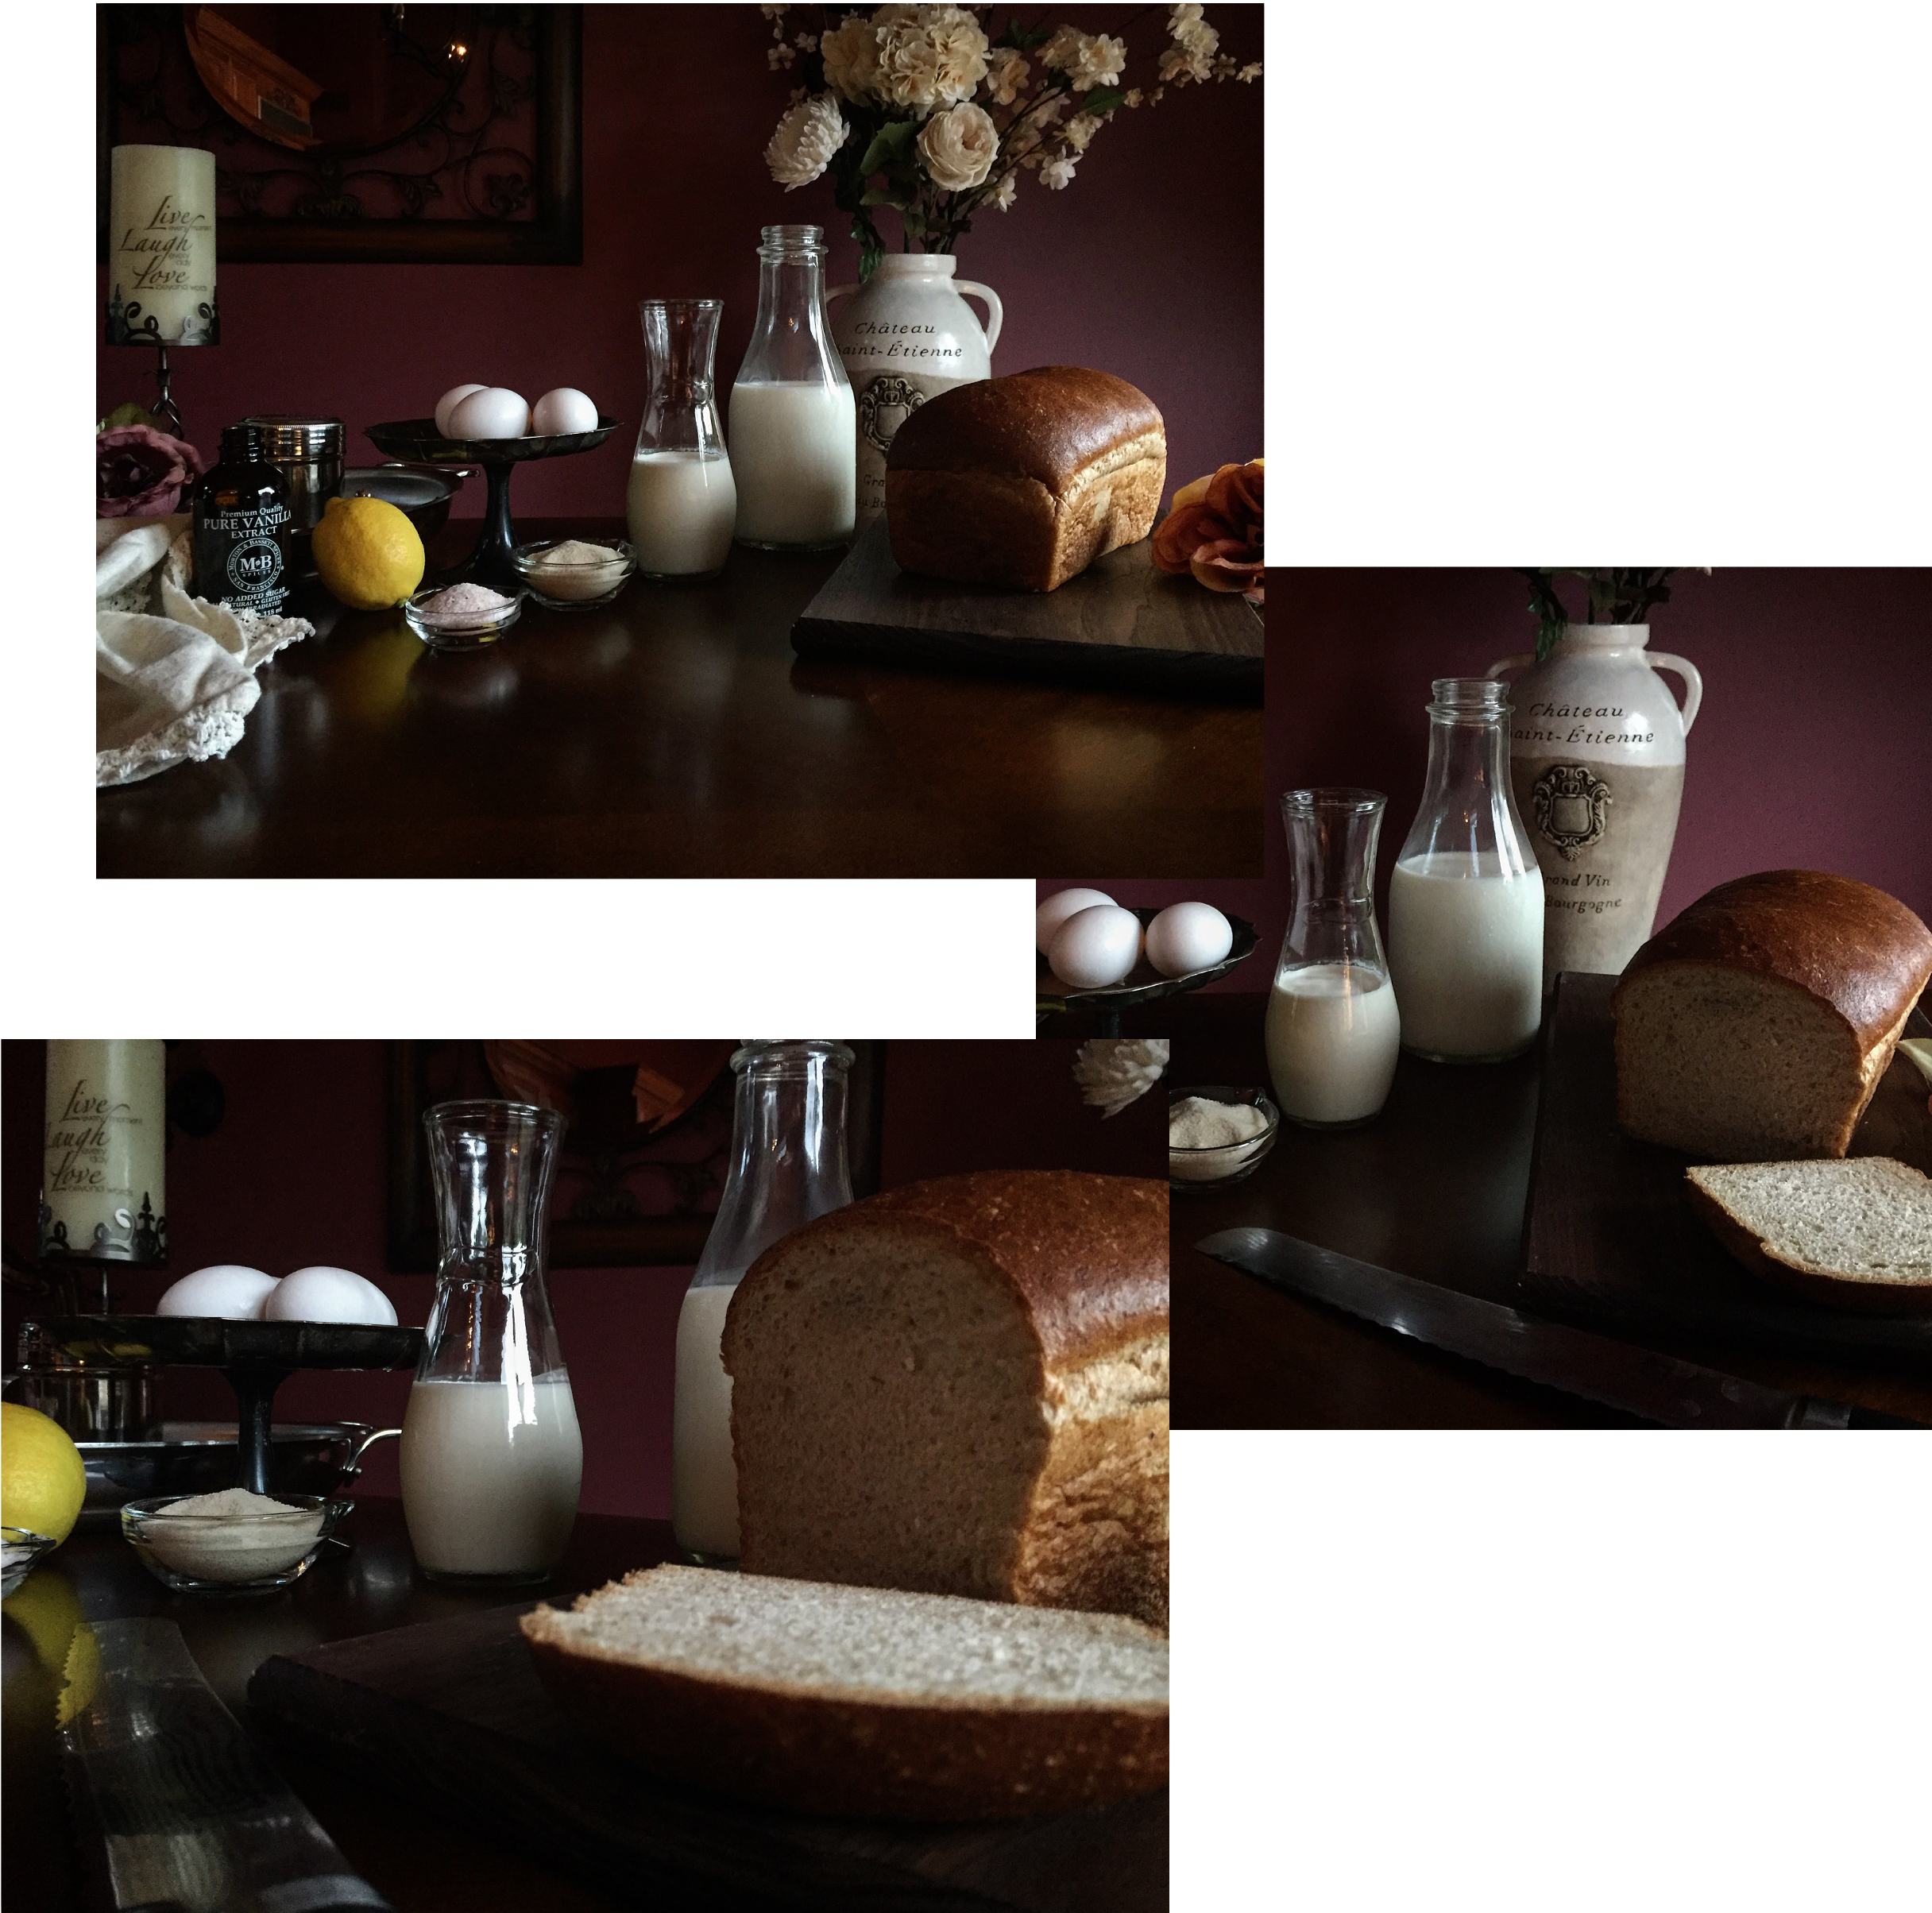
3. Serve with Sesame Semolina Italian bread with butter..
4. You can also remove some of the clams from their shells, lightly chopping them and tossing with the sauce before serving..

"Mexican Skillet Dinner"

"Mexican Skillet Dinner" with "Spanish Rice"

I am kind of in love with Skillet dinners lately...

They are so quick and easy to make and
you can change them up in so many different ways...

From "Frittatas" galore, to "Skillet Pizzas" and on to the recent "Oatmeal Bake"  I've concocted—I just can't get enough of them..

Now with the stress of holiday cooking, presents and parties temporarily abated till this weekends New Years revelry; what better way to simplify your evening then a "Mexican Skillet Dinner"

Skillet dinners are great because you generally only get one pan dirty, and dinner can be ready in about a half an hour..

On busy weeknights when getting dinner on the table, for me and my baby, can be a struggle you don't want to have a lot of excess clean up to do afterwards—leaves more time for snuggling watching Netflix..

So, one pan dinners can be ideal and keeping a few easily customized ones that everyone likes is nice and can make for an easy night for the cook..

                                                                                                This "Mexican Skillet Dinner" is easy to play around with; from adding or changing the beans, type of meat, additional vegetables or variety of spices..

This one here is a pretty basic recipe for everyone but remember to be imaginative and creative in your own preparation because a meal should always be made to your own tastes..

Suffice it to say, there's an unending supply of alternatives for you to try out for yourself—to start, for the other night, I added an extra pot and cooked up some brown rice and quinoa into a healthy Spanish style rice mix separately as well as used a mix of black, pinto and dark red kidney beans in the skillet..

After a little cooking, then a sprinkling of cheese—it was under the broiler for all of two minutes and then time to dig in..

Me and my Baby loved it, and I especially love that I can change it up so easily to make an entirely different meal out of it each time..

"Definitely Delish" and definitely a dish to make again and again..

"Mexican Skillet Dinner"

Ingredients:
12 ounces Chorizo or Spicy Pork Sausage (I used lean spicy turkey sausage)
1 cup frozen Corn
1 (14 1/2 oz.) can diced Tomatoes, un-drained
1 cup uncooked Rice
1 cup Water
1 tablespoon Lime juice
1/2 small Red Onion, diced
1 1/2 teaspoons Chili Powder
1/2 teaspoon Paprika
1/2 teaspoon ground Cumin
1 (15 oz.) can Pinto beans, rinsed and drained (I used a mix of beans)
3/4 cup shredded Mexican-blend cheeses or Colby and Monterey Jack cheese 

Directions:
1. If present, remove casing from sausage. In a large skillet cook sausage over medium  to medium-high heat for 10 to 15 minutes or until brown..
2. Drain in a colander; set aside..
3. Add corn, tomatoes, uncooked rice, the water, chili powder, paprika and cumin to skillet..
4. Bring to boiling; reduce heat. Cover and simmer about 15 to 18 minutes or until liquid is absorbed and rice is tender..
5. Stir in beans, onion, lime juice and cooked sausage; heat through for several minutes..
6. Sprinkle with your cheese choices; cover and let stand for 2 to 3 minutes or slide under the broiler until cheese is nice and melted..

Notes
1. I changed my skillet to spicy turkey sausage, as well as adding a variety of beans (Red Kidney, Pinto and Black). Also I added onion and a few flavorful ingredients to liven things up..
2. I cooked my rice separately, so drained the tomatoes and didn't add the water to skillet..
3. You can slide the skillet under a broiler for a minute or two to melt the cheese quickly and lightly brown, I've done this myself..
4. Experiment, changing up spices, beans, meats, cheeses, vegetaables to make whole different varieties of skillets—from shredded chicken to short ribs, use your imagination..
There's so much you can do with a little experimentation and imagination...

"Hoisin Pork Loin"

Recently while with my Mom, I had the opportunity to look through some of the old recipes and newspaper clippings she had put together over the years..

Some were family favorites I remember from childhood, some from friends of my parents, others were from cookbooks or articles from yesteryear and one was created by my Dad..

I had completely forgotten, and it was probably from fifteen or twenty years ago, but at one point my Pops had a recipe of his own published in a local New York newspaper—I thought that was beyond cool, especially since I have had the chance to be published too. Definitely shows how much we had in common..

So taking a trip down memory lane I try my hand at a recipe my Dad created decades ago; though I made a few tweaks of my own, considering that I would be feeding just two..

The flavor was amazing and I think you'll find it well worth the time and effort; and just in case, I'll be adding both my altered version and his original here for you..


Because no matter what I do believe that you will find them both, oh so "Definitely Delish"

"Hoisin Pork Loin"

11.jpg

Ingredients:
2 tablespoons Extra Virgin Olive Oil
2 pounds Pork Tenderloin, room temperature
1/2 cup Hoisin sauce
3 cloves Garlic, finely minced
2 Scallions, cut diagonally into 1 inch pieces
1/2 teaspoon whole Pink Peppercorns, hand crushed
2 Carrots, chopped
4 ounces fresh Shiitake Mushrooms, sliced
1/4 cup Scotch Whiskey (amber single malt)
1/4 cup Water
3 Green Onions (Scallions), sliced for garnish
Fresh chopped Parsley, for garnish
Sea Salt and Pepper, plus more to taste
 

Directions:
1. Pre-heat oven to 350 degrees Fahrenheit and season all sides of your pork with fine sea salt and fresh ground pepper after sitting it out on the counter to come to room temperature..
2. Heat a cast iron skillet for 2 minutes on high heat, drizzle with olive oil and place tenderloin into skillet turning to brown on all sides-approximately 3 to 4 minutes..

3. Mince your garlic and mix into the Hoisin sauce; remove skillet from heat and then coat the pork with your Hoisin sauce mixture on all sides. Sprinkle with sliced scallions and crushed peppercorns, then place inside the top third of your oven to bake uncovered for 20 minutes until cooked through..
4. Quick steam cook your carrots in a microwave safe dish for 3 minutes in the microwave, then in a separate dish microwave the sliced mushrooms and green onion for 45 seconds..
5. When the pork is done; remove from skillet and tent with foil on a cutting board till ready..
6. Using protective oven mitts, return the skillet to the stove-top and add the Scotch Whiskey, 1/4 cup of water, carrots, mushrooms and scallion pieces—bring mixture to a boil and cook until slightly thickened. (Add water by the tablespoonful if too thick, or boil longer if to thin)
7. Remove sauce from heat. Slice the pork into one inch pieces, season with salt and pepper if desired, then pour over with sauce and vegetables—garnish with chopped parsley, sliced green onion and enjoy immediately...


"Pops Hoisin Pork Shoulder"

Ingredients:
2 tablespoons Olive Oil
1 (6 1/2 pound) Pork Shoulder
3/4 cup Hoisin sauce
3 bunches of Green Onions, cut into 1 inch pieces
1 teaspoon whole Peppercorns
3 medium Carrots, chopped
1/4 cup Scotch Whiskey
3/4 cup Water
1 (4 oz) can sliced Mushrooms
sliced Green Onions, for garnish

Directions:
1. Pre-heat oven to 300 degrees Fahrenheit.
2. Heat oil in a heavy, ovenproof pot over high heat. Add pork shoulder, fat side down, and brown all sides, turning often, about 12 minutes..
3. Remove pot from heat. Spread Hoisin sauce over pork. Sprinkle with green onion pieces, carrots and peppercorns..
4. Cover and place in oven. Cook until pork is very tender when pierced with a fork, about 2 3/4 hours. Add water to pot by the 1/4 cup fills if mixture is dry while cooking..
5. Remove pot from oven. Transfer pork to a cutting board and tent with foil. Let stand for 20 minutes..

6. Spoon off fat from pan juices. Stir in mushrooms and whiskey, along with 3/4 cup of water and bring to a boil for 2 minutes. Add water by tablespoons if sauce is to thick, or boil longer to reduce sauce if to thin..
7. Cut pork into 1 inch thick slices. Garnish with green onion slices. Pour sauce over pork and serve..

"Iron Skillet Chicken Pot Pie" With "Cheesy Beer Bread Biscuits"

It being such a cold and wet day in New York, with the damp chill soaking into my bones and making it one of the ickier days this month so far—I decided that what was needed here was some good old comfort food...

Taking out an oldie but goody of a recipe, I decided to play around and see what I could do to liven it up a little and truly make it a "stick your bones" dish to warm the soul on a blustery winters day...


126.JPG


Grabbing an armful of staples floating in fridge and freezer, I got down to work; from the rotisserie chicken (always try to keep one on hand) and the variety of fresh and frozen vegetables, I proceeded to shred, chop, slice and dice to my hearts content...

Making a simple gravy, I tossed it all together with some seasonings and poured it into my trusty cast iron skillet...

Time for the all important top to my take on the classic chicken pot pie. For this I decided on a cheesy beer bread biscuit dough, full of ale and yummy cheddar cheese...

Taking the basics of a beer bread mix, throwing in the cheese, beer and seasonings—I then scooped it into little biscuit shapes and dropped it on to the filling inside the skillet...

In the oven to bake and before long the wonderful smells start to permeate the house and then—lunch...

Definitely a perfect, quick and easy meal to make and serve on a cold day using what's on hand—and, oh so, "Definitely Delish


"Iron Skillet Chicken Pot Pie" with "Cheesy Beer Bread Biscuits"

Ingredients:
Filling:
1 rotisserie chicken, meat removed & shredded
1/2 cup frozen pearl onions, more if desired
1 cup frozen peas & carrots (can mix and match vegetables, add corn, etc.)
1 cup reduced sodium chicken broth
1 cup low fat milk
2 tablespoons cornstarch
1/2 teaspoon sea salt
1/4 teaspoon white pepper
1/4 teaspoon poultry seasoning blend
1 teaspoon fresh chopped Italian parsley
1 tablespoon of olive oil

FullSizeRender[1].jpg

Biscuit:
2 1/4 cups Bisquick mix (If you have beer bread mix, then use)
2/3 cup brown ale (I used Newcastle ale)
1/2 teaspoon fine minced garlic
1/2 teaspoon minced onion
1/4 teaspoon fine sea salt
1/2 teaspoon finely chopped chives
1/4 teaspoon garlic powder
1 cup shredded cheddar cheese
1 stick of softened butter
2-3 tablespoons milk or cream, as needed (optional)
1 tablespoon of melted butter, separate

Directions:
1. Pre-heat oven to 400 degrees Fahrenheit...
2. To make the filling; whisk together broth, milk, cornstarch, sea salt, poultry seasoning and pepper...
3. Bring to a boil, stirring, until sauce thickens. Stir in your shredded chicken and mixed vegetables—return to a boil, then remove from heat...
4. To make the biscuits add all of the ingredients to a bowl except for the milk and ale. Mix together well, then slowly add the ale until fully incorporated. If mix is to dry, add 1 tablespoon of milk or cream at a time till desired consistency is reached...
5. Take a cast iron skillet and add 1 tablespoon of olive oil and using a brush or paper towel coat the inside of the skillet...
6. Add the fresh parsley to the filling and stir, then pour the heated filling ingredients inside your prepared skillet (or baking dish)
7. Next drop small biscuit sized amounts of the dough on top of the chicken mixture, making around 12 biscuits (I did slightly more, you can do slightly less as well)
8. Using a basting brush, brush tops of biscuit dough with the melted butter—and then place into the oven to bake...
9. Bake for approximately 18 to 22 minutes, until tops of the biscuits are a nice golden brown color and the filling is bubbly...
10. Remove for the oven and let sit for 10 minutes before serving...

Notes:
1. Any leftover biscuit dough can be dropped onto a parchment lined baking pan and cooked separately and saved in the fridge for up to 5 days...
2. You can mix and match vegetables, add corn, green beans, more onions, fresh or frozen—truly whatever you desire, or find in your fridge, freezer or cupboards...

"Skinny Bourbon Chicken"

I love food that's bad for you...

  I mean who doesn't, right?

  But as I've gotten older I've found that I just can't eat like I used, not on a regular basis anyway...

  Though I'll still on occasion make something sinfully delicious as you can plainly see from some of my other posts...

  This, though, just happens to be one of those happy creations where I discover a way to create that unbelievably delectable experience without the sin...


  Taking the wonderful flavors of a "New Orleans Style Bourbon Chicken" and tweaking the ingredients, measurements and cooking to create something that tastes, in essence, so incredibly close to the original but with less than half the calories amazes me...

"Blues on Bourbon" by R.Fisher


  That is what we have here; a scrumptious melding of Southern Comfort and other ingredients brought together in harmony to compose a sweet and slightly spiced melody that'll have you singing the Blues when it's all gone...

  I served mine with a sticky risotto rice this time but next time for an even healthier version I think I'll be using some riced cauliflower instead; either way I think you'll find this dish is perfect—because it is, oh so "Definitely Delish"

"Skinny Bourbon Chicken"

Ingredients:
2 tbsp coconut oil
3 lbs boneless, skinless Chicken, cut into bite size pieces
1 cup Water
1 cup brown sugar, packed (less using Truvia brown sugar blend-6 tblsp's)
3/4 cup low-sodium Chicken broth
1/2 cup soy sauce (Tamari-lite Japanese Soy)
1/4 cup Ketchup (low sugar)
1/4 cup Southern Comfort
2 tbsp Apple Cider vinegar
5 cloves Garlic, minced
1/2 sweet Onion, minced
1 Shallot minced
1/4 tsp crushed Red Pepper flakes (more if you like it spicy)
1 1/2 tbsp freshly grated Ginger
1/2 cup Apple Cider
1 tbsp Corn Starch
Fresh Chives, Scallions and Parsley for garnish
White Rice (I used 1 cup Risotto Rice cooked with 3 cups of water till done and sticky)

Directions:
1. Heat the oil in a large heavy bottom pot. Add the chicken pieces and brown until lightly golden on all sides. This will take about ten minutes. Remove the chicken with a slotted spoon to a plate and tent with foil to keep warm. It will not be fully cooked yet...

2. In the now empty pot, add the water, sugar, chicken broth, soy sauce, ketchup, Southern Comfort, apple cider vinegar, garlic, onion, red pepper flakes, and ginger. Bring to a boil, and use a wooden spoon to scrape all the browned bits off the bottom of the pan...

3. Add the chicken pieces back into the pan with the sauce, along with any accumulated juice on the plate. Reduce the heat to medium-low and let simmer for 20 minutes, until the chicken is cooked through, and the sauce has started to thicken...

4. In a small bowl, whisk together the apple juice and corn starch. Stir into the pot with a wooden spoon, then turn up the heat to medium-high and bring to a boil for 1 minute, stirring constantly, to thicken up the sauce. Add 1 tablespoon of Southern Comfort at the end before serving...

Serve while hot, and remember, this goes great with rice (and a glass of bourbon)

"Easy like a NOLA morning" by R.Fisher

Notes:
1. Slow Cooker Directions: Whisk together everything except for the chicken, apple juice, and corn starch. Pour into the bowl of your slow cooker. Add the chicken pieces, toss with a wooden spoon to coat, then cook over low for 6-7 hours, or high for 3 hours. Stir in the apple juice and cornstarch mixture at the very end to thicken up the sauce more if needed...

2. I used sticky white risotto rice this time but to cut the calories even more you could use riced Cauliflower or another alternative. (I'll be trying this next time I make it)

"Scrumptious Sides For Your Fall & Winter Holiday Table"

Summer's over and all the children are back in school; so you know what that means, that's right, the Holiday season is upon us. For the next several months the parties and dinners will almost be non-stop and though the big granddaddy of them all may be "Thanksgiving" in November, there will be more than enough other events both big and small to occupy our days in the meantime. So to help with that all important decision this year about what to bring, or serve, as a vegetable for family and friends at your next gathering. Let me suggest two that will serve you well…


A quick and simple side, full of the incredible flavor of Italian bacon and perfect to either make for your own, or bring to a, Thanksgiving Day celebration with family or friends…

"Pan-Seared Brussels Sprouts with Pancetta"

Ingredients:
1 pound fresh Brussels sprouts, trimmed and halved
2 tablespoons extra virgin olive oil
4 ounces thick cut pancetta, diced
2 garlic cloves, minced
Sea Salt and freshly ground black pepper
Dash of red pepper flakes
1/4 cup low-sodium chicken broth
Pinch of fresh Thyme and Sage, finely minced (1/4 teaspoon)

Directions:
1. Begin by partially cooking the Brussel sprouts in a large pot of boiling salted water, about 4 minutes. (Or you can lightly steam in the microwave until slightly cooked
2. Meanwhile, heat the oil in a heavy large skillet over medium heat. Add the pancetta and sauté until beginning to crisp, about 3 minutes. Add the garlic and sauté until pale golden, about 2 minutes...
3. Then add the herbs and red pepper flakes, followed by the Brussels sprouts, to the same skillet and sauté until heated through and beginning to brown—about 5 minutes...
4. Season with sea salt and pepper, to taste. Then add the broth and cook until the broth reduces just enough to coat the Brussels sprouts, about 3 minutes...
Serve and enjoy...


This is the most delicious cauliflower recipe you’ll eat and on top of that it’s such an easy addition to include a roasted cauliflower in your family’s dinner plan or for a dinner party with friends. I have also been told you can do it in an instant pot, and then brown in the oven for a few minutes.

"Whole Roasted Cauliflower"

Ingredients:
1 whole head of Cauliflower
½ cup of Greek Olive oil (premium EVOO available at The Crushed Olive, Babylon)
Clarified Butter or Ghee (available at North Shore Farms, or substitute butter)
Fresh Italian Parsley, chopped
Cast Iron Skillet (or any oven safe pan)
1 teaspoon Pink Himalayan or Sea Salt, or more to taste
1/4 teaspoon Fresh Ground White Pepper, or more to taste
Aluminum/Tin Foil

Directions:
1. First, go and preheat your oven to 375º Fahrenheit. Then trim the bottom of the cauliflower and remove all the leaves and the hard stem – but without breaking apart the cauliflower...
2. Go ahead and give it a quick rinse, patting it to dry. Generously drizzle your extra virgin olive oil on top. It’s the key to a perfectly roasted cauliflower head. Then add salt and pepper...
3. Using your hands spread the oil and salt all around the cauliflower.  Place it in an oven-safe pan and cover tightly it with foil. I use a cast iron skillet, but if you don’t have one, anything that you use in the oven will work...
4. Cook in the oven for 30 minutes, depending on the size of your cauliflower...
5. Now, remove foil and allow it to roast for an additional 60 minutes so it turns golden brown. Keep an eye on it, so it doesn’t burn...
6. After it’s finished; melt 3 Tbsps. of Ghee (clarified butter, available at North Shore Farms) and mix in the chopped parsley, then drizzle or brush it on the cauliflower while it’s still hot...
7. Once it’s sliced, it may need extra salt-season to taste…

"Brussels Sprouts with Pancetta"

"Roasted Cauliflower"

"Pan Roasted Brussels Sprouts"

"Holiday dinner is perfect for these sides"

"Thanksgiving Dinner Or Anytime - You Can't Go Wrong With These Veggie Dishes"

"Interview With The Dietitian"

How to fight that Holiday splurge!

With the holidays fast approaching as the summer time comes to a close–you, like myself, might find it difficult to maintain your regular eating habits or new healthy diet especially in the face of all of the upcoming sweets and meals you'll be tempted by in the months ahead. 

That in mind; I caught up with my friend and dietitian, Melissa Rifkin, on what to do to stay on track—or make new habits stick.


As I understand it you're a fully trained dietitian with a whole line of initials following your name—MS, RD, CDN and more. What does your work usually entail?

As a dietitian at Montefiore Medical, my work entails preparing individuals for prospective weight loss surgery. With that being said, my patients are educated on dietary and lifestyle changes to help prepare them for a healthier and more meaningful life post operatively.

I notice in your bio on social media that it mentions you are a Rise Coach. What brought you to them, and how has it impacted your career?

RISE is a weight loss coaching app where I am able to coach a broader range of clients directly via their smartphones on how to improve their eating habits based on the size, preparation and content of their meals.

Originally I was referred by a colleague and in the two years I've been with them I've found it to be a truly rewarding experience. Not only do I love the connection to and communication with my clients; since starting I've had the honor to coach the CEO of the company and several celebrities, as well as assisting in the growth of the company, improving the app itself and management of their Instagram presence @letsrise where I provide healthy eating tips on delicious images of food.

As you've gone about work as a dietitian and with branching out into social media. What have you found to be the most challenging aspect..? What has been the most rewarding experience?

I find my work to be incredibly rewarding experience; whether it be watching a patient come to me at 350 pounds and teaching them the skills and motivations to change and withhold for a lifetime, then following them on their journey and watching them drop 200 pounds is an amazing feeling for me. I just love that interaction, the coaching meal to meal and watching them improve in real time as they learn the exercises and habits to help themselves—the challenges can be complex, just like my clients, but the emotional fulfillment I get is well worth the effort.

As you know Holiday season is almost upon us and the temptation to overindulge can be near to unstoppable. How bad for my weight and health is it to, perhaps, splurge and enjoy just a bit too much during the Holidays or on vacation?

Personally I believe in cheat meals not cheat days. Just because it's a holiday, birthday, vacation or celebration doesn't mean you should give up on doing what's right for you and your body—especially given that they come each year, often times throughout the year. At these times I think it gives you an opportunity to spread the word on healthy eating; for example, by using whole wheat pasta rather than white at your next BBQ when bringing pasta salad or by substituting "spiralized" vegetables in different dishes for a healthier change of pace.

It can be immensely tough to maintain willpower in the face of all of those cookies, candies and family dinners— it seems especially difficult after a few days of overeating. How can I or anyone else find the motivation to get back on track?


I find eating off of a smaller sized plate can help to control your portions and by having conversations throughout the meal will slow down your consumption allowing you time to feel full before you've overindulged.


Are there foods I should cut back on, eliminate or particular foods I should focus on?

High sugar and high fat sweets can be the toughest but most important to cut down; during the holidays allow yourself one cookie, one piece of pie or other treat but know when to stop. I also always love to sign up for a race or walk around the holidays; for example, the "turkey trot" to burn some extra calories before I know I may be overeating.

What would be your number one tip to help those of us lacking the will combat the urge to over eat?

The Plate Method. Really, I find it can not only be helpful at parties or celebrations but even in the comfort of your own home. Half the plate is salad and vegetables while the other half is a quarter protein and a quarter healthy starch. Never fails me or my clients.

Any other useful tips our readers may be unaware of to help avoid splurging?

It can take 20 minutes for your brain and stomach to get on the same page and communicate, think about what damage you could do in that time? Drink a whole glass of water before and after you eat and take your time, give yourself a chance to feel as full as you are.

Any final words of advice before I let you go for making these habits long lasting?

This is a lifestyle-not a diet. You are what you eat, cliché or not, when you eat junk you feel it. Life is short, fuel your car with the finest gasoline possible—because you're worth it! Aren't you?

Well thank you so much for your time, insight and advice. I'm sure it will prove to be helpful for those of us in need during the mad holiday rush from now until New Years. In closing; any future plans you can let our readers in on..? Perhaps a book even..? I know I'd be looking to get my signed copy of "Confession of a Dietitian"

Nothing as of now but you never know what may happen in the future.

FullSizeRender[1] (2).jpg

Melissa Rifkin MS RD CDN CSO is a licensed & trained dietitian who attended UCONN as an undergrad before attaining a Masters at NYU. After completing her Dietetic Internship at NY Presbyterian Hospital she began working with Montefiore Medical, as well as RISE Weight Loss. She's available for contact about coaching on the RISE phone app along with her website at http://www.melissarifkinnutrition.com as well as on social media via Twitter @MelRifkinRD or Instagram @ConfessionofaDietitian

"Sweet & Creamy Polenta" with "Roasted Vegetable Sauce"

"Polenta with Roasted Vegetable Sauce"

I can't believe it, but it's been only just a little over a year now since I started playing around with the idea of blogging online...


It certainly has felt like so much longer to me...


Now between all of the cooking, photographing and sharing of my recipes I've been blessed to have met some of the kindest, sweetest and most supportive "Foodies" from just about every corner on Earth...


"Venice" by R.Fisher


They really have been beyond wonderful and I've cherished the friendships I've made with each of them...

One of the very first good friends within the "Foodie" community that I made was Lizzy, from A Tasty Mess...


"Farm Fresh and Organic"

"Farm Fresh and Organic"


An at home Chef, much like myself, from Houston Texas—who beyond just the incredible encouragement she always gave me, and my early endeavors, was also kind enough to invite me to write, and create, a guest post on her blog—a post that amazingly enough even made it onto the The Daily Meal...

"Sweet Polenta with Sauce"


For someone like myself who hadn't ever even shared a recipe, let alone write & photograph for a website, this was an opportunity that I've always been grateful for...

So in honor of the recipe that started it all, I've decided to take most of the same wonderful ingredients to create this dish—a mix of farm fresh and organic, brought together to give you a scrumptious "Sweet & Creamy Polenta" with a "Roasted Vegetable Sauce"

Try it out for yourself. I'll think you'll find it, oh so "Definitely Delish"


"Freshest Ingredients"

"Freshest Ingredients"

"Sweet & Creamy Polenta" with "Roasted Vegetable Sauce
(serves about 4)

Roasted Vegetable Sauce:
Ingredients:
1/3 cup Kalamata Olive oil
1-2 Japanese eggplants, cut into 3/4 to 1 inch pieces
1 medium Zucchini, cut into 3/4 inch pieces
1 yellow squash, cut into 3/4 inch pieces
2 teaspoons tomato paste
1/4 cup white wine (Sauvignon blanc or Pinot Grigio)
1 cup chopped fire roasted tomatoes (fresh or canned)
6 tablespoons water
1/4 teaspoon sea salt
1/4 teaspoon organic sugar
1/2 tablespoon Shallot, minced
1 tablespoon fresh oregano, chopped 

Directions:
1. Heat the oil in a large deep sided sauté pan on medium heat—add the various sliced vegetables (zucchini, eggplant & squash) and pan roast for 10 minutes, or until nicely browned...
2. Now add the shallots and cook for one minute more before draining off any excess oil if necessary...
3. Follow by adding the tomato paste to the pan and stir, cooking for 2 minutes, before then adding the wine and cooking for 1 more minute...
4. Add the chopped tomatoes, water, sea salt, organic sugar and fresh oregano and cook for a further 5 minutes to get a deep-flavored sauce. Set aside or save; warm it up when ready to serve...

"The Grand Canal" by R.Fisher

Polenta:
Ingredients:
6 ears of Farm Fresh Corn
2 cups Water
3 tablespoons unsalted Irish Butter, diced
7 ounces Bulgarian Feta, crumbled
1/4 teaspoon Sea Salt
Fresh ground White Pepper


"Polenta with Roasted Vegetables"

"Polenta with Roasted Vegetables"

Directions:
1. Remove the leaves and "silk" from each ear of corn, then chop off the pointed top and stalk. Using a sharp knife to shave off the kernels by either standing each ear upright on its base and shaving downward, or lay each ear on its side on a cutting board to slice off the kernels...
2. You want to have about 1 pound of corn kernels...
3. Place the kernels in a medium saucepan and barely cover them with the water. Add one tablespoon of butter and a pinch of salt. Cook for 15 minutes on low heat simmering...
4. Use a slotted spoon to remove the kernels from the water and place them into a food processor; reserve the cooking liquid...
5. Process them for several minutes, to break as much of the kernel case as possible. Add some of the cooking liquid if the mixture becomes too dry to process...
6. Now return the processed corn to the pan with the reserved cooking liquid and cook, while stirring, on low heat for 10 to 15 minutes, or until the mixture thickens to an almost mashed potato consistency. (If you have a lot of liquid left in the pan, it can take longer to cook down the polenta, and it will sputter)
7. Fold in the remaining butter, the feta, sea salt and some pepper and cook for another 2 to 3 minutes. Taste and add more sea salt & white pepper if needed...

"Porto'Fino At Night" by R.Fisher

"Spiced French Toast Bake"

"Spiced French Toast Bake"

I find that creating breakfast recipes can be some of the toughest to do...

I mean there's only so many ways to scramble an egg or make an omelette, waffle or French toast...

An though I've still attempted it by tweaking an "Eggs Benedict" using "English" crumpets and "Kobe-Wagyu" sirloin burgers or by layering a "Frittata" with potatoes, pancetta, mushrooms, asparagus and cheese—I still find it tough to find a technique or addition to make a breakfast recipe truly my own...

"Farm Fresh, Organic & Homemade"

"Farm Fresh, Organic & Homemade"

This is one of those...

Taking a personal love of all things bread related; I took buttered toast for breakfast, along with my French Toast recipe and decided to combine the two together with a twist...

Taking cues from a "New Orleans" style Bread Pudding (which has been much on my mind as me and my Baby plan our return trip); I played around with the ingredients and after a night at rest, me and my Baby were blessed to have this beautiful symphony of sweet and spicy ingredients slowly baking in the oven...

"Sweet, Spicy & Buttery"

Once done, and dusted with powdered sugar, it was ready to be served up with some pure organic maple syrup...

Such a serendipitously satisfying selection to soothe both your hunger and your sweet tooth at the same time...

So try out my "Spiced French Toast Bake" yourself; I think you'll find that it is,
oh so "Definitely Delish

"Sweet & Spicy Sliced French Toast" 

"Spiced French Toast Bake"

Ingredients:
1 loaf of fresh made Whole Wheat Bread, cut into 14 slices
3 tablespoons unsalted Irish Butter, softened
6 tablespoons granulated organic Sugar
Zest of 1/2 lemon
2 teaspoons Vanilla extract
6 farm fresh Eggs
2 cups Whole Milk
1 cup Light Cream
1 tablespoon Amber Rum
1/2 teaspoon ground Cinnamon
1/8 teaspoon of ground Cloves, Allspice & Nutmeg
1/4 teaspoon Pink Himalayan Salt or Sea Salt
Powdered sugar, for dusting
Organic Maple syrup to finish (optional)

Directions:
1. Pre-heat oven to 350 degrees Fahrenheit. Slice your bread into 14 slices and then diagonally into triangles. Arrange them on a large baking tray and bake for 5 to 10 minutes, until firm to the touch but not yet browned. You can flip halfway through baking...
2. Lightly butter a 9×13-inch or other 3-quart casserole dish with 1 tablespoon of softened butter. Melt the remaining butter in a dish and using a silicone basting brush, brush each slice of bread after they're done in the oven...
3. Fan your bread slices out into the pan. Now place sugar and lemon zest in the bottom of a small dish and use your fingertips to rub the zest into the sugar, so it breaks up a bit and also releases the most flavor. Sprinkle half of lemon sugar over bread inside your casserole dish...
4. Whisk eggs in a large bowl; then slowly whisk in the cream and milk, followed by the ground spices...
5. Stir in vanilla, rum and salt. Pour custard slowly and evenly over bread and sugar, then sprinkle with the remaining lemon sugar... 
6. Let mixture soak covered overnight in the fridge. If pressed for time you can let it sit for 30 minutes on the counter instead before baking, but overnight is better...

"French Toast Bread Pudding"

7. When ready, heat oven to 365 degrees. Loosely cover the "French Toast Bake" with foil and bake for 15 minutes on the middle (or just below middle) rack of the oven. Remove foil and bake for approximately 30 minutes more, until a knife inserted into the center of the casserole and turned slightly causes no liquid custard to spill into the crack. (This can vary by the density of your bread; it can sometimes take longer to finish. Check regularly till done every couple of minutes)
8. Let cool slightly before serving. Dust with powdered sugar and serve with maple syrup on the side, if desired...

"Spiced French Toast"

"Sweet, Spicy & Delicious"

"Buttered Toast, French Toast And Bread Pudding Together At Last"

"Perfect on a Sunday Morning"

"Oia, Santorini - Somber Shades by R.Fisher"

"The Cubano-A Southeastern Sandwich Classic"

"Cuban Sandwich"

As you can see, the love of sandwiches has continued this week—from the deliciousness of "Pulled Pork" to the incredible merging of sweet and savory with the "Monte Cristo"

Now though I bring you that most delectable of Miami favorites, the "Cubano" or "Cuban Sandwich"


"Cubano"

As with Cuban bread, the origin of the Cuban sandwich (sometimes called a "Cuban mix," a "mixto," a "Cuban pressed sandwich," or a "Cubano") is murky and somewhat intriguing...

In the late 1800s and early 1900s, travel between Cuba and Florida was easy, especially from Key West and Tampa, and Cubans frequently sailed back and forth for employment, pleasure, and family visits...

"Cuban Pressed Sandwich"

Because of this constant and largely undocumented movement of people, culture and ideas, it is impossible to say exactly when or where the Cuban sandwich originated.—it's rumored, though, to have originated in Cuba or Key West before spreading in popularity from Tampa to Miami...

Wherever it came from, and whatever it's origins, you almost have to stop to try one in "Versailles" or another eatery in "Little Havana" just to indulge in some of the local flavor...

"Crashing Waves along the Keys"

If traveling to the sandy shores of Florida is out of the question though, why not sit back comfortably in your own home and try my very own tasty take on this Southeastern classic...

I think you'll find it to be oh so "Definitely Delish"


"Cuban Sammie"

"Classic Cuban Sandwich"

Ingredients:
8 oz. Brown Sugar Baked Pit Ham, sliced (see recipe section)
12 oz. Roasted Marinated Pork Shoulder, sliced (see recipe section)
8 oz. Emmentaler Swiss Cheese, thinly sliced
6 Half-Sour Dill Pickles, thinly sliced lengthwise
1 cup Sweet Cream Butter, softened
3 tablespoons Yellow Mustard, for brushing
3 tablespoons Mayonnaise, for brushing
6 (six to 9 inches long) soft Baguettes or Club rolls, split
lengthwise (If Cuban bread is unavailable)

"Cubano Sandwich"

Directions:
1. Heat a large cast-iron griddle or panini press. Add the ham slices to the griddle and cook over moderate heat, turning once, until browned in spots, about 1 minute. Transfer ham to a plate...
2. Generously butter the cut sides of each baguette(roll) and toast on the griddle over moderate heat until lightly browned, 1 to 2 minutes...
3. Transfer the baguettes to a work surface and generously brush the top cut sides with 2 teaspoons of mustard, and the bottom cut sides with 2 teaspoons of mayonnaise...
4. Layer the ham, emmentaler Swiss cheese, pickles  and pork on to each baguette and close the sandwiches...
5. Generously brush the outside of the sandwiches with more butter and set them on the griddle or press; if using a griddle, top the sandwiches with a large baking sheet and weigh it down with heavy cans or a cast-iron skillet...
6. Now cook the sandwiches over moderate heat until they’re browned and crisp on the outside and the cheese is melted, 3 minutes per side on a griddle or 3 minutes total in a press. Cut the "Cubanos" in half and serve while hot with some Yucca fries with banana ketchup or chips...

Notes:
Additional Recipes:

"Yucca Fries with Banana Ketchup"

"Yucca Fries with Banana Ketchup"

Ingredients:
Ketchup:
2 large ripe bananas, peeled and chopped
1 1/2 cups vegetable stock
1 small onion, halved and thinly sliced
1/2 cup water
4 whole pickled jalapeños, stems discarded, plus 2 tablespoon pickling liquid from the jar
1/4 cup thinly sliced garlic cloves
3 tablespoons finely chopped peeled fresh ginger
1 cup ketchup
1 cup lightly packed Basil
Sea Salt and Pepper

Fries:
3 pounds yucca (about 4 yucca)
Peanut oil, for frying
Sea Salt
Lime wedges, for serving

"Yucca Fries"

Directions:
Ketchup:
1. In a medium saucepan, combine the bananas with the vegetable stock, onion, water, pickled jalapeño, garlic and ginger and bring to a boil...
2. Simmer over moderate heat, stirring, until the bananas and onion are very tender, 15 minutes. Transfer to a blender and let cool slightly. Add the ketchup, basil and the jalapeño pickling liquid and puree until smooth...
3. Scrape the banana ketchup into a bowl and season with salt and pepper. Cover and refrigerate until chilled, about 30 minutes...
Fries:
1. Bring a large saucepan of salted water to a boil. Peel the yucca and cut into 3-inch lengths. Cut the lengths into 1/2-inch-thick wedges. Cook the yucca in the boiling water until tender, 10 to 15 minutes...
2. Drain well and spread on a baking sheet to cool and dry; discard any stringy pieces of yucca...
3. In a large saucepan, heat 1 1/2 inches of oil to 360 degrees. Set a rack over a baking sheet. Working in batches, fry the yucca, stirring gently to separate the wedges, until golden brown and crisp, 5 to 7 minutes...
4. Using a slotted spoon, transfer the wedges to the rack and season generously with salt. Serve right away with the banana ketchup and lime wedges...

"Waves Breaking Along the Florida Gulf"

"A Rose Tart by any other name would smell as Sweet"

"Vegetable Rose Tart"

Last night, as is my usual modus operandi, I decided to mess around in the kitchen...

Now it's not every day that I make a new dish, and a lot of times I'll make the same thing again and again-because, well, it's good an I liked it enough too...

Sometimes, if I'm trying something different with a dish I've done before, I might post it-like with the Caramelized Apple Almond Galette recently...

"Beauty in the petals of a Rose"

But mostly this week I've been doing various dishes that I've done plenty before-like last nights Lemon Chicken de Provence...

Though for a tasty visual treat I did decide to make for me and my Beautiful baby last night a "Vegetable Rose Tart" with a fresh mozzarella and herb'ed cream base.
Slicing up my Zucchini, Squash and Carrots with a vegetable peeler; I began wrapping them into my Roses...

Then inside the tart pan filled with puff pastry I added my mozzarella, sour cream and some fresh herbs-followed by all of my beautiful Roses...

"Roasted vegetables almost to pretty to eat"


Drizzled a little olive oil, with chopped fresh herbs and garlic, over top it to finish-then into the oven to bake...

Finally while it was cooking, I played around with setting up for the picture; which I got done just as it finished baking...

A couple of pretty pics later and it was finally time to dig in and eat..

Such a beautiful dish in it's presentation and oh so—"Definitely Delish"

"All ready for roasting"


"Vegetable Rose Tart"

Ingredients:
For Pastry Shell:
1 package Dufour all butter Puff Pastry (or your own puff pastry recipe)

"Just one perfect Rose"

For the Filling:
1/2 cup fresh Mozzarella
1/2 Sour Cream
1 tsp Sea salt
1 clove minced garlic
Fresh cracked Pepper to taste
1 tsp mixed Herbes de Provence (2 tsps if using fresh Herbes instead of dry)

For the Vegetable Roses:
1-2 medium Zucchinis
1-2 medium Yellow Squash's
2-4 Carrots (purple and other carrot colors if available)
Quality Olive Oil
1 clove minced garlic
1 tablespoon Fresh thyme and parsley, finely chopped
Sea salt and Pepper to taste

Directions:
For the tart shell:
1. Lightly grease a 8-9 inch loose base tart tin.
2. Roll the pastry out until you have a circle approximately 11 inches and lay it over the tart tin and press into the sides. Place in the fridge for 30 minutes.
3. Preheat the oven to 350 degrees Fahrenheit. Scrunch up a piece of baking paper and open it back up. Place on the tart shell and fill with baking beads.
4. Place in the preheated oven and cook for 10-15 minutes. Remove the beads and cook for a further 5-10 minutes until the base is cooked through.
5. Set aside to cool.

"Vegetable Rose Tart" 

"A beautiful Rose"

For the filling:
1. Chop the mozzarella into small pieces and place in a bowl.
2. Add the sour cream, garlic and mixed herbs then stir until combined.
3. Spread the filling over the base of the tart shell.

For the vegetable Roses:
1. Slice the vegetables into 1/8 inch or thinner slices. (Strips)
2. Preheat the oven to 375 degrees Fahrenheit.
3. On a chopping board, start with a piece of carrot and begin rolling it into a tight curl. Then wrap the Carrot with a piece of Zucchini and then a piece of Yellow Squash. Roll together the 3 vegetables into a rose shape. Place into prepared Tart shell with filling.
4. Continue this process until you have filled the tart with vegetable roses of various sizes.
5. Drizzle the top lightly with olive oil, sprinkle with fresh chopped herbs, finely minced garlic, sea salt and pepper.
6. Transfer the tart into the oven and bake for 40-50 minutes or until the vegetables are cooked and lightly golden. (Alternatively, you could partially pre-roast the vegetable strips before rolling into roses-adjust cooking time accordingly)
7. Serve with a salad for a main course or as a side dish with a main entree of your choice...

"Sunrise"