"Roasted Butternut Squash & Sweet Potatoes" With "Kielbasa & Apples"

Fall means busier schedules, so fast family-friendly weeknight meals like this simple Roasted Squash, Sausage and Apple One-Pan Dinner are so helpful to have on hand..


A mix of healthy ingredients and low calorie alternatives create a dish with an exceptionally sweet, and tasty, treat for dinner that even the young ones in your house will enjoy it..

So if you’re ready for fall colors and flavors, then throw a pan of this pumpkin spiced meal that will be sure to hit the spot..


Trust me, you won’t be disappointed..


“Roasted Butternut Squash With Apples And Turkey Kielbasa One-Pan Dinner”
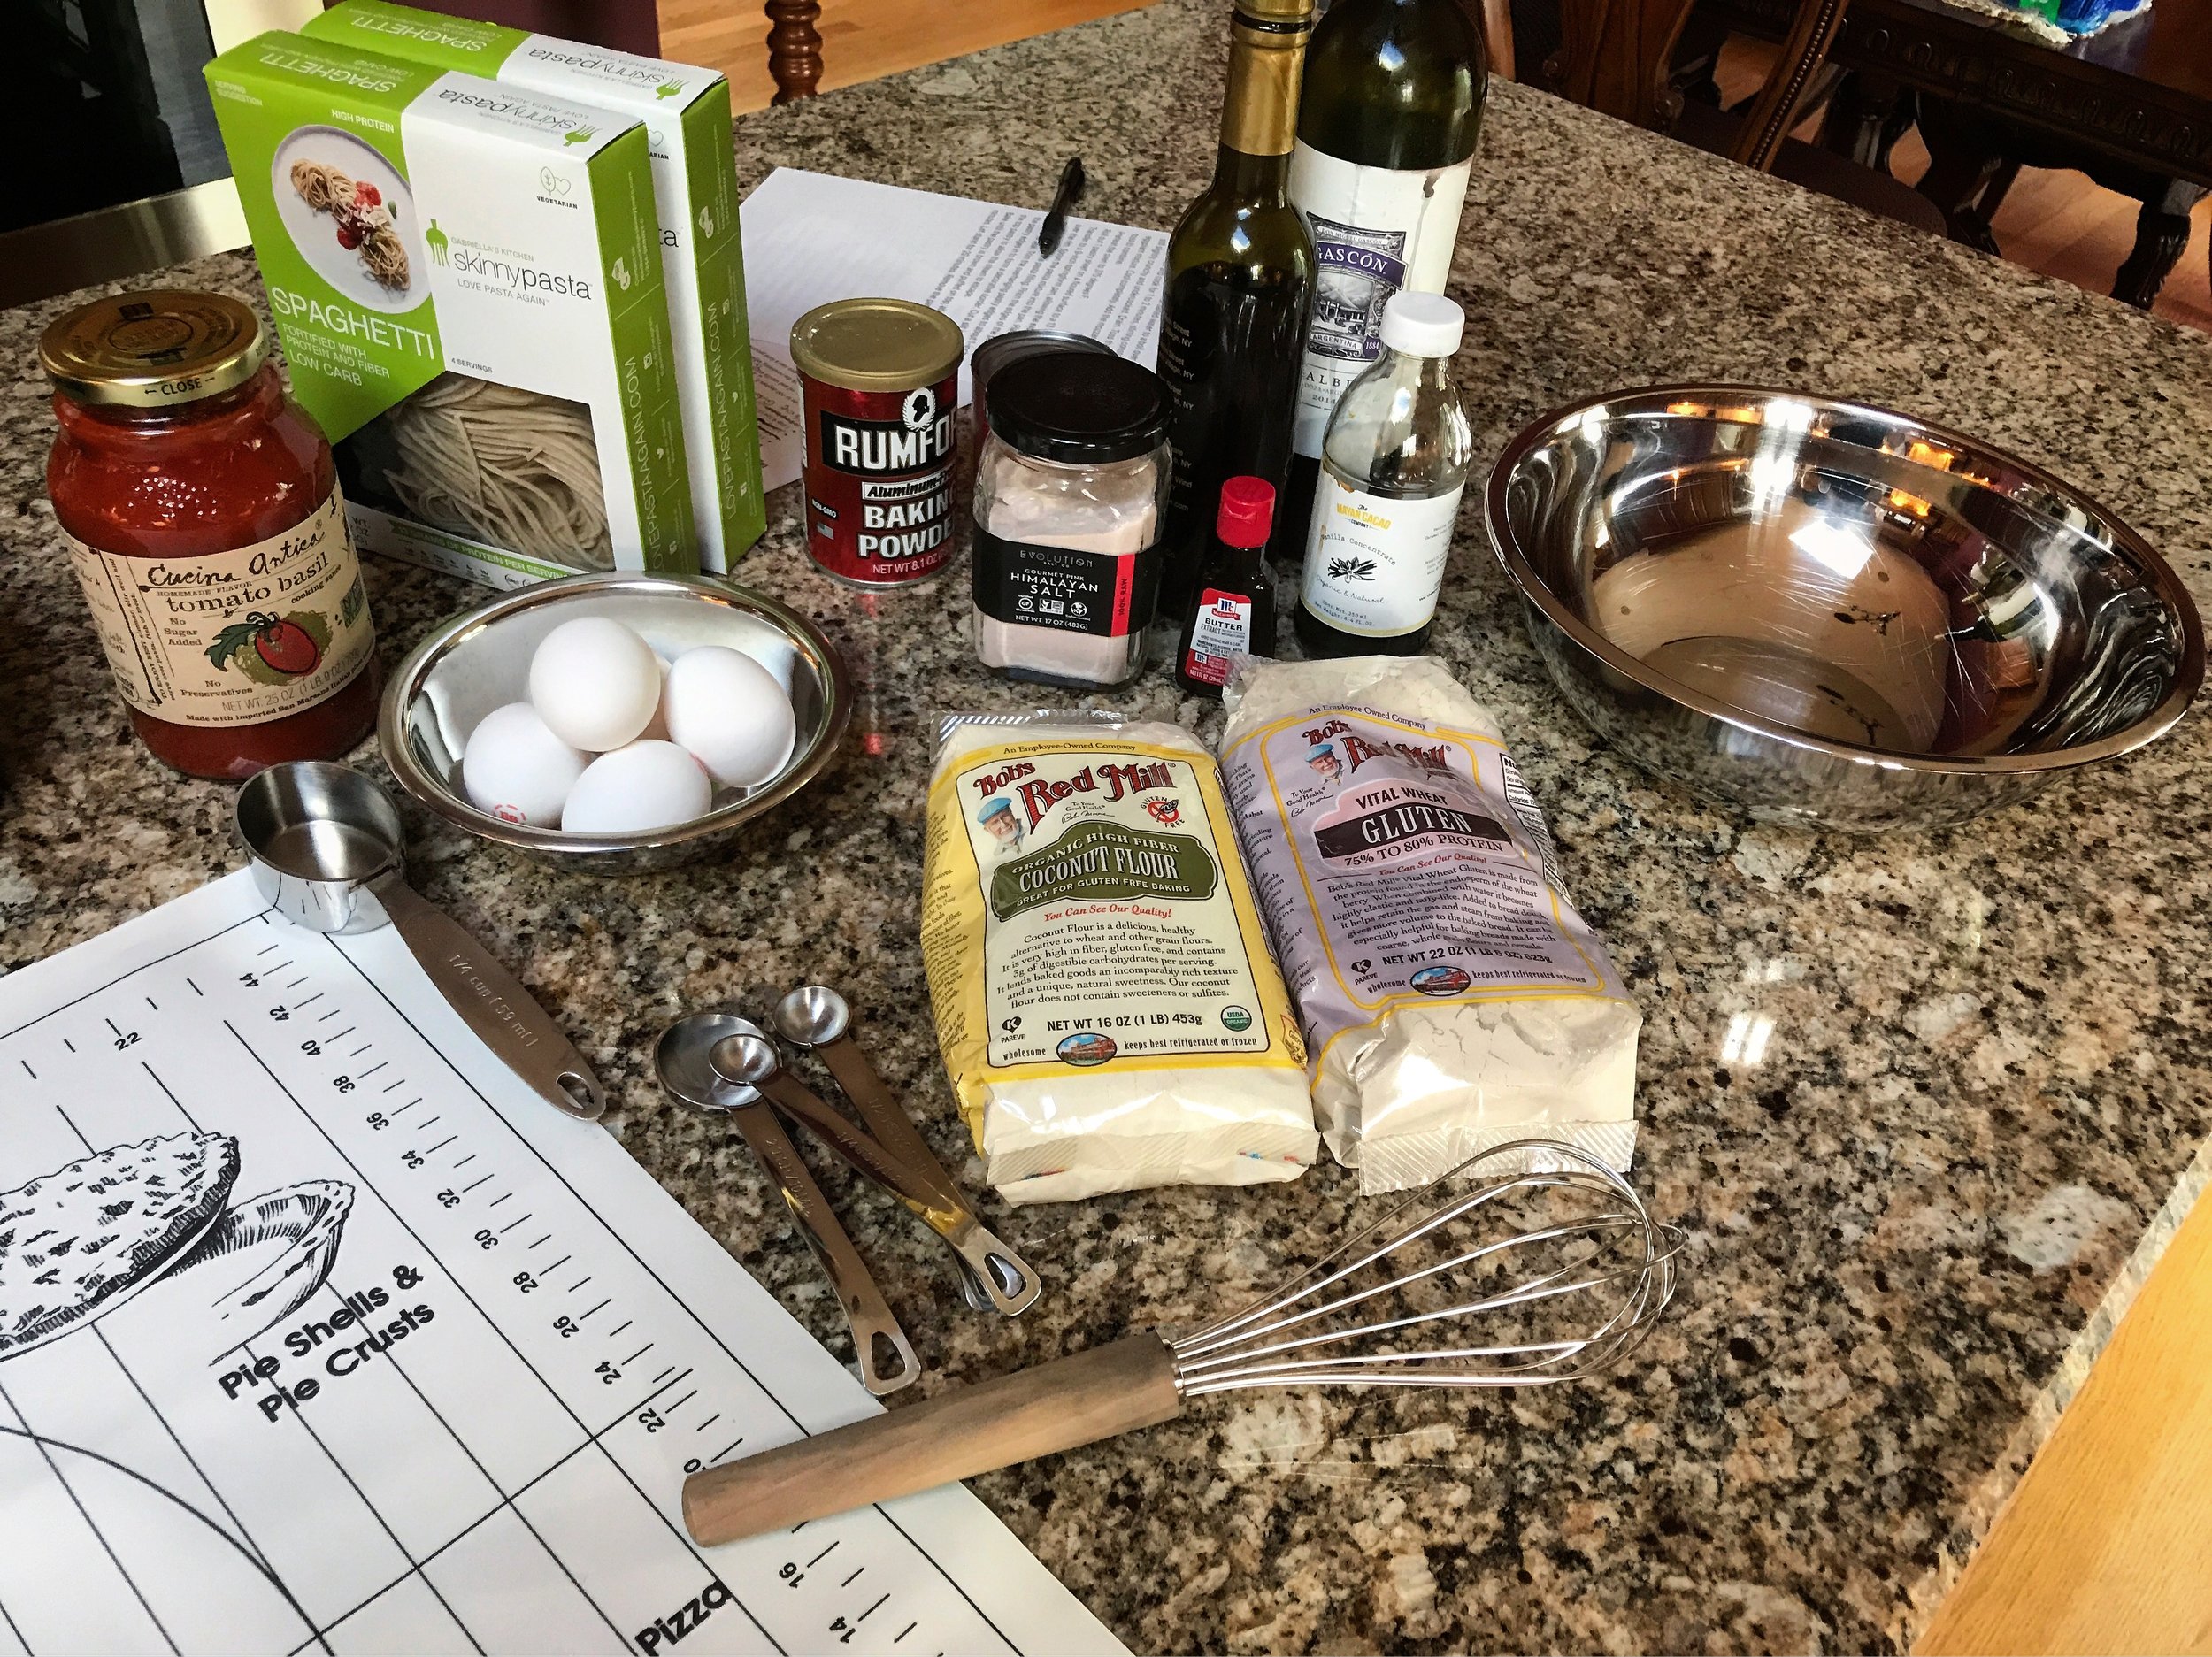
Ingredients:
1 tablespoon, divided in half, apple cider vinegar
1 tablespoon pure maple syrup
2 teaspoons Dijon mustard
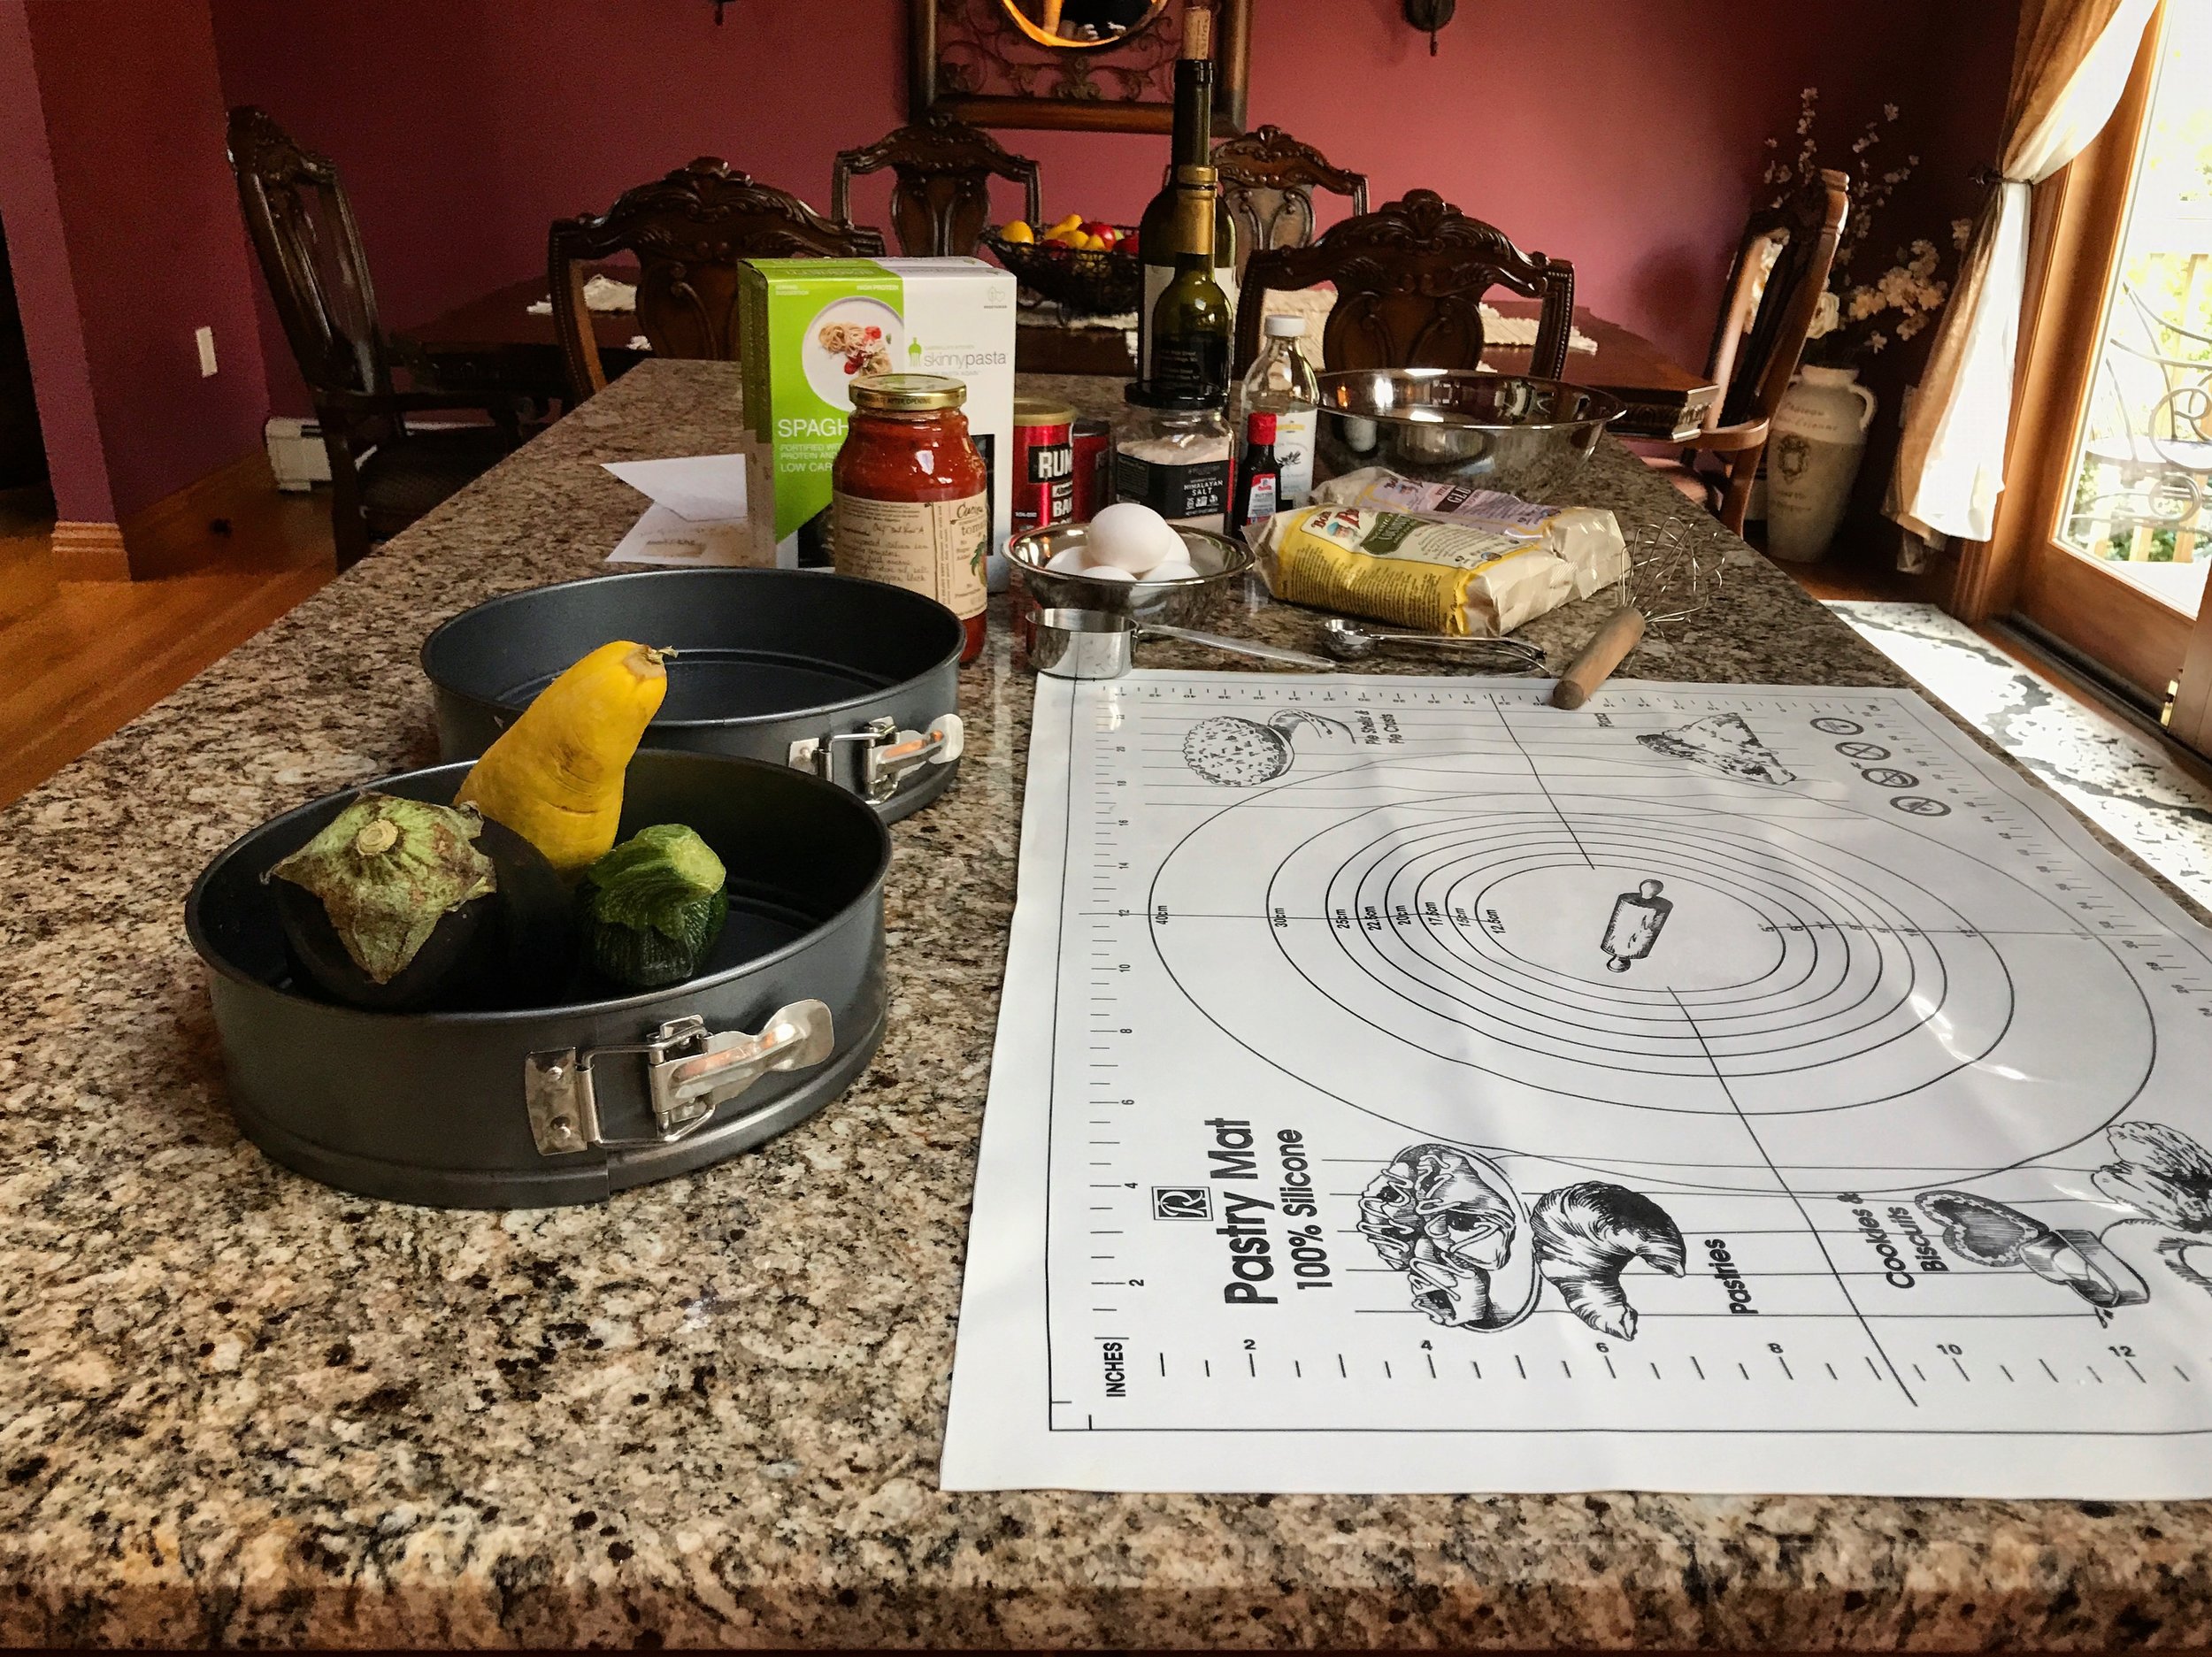
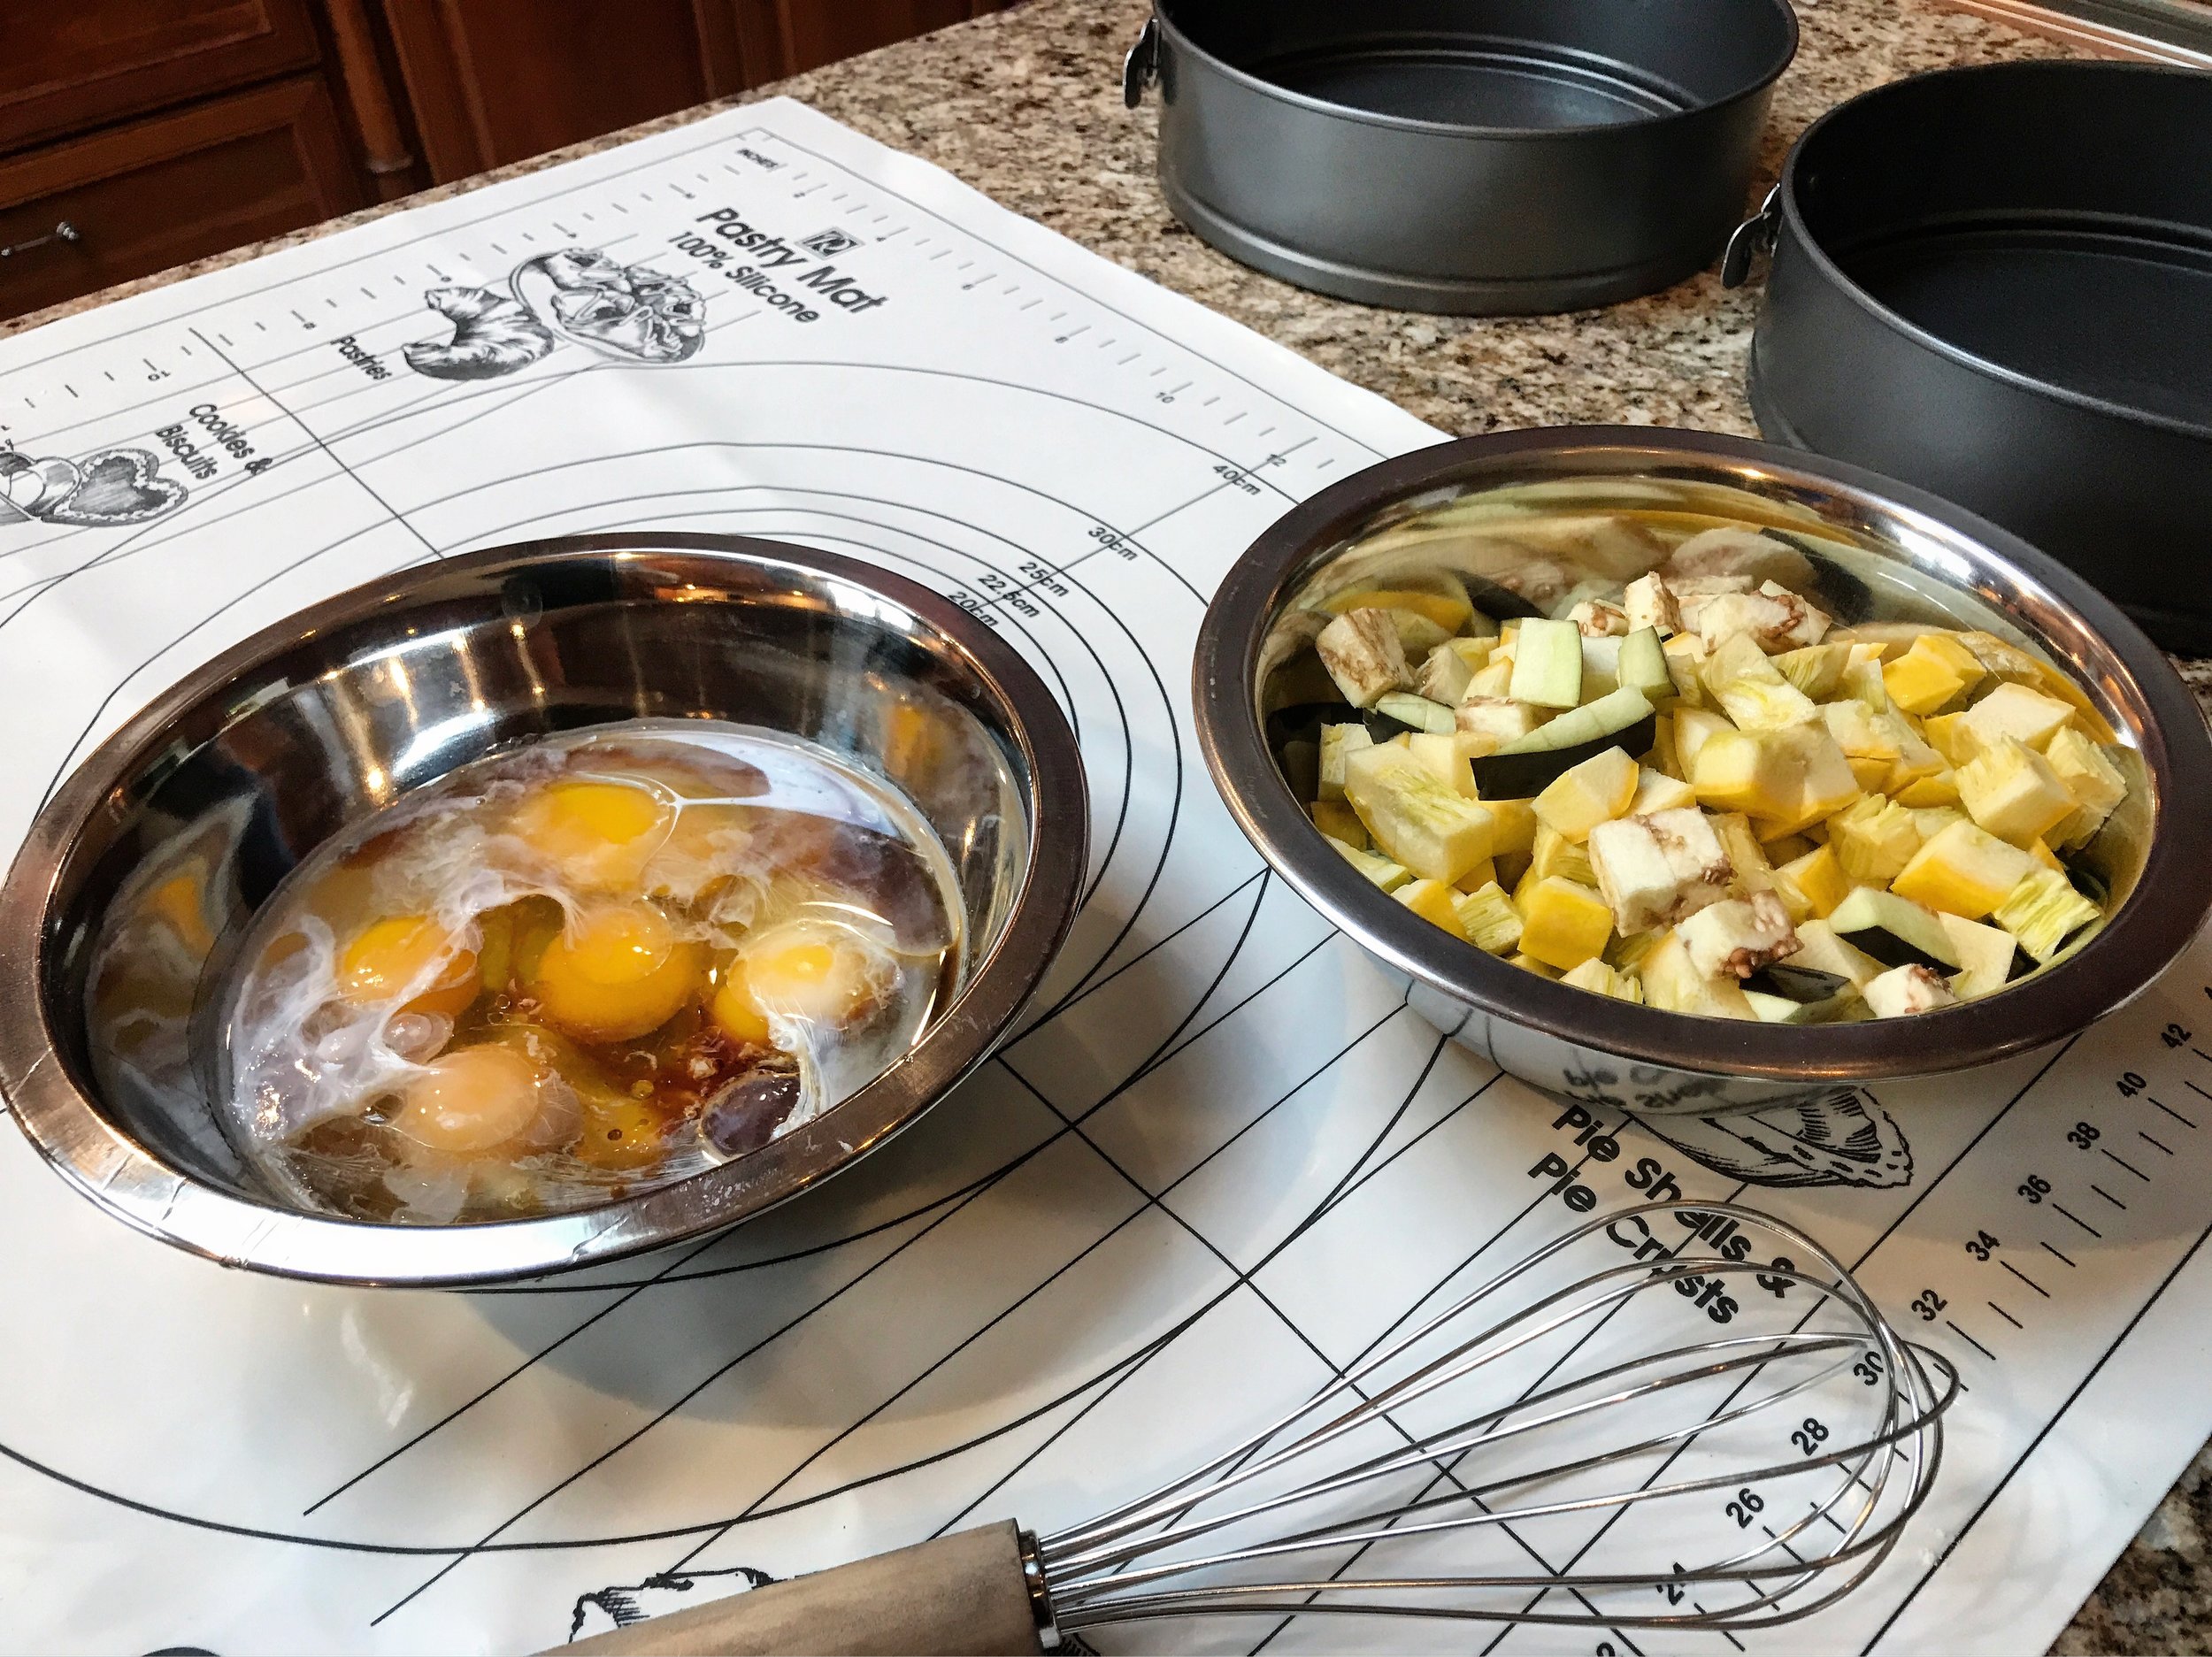
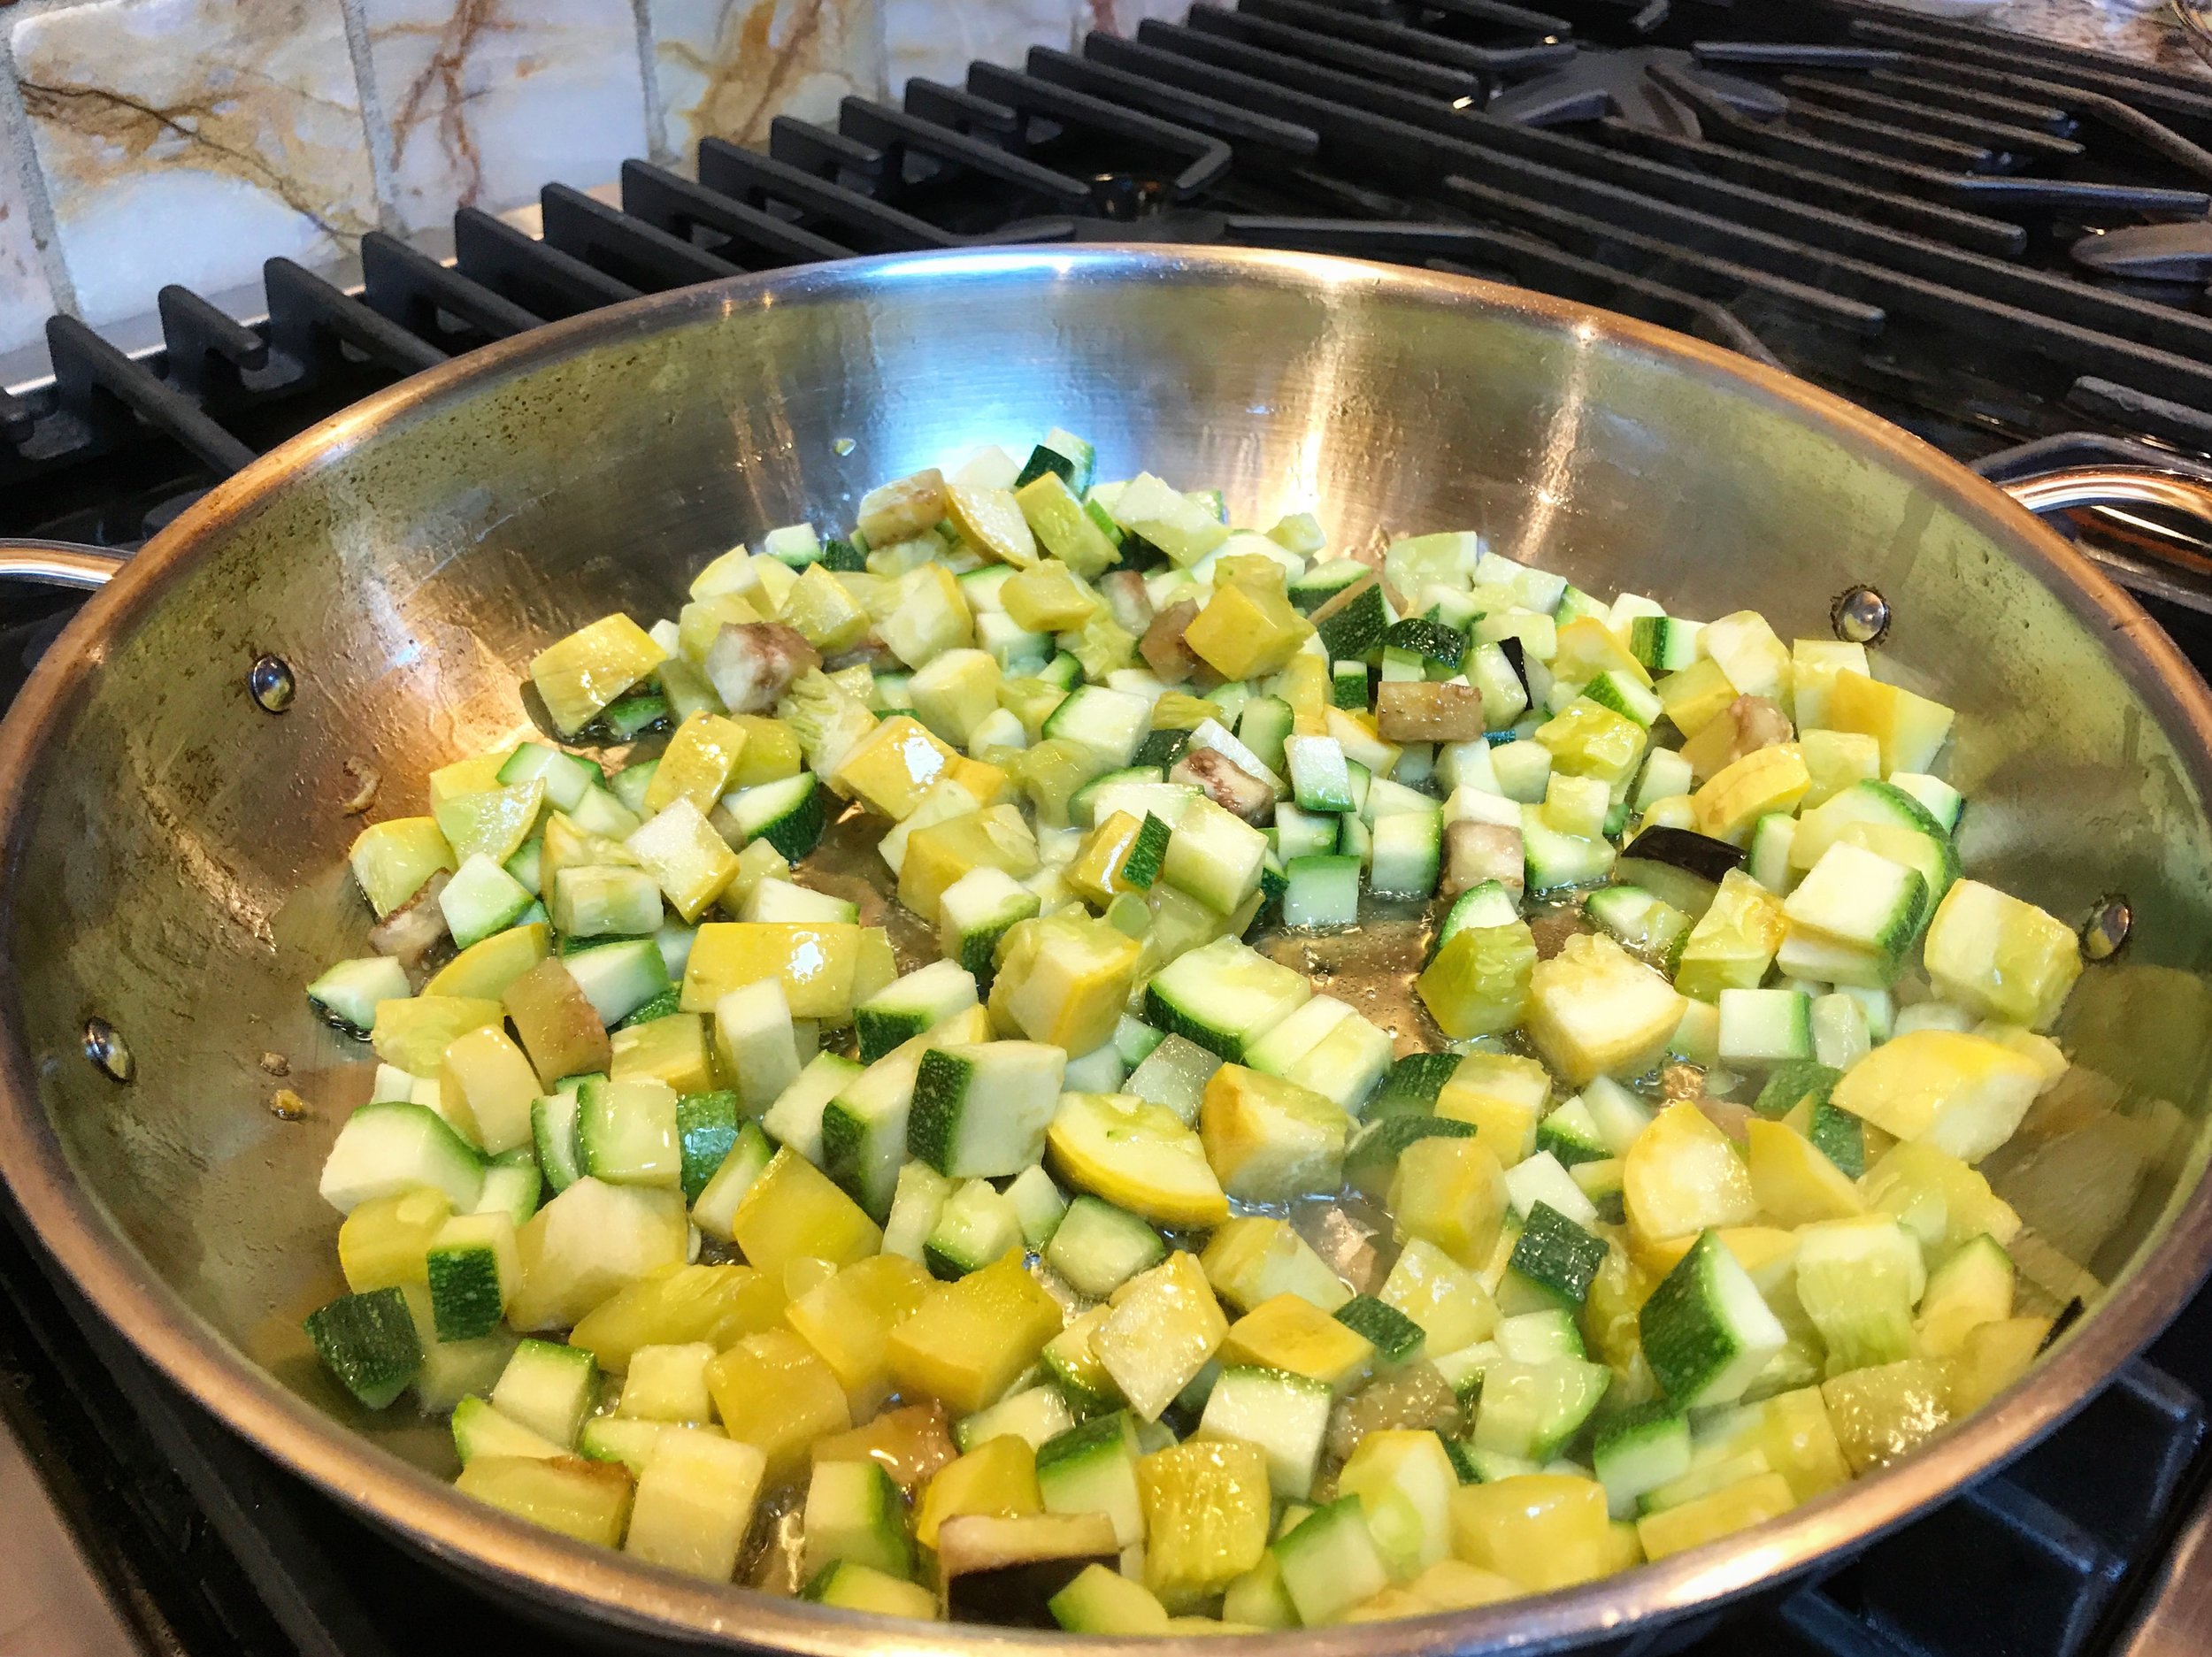
1 small butternut squash, peeled, seeded and cut into 1 ½-inch chunks (about 1 to 1/2 pound)
2 to 3 small sweet potatoes, peeled and cut into chunks
1/4 cup, or less, light butter (I use Kerrygold or Smart balance light with omega 3)
2 tablespoonfuls of “Truvia Brown Sugar Blend” (Splenda makes a lower sugar, brown sugar blend also)
1/2 teaspoon smoked or sweet paprika
1/2 teaspoon sea salt
1/4 teaspoon ground nutmeg
1/4 teaspoon cinnamon
1/8 teaspoon ground cloves
1/8 teaspoon ground allspice
Freshly ground pepper, to taste
3 small apples (or 2 large) cored and cut into 1 ½-inch chunks (I mix green and red)
1 pre-cooked Turkey Kielbasa, sliced (I use Hillshire Farms or Johnsonville)

Directions:
1.
Preheat oven to 425 degrees F, positioning the rack at above the mid level of the oven. Shake 2 teaspoons apple cider vinegar, maple syrup and mustard in a small jar..
2. Meanwhile, toss squash, sweet potatoes, melted light butter (or substitute), Truvia brown sugar blend, paprika, sea salt, 2 teaspoons of apple cider vinegar, spices (cinnamon etc) and pepper in a large bowl to coat. Spread out on a large rimmed baking sheet..
3. Transfer squash to the oven and roast 10 minutes. Add apples & sliced sausage into the large bowl with melted butter and spices then toss to coat with the remaining liquid..
4. After 10 minutes remove baking sheet from oven and add the apple, sausage and any remaining liquid to the sheet. Return to the oven and roast, until the apples are softened and the squash is tender, about 18 to 22 minutes longer. Remove from the oven..
5. Drizzle the vinegar-maple-mustard mixture over the roasted mixture in the pan and toss to coat. Serve immediately..

Notes:
1. You can add other vegetables or squash types if desired. I will often add chopped carrots with the squash in step 2.
2. Some might prefer more or less of the spices, your personal preference, add more or less if desired or leave out if you don’t like a specific spice (say cloves or another)
3. Seen similar dishes which add a couple of handfuls of kale to their dishes—if you’re a Kale fanatic who loves adding the greens to a dish, then I would suggest adding it during step 4 with the apple & kielbasa..

"GK Skinny Pasta Spaghetti Pie" with "Coconut Flour Crust"

I love trying new things, especially taking a recipe that might be a little on the decadent side or that would send you into carb overload and making it healthier..

One of the things I love and almost rarely ever ate over the past several years was pasta..

Getting older isn't easy, and needing to change up your eating habits can be difficult but luckily for a lot of us there are a few companies who have heard our cry for a healthy pasta alternative that doesn't involve zucchini..

This particular brand is "GK Skinny Pasta"

Gabriella's Kitchen has been making pasta alternatives, gluten free and teff pastas for a while now, but my favorites by far are the high protein low carb pastas they've created..

An that's where this comes in..

This recipe was one I made years ago but it's so filling, and so carb and fat heavy, that I just couldn't bring myself to make it again..

Now taking my new discovery of skinny pasta, and a pie crust I've been experimenting with, I went about making a healthy version of an incredibly scrumptious dinner dish..

Using part skim, low fat, low carb ingredients with a minimum of oil and turkey sausage—I've gone about creating a meal that is anything but bad for you no matter how gluttonous you might feel enjoying it..


Full of tons of protein, vegetables and fiber—you'll definitely feel satiated after a piece of this..

So give it a try yourself, and give "GK Skinny Pasta" a try to—I know that you'll find them both "Definitely Delish"


"Baked Spaghetti Pie" with GK SkinnyPasta and "Coconut Flour Crust"

Ingredients:
1/3 cup plus 1/4 cup extra-virgin olive oil
1 zucchini, large dice
1 yellow Squash, large dice
Sea Salt and freshly ground black pepper
1 tablespoon minced garlic
1 pound mild Italian turkey sausage, casings removed
1/4 cup red wine
3 cups tomato sauce (plus 2 more cups for serving on the side
1/2 teaspoon crushed red pepper flakes
2/3 pound GK SkinnyPasta, Spaghetti
1 pound part skim mozzarella, diced
1/2 to 2/3 cup Parmesan, Asiago & Romano cheese, shredded
1/2 cup or more part skim ricotta cheese
1 tablespoon Fresh chopped parsley
Coconut Flour Pie Crust (see recipe below)

Directions:
1. Heat  2 tablespoons cup of olive oil in a large sauté pan over medium-high heat. Add the vegetables and toss to coat in the oil..
2. Sprinkle with sea salt and pepper. Saute the veggies until it is lightly golden and tender, about 10 minutes. Decrease the heat to medium. Add the garlic and saute until it is tender, about 2 minutes longer..
3. Using a slotted spoon, transfer the vegetable mixture to a large bowl..
4. Add the sausage and wine to the same frying pan. Cook over medium-high heat until the wine evaporates and the sausage is brown, breaking the sausage into smaller pieces, about 8 minutes..
5. Add the sausage, parsley, tomato sauce, and crushed red pepper to the veggie mixture, and toss to combine..
6. Meanwhile, bring a large pot of salted water to a boil over high heat. Add the GK Skinny Pasta and cook for 1 to 2 minutes, stirring constantly..
Drain. Toss the spaghetti with the mixture. Cool completely. Add the mozzarella and shredded cheeses and toss to combine..
7. Preheat the oven to 375 degrees F. Follow the "Coconut Flour Pie Crust" directions and transfer to a 9 or 10 inch spring-form pan (I used a double recipe and 10 inch spring-form)
8. Spoon the mixture into the prepared bottom crust till full adding spoonfuls of part skim ricotta cheese here and there (more or less to preference)
9. Roll out a 10 inch circle of coconut flour pie crust on parchment paper, brush the exposed edges of the pie crust in the spring-form pan with egg wash and transfer the circle of dough on top sealing it by pressing the edges..
10. Lightly brush the top with egg wash and sprinkle a pinch or two of coarse salt on top—then cut small slots for the inside to vent..
11. Place in middle rack of the oven. Bake until the pastry is golden brown on top, about 30 minutes..
12. Use foil around the edges if they begin to darken to quickly..
13. When done let stand for 10 to 15 minutes. Remove the pan sides and serve with some reserved tomato sauce on the side..

Notes:
1. You can pre-bake the bottom shell of pie crust till just beginning to lightly golden, to avoid the chance of it remaining to soggy, before filling. Just be careful not to overcook..
2. You can also switch up the vegetables if you wish, I added a small amount of eggplant to mine. You can use all yellow or all green squash, all eggplant-it's personal preference really..

"Low Carb High Protein Coconut Flour Pie Crust"

Ingredients:
2 eggs plus 2 egg whites
2-3 teaspoons peanut or canola oil
1 teaspoon butter extract
1/4 tsp fine Himalayan pink salt
1/2 teaspoon baking powder
1 cup coconut flour (Bob's Red Mill or preferred brand)
1/4 cup Vital Wheat Gluten (24g protein per serving)
1/2 cup light butter, softened & added in spoonfuls (or cubes)

Options:
1 tsp vanilla extract (only for dessert pies)
3 teaspoons Truvia (for dessert pies)

Directions:
1. Preheat oven to 400 degrees F.
2. Whisk the eggs, oil & butter (vanilla extract & Truvia added here for a dessert pie recipe) into a stand mixer..
3. In another bowl whisk the remaining ingredients together until combined..
4. Pour the dry and wet mixture into a mixer and combine on low speed..
5. Add the cubed light butter. Process until it looks like crumbles..
6. Squeeze the crumbles together with your hands until you form a ball of dough..
7. Roll out the needed dough between two pieces of parchment paper and flip over into pie plate or spring-form pan (will want to break, just use your hands to fill and form the dough inside)
8. Using a fork randomly make holes into the bottom of the crust using the tines..
9. Loosely ring the top edges of your dough with aluminum foil if you're going to do additional baking after filling..
10. Pre-Bake the crust 7 to 10 minutes or until lightly golden..
11. Once cooled out of the oven, add your filling. Or if you're doing additional baking, fill and add your additional layer of pie crust on top before baking again..

Notes:
1. For Gluten Free version you can try switching out the Vital Wheat gluten for unflavored brown rice protein..

2. You can also increase the sweetness of the crust by adding additional Truvia (or your preferred sugar substitute), Vanilla extract or other flavors depending on what you plan to fill the crust with. (Sweet or Savory works great with this crust)

"Cabbage Roll Soup"

I love good old fashioned comfort food, the kind that sticks to your ribs and makes you feel all warm and fuzzy inside..

A soup, a stew, a pasta; you know, something truly hearty and filling that takes you back to good ol'days of growing up and coming home to Mom cooking in the kitchen..

So after a little thought; and a lot of rummaging thru the pantry and fridge, what I ended up creating was this wonderfully fulfilling and delightfully tasteful "Cabbage Roll Soup"

I find it so tricky photographing a soup or stew like this, everything tends to mush together; but to paraphrase someone from a long long time ago..

"She may not look like much, but she's got it where it counts

And that's flavor..

Loved it, truly—with each and every mouthful exposing a new hint of taste; from the smoky sweet Paprika, fresh chopped Herbs and mix of delicious Cabbages all the way to the scrumptious blend of wild & brown rices with quinoa, and lean ground beef & pork browned to perfection..

Simmered all of that delectable goodness with some beef broth, vegetable juice and fire roasted diced tomatoes until finally finished—and then, when I didn't think my hunger could hold out any longer, it was time to dig in..

Yum, yum and yum is all I can really say; me and my Baby enjoyed it immensely and she feels that this is one that is definitely destined for the cookbook, for sure..

So perfectly filling and oh so—
"Definitely Delish"

"Cabbage Roll Soup"

Ingredients:
1 cup of pearl onions (you can use thawed frozen, though I prefer fresh white and gold)
3-4 cloves of garlic, minced
1/2 pound lean ground beef (if you want meatier, add extra beef and pork—1/4 pound of each)
1/2 pound lean ground pork
3/4 cup uncooked mix of quinoa, brown & long grain rice
1/2 cup or more of carrot bites(nibler) sliced or chopped
1/2 medium head savoy cabbage, chopped (core removed)
1/2 medium sized Cabbage (red, regular or other preferred), chopped (core removed)
3 tablespoons flour
2 (14 oz) cans diced fire-roasted tomatoes
2 tablespoons tomato paste
4 cups beef broth
1½ cups V8 or other vegetable juice
1 teaspoon smoked paprika
1 teaspoon fresh thyme
1 tablespoon Worcestershire sauce
1 bay leaf
1 tablespoons fresh chopped parsley
Sea salt and cracked pepper, to taste

Directions:
1. In a large pot, brown pork and beef. Drain any fat..
2. Stir in Garlic, cooking for one minute; then add carrots and pearl onions, stirring for 3 minutes..
3. Stir in chopped cabbage and let cook until slightly softened (about 3 minutes).
4. Sprinkle flour into cabbage mixture and cook an additional 2 minutes.
5. Add all remaining ingredients, bring to a boil and reduced heat to medium low..
6. Cover and simmer on low until rice is fully cooked (about 25-30 minutes)
7. Remove bay leaf, add additional Salt and Pepper to taste and serve garnished with fresh chopped flat-leaf parsley..

Notes:
1. If you prefer a thinner soup, add more beef broth to reach desired consistency once rice is cooked..
2. If you enjoy spicier, add a pinch of red pepper flakes or dash of cayenne...
3. You can sub in a chopped onion for the pearl onions, as well as adding sliced scallions etc... Feel free to experiment..
4. Serve it with some nice crusty bread
(A French boule, sesame Semolina Italian, or Sourdough-all my favorites), warmed in the oven with butter on the side..

"Gluten-Free Cauliflower Crust Pizza"

 I'm always seeing all of these wonderful healthy crust pizzas, that people share, all of the time..

Makes me so hungry for something I generally don't eat anymore, but do so definitely love..

So taking a little inspiration from those who have posted before me, I decided to go all in and create a couple of "healthy" pizzas of my very own..

This first one is made up of a deliciously flavorful crust of Roasted Cauliflower, Coconut flour, Parmesan and Mozzarella cheeses, and some spices..

It was actually much easier to do then expected and using parchment paper to help move it on and off the Pizza stone, during cooking, made all the difference in the world..

So, literally, after 10 minutes of baking it was time to take it out and slide my other crust into the oven and decide what I should top this one with..

I made sure to have more than a few options available for me, and my Baby, and then left it up to her to decide..


After looking over everything, she went with the fresh mozzarella and basil..

So slathering the top with pizza sauce, placing some medallions of mozz' and scattering a couple of pinches of fresh cut basil—it was time to go back on the stone in the oven to finish cooking..

A handful of minutes later it was done and all ready to be devoured, added just a smidgen of shaved Parmesan for good measure and began cutting into this one to give it a try..

Yum, it was so good and the crust was so tasty—it even held together just enough to be picked up just like a regular slice of pizza..

So very good and so very healthy with all of those natural ingredients with the gluten free, low carb crust..

So going to make this again because it was so—"Definitely Delish"


"Gluten-Free Cauliflower Crust Pizza"

Ingredients:
1 small to medium sized head of roasted cauliflower - should yield 2 to 3 cups once processed
1/4 teaspoon sea salt
1/2 teaspoon freeze-dried basil (crush it even more between your fingers)
1/2 teaspoon freeze-dried oregano (crush it even more between you fingers)
1/2 teaspoon garlic powder
1/2 teaspoon minced fresh Garlic
1/4 cup shredded parmesan cheese
1/4 cup 2% mozzarella cheese
1 egg
2-3 tablespoons coconut flour
Toppings:
Pizza sauce-homemade or store bought
Cheese fresh or pre shredded mozzarella
Toppings, whatever you enjoy.....

Directions:
1. Place a pizza stone in the oven, or baking sheet if you don't have a pizza stone. Preheat oven to 450 degrees..
2. On a cutting board, place a large piece of parchment paper and spray it with nonstick cooking oil..
3. Wash and throughly dry a small head of cauliflower..
4. Cut off the florets, you don't need much stem. Place in baking dish and drizzle a tablespoon of olive oil and sprinkle a touch of salt..
5. Place in oven and roast for 20-30 minutes. Remove, and when cool enough to touch, place into food processor..
6. Pulse in your food processor for about 30 seconds, until you get powdery snow like cauliflower. You should have about 2 cups of cauliflower..
7. Scoop out cauliflower and place into a dish towel or cheesecloth and squeeze. You want to squeeze out as much water as possible. This will ensure you get a nice chewy pizza like crust instead of a crumbly mess.. 
8. Dump cauliflower into a bowl. Now add 1/4 cup parmesan cheese, 1/4 cup mozzarella cheese, 1/4 teaspoon kosher salt, 1/2 teaspoon freeze-dried basil (crush up the leaves even more between your fingers before adding), 1/2 teaspoon freeze-dried oregano (crush up the leaves even more between your fingers before adding), 1/2 teaspoon garlic powder (not garlic salt), minced fresh garlic and a dash of red pepper if you want..
9. I also added 2-3 tablespoons of coconut flour at this time. Now add your egg and mix away. Hands tend to work best, I'll wear those throw away gloves sometimes so as to be able too have clean hands again when needed..

10. Once mixed together, use your hands to form the dough into a crust on your oiled parchment paper. Pat it down throughly, you want it nice and tightly formed together. Don't make it too thick or thin either. (I used the outer ring of a spring-form pan to ensure a nice circular crust..
11. Using a cutting board slide the parchment paper onto your hot pizza stone or baking sheet in the oven. Bake for 8 - 11 minutes, until it starts to turn golden brown. Remove from oven... (Just eye the crust the last few minutes to ensure you don't under or over cook it)
12. Add however much sauce, cheese, and toppings you want. I'm not gonna give you measurements for this. You should know how you like your pizza - this is your personal taste that matters..
13. Slide parchment with topped pizza back in the hot oven and cook for another 5 to 7 minutes until the cheese is melted and slightly golden....
14. Test your patience and allow it to cool for a minute or two. Probably closer to two. Then using a pizza cutter and a spatula serve up your delicious gluten-free cauliflower crust pizza!

Notes:
1. It makes a big difference oiling the parchment paper before forming the crust on it and using a pizza stone in the oven..
2. You'll want to have the oven pre-heated well ahead to allow the stone to be heated completely..
3. An average size head of cauliflower is fine, you don't want to have much more then 2 cups of processed cauliflower after roasting..
4. Can use un-roasted cauliflower as well— just rinse, remove florets, process into snow and microwave for 4 minutes on a plate before squeezing liquid out with cheese cloth..

"Gluten Free Quinoa Coconut Flour Crust Pizza"

Who doesn't love pizza, I know I do—and when I get to craving, especially now that I'm older, I try my hardest to figure out ways to enjoy it without regretting it almost immediately..

This is one of them, and one of my favorite fit and healthy alternatives to the oh so tasty pizza crust—and I think you'll find that you enjoy it to..

Deciding, though, that I missed pizza was only the first hurdle and then after seeing so many of those cauliflower, and other, crusts floating around out there —well I just had to give it a try myself..

So after messing around with a recipe or two, I decided to try a completely different take on the pizza crust myself..


So after a quick mixing together of all the various ingredients; I dumped it all out onto oiled parchment paper, and using the ring of the spring form pan, formed it into a circular shape..

Into the oven, for a few minutes, on the paper till just golden brown and then time to slather with sauce and cover with toppings..

I decided to go with one of my favorite pizza styles, the "Hawaiian Pizza"—fresh cut pineapple, sliced prosciutto, shredded and fresh mozzarella with a few torn fresh basil leaves..

Back in for five or so minutes more, until the cheese has melted and then it's almost time to dig in..

Just let it sit for a minute or two; sprinkle it with shaved Parmesan if desired and some extra basil, a little salt & pepper or red pepper flakes—if that's suits your tastes..

Now time to jump in and start eating; cut up a few slices for me and my Baby—then devoured this terrifically tasty treat..

So very good and healthier for you as well..

Will be playing around more with this one in the future, from toppings to sauce—you should too..

"Definitely Delish" and definitely a dish to make again and again..


"Quinoa and Coconut Flour Pizza Crust"

Ingredients:
Crust:
1/2 cup Quinoa Flakes
1/4 cup +2 tablespoons Coconut Flour
3 Eggs, room temperature
2 tablespoons of Water
2/3 tsp Baking Soda
1/2 tsp Baking Powder
3 tablespoons Extra Virgin Olive Oil
2/3 tsp Sea Salt
1/2 tsp Garlic Powder
1/2 tsp dried Oregano and Basil, crushed between fingers
2 cloves fresh Garlic, minced
2 heaping tablespoons shredded Parmesan cheese
1/4 cup shredded 2% Mozzarella

For Toppings:
Pizza sauce, homemade or store bought
Shredded or fresh Mozzarella, or mix
2-3 fresh torn Basil leaves
Any other toppings you enjoy (I did prosciutto and pineapple with fresh basil)

Directions:
1. Place a pizza stone in the oven, or baking sheet if you don't have a pizza stone. Preheat oven to 450 degrees..
2. On a cutting board, place a large piece of parchment paper and spray it with nonstick cooking oil..
3. Dump quinoa flakes and coconut flour into a bowl. Now add Parmesan cheese, 1/4 cup mozzarella cheese, 2/3 teaspoon sea salt, 1/2 teaspoon dried basil (crush up the leaves even more between your fingers before adding), 1/2 teaspoon dried oregano (crush up the leaves even more between your fingers before adding), 1/2 teaspoon garlic powder (not garlic salt), minced fresh garlic, baking soda, baking powder and a dash of red pepper if you want..
4. Now add your egg and mix away. Hands tend to work best, I'll wear those throw away gloves sometimes so as to be able too have clean hands again when needed..

5. Once mixed together, use your hands to form the dough into a crust on your oiled parchment paper. Pat it down thoroughly, you want it nice and tightly formed together. Don't make it too thick or thin either. (I used the outer ring of a spring-form pan to ensure a nice circular crust)
6. Using a cutting board slide the parchment paper onto your hot pizza stone or baking sheet in the oven. Bake for 7-10 minutes, until it starts to turn golden brown. Remove from oven... (Just eye the crust the last few minutes to ensure you don't under or over cook it)
7. Add however much sauce, cheese, and toppings you want. I'm not gonna give you measurements for this. You should know how you like your pizza - this is your personal taste that matters.!
8. Slide parchment with topped pizza back in the hot oven and cook for another 5 to 7 minutes until the cheese is melted and slightly golden..
9. Test your patience and allow it to cool for a minute or two. Probably closer to two. Then using a pizza cutter and a spatula serve up your delicious gluten-free quinoa coconut flour crust pizza!

Notes:
1. It makes a big difference oiling the parchment paper before forming the crust on it and using a pizza stone in the oven..

2. You'll want to have the oven pre-heated well ahead to allow the stone to be heated completely..

"Skinny Orange Chicken"

I love finding fun ways to create low calorie healthier alternatives to some of my favorite dishes..


Through experience, and experimentation, I've gotten pretty good at it with some recipes—such as this incredibly tasty "Skinny Orange Chicken"


Using "Tamari" lite Japanese soy sauce, natural coconut oil spray and my favorite brown sugar substitute by Truvia—I'm able to create these wonderful skinny dishes that are amazingly flavorful and with near none of the regret..

For this one, this time, I used a mix of quinoa and low glycemic rice—but I'm just as likely to serve it with roasted riced cauliflower or Shirataki rice by "Miracle Noodle" to cut the carb calories even more..

The depth of citrus orange taste along with spicy tang of red pepper and ginger gives this dish a wonderfully sweet and zesty taste that's sure to please the people in your home..

Add in the fact that you can't tell the difference between this and the high calorie, high sodium version, for me anyway, and this is a win-win as far as I'm concerned..

Tasty, filling, healthy and guilt free—this is another dish that's sure to help you fulfill your desire for a healthier you; and it is, most assuredly, oh so "Definitely Delish"

"Skinny Orange Chicken"

Ingredients:
2 lbs. boneless, skinless Chicken Breast
1 cup fresh Orange Juice (low sugar, no pulp, pulp-up to personal taste)
2 tablespoons fresh Lemon juice
2 tablespoons Sushi Vinegar (rice wine vinegar)
2 tablespoons Tamari lite soy sauce
4 tablespoons of Truvia Brown Sugar Blend (equal to 1/3 cup of brown sugar)
2 cloves of Garlic, minced
1 tsp. Ginger
1 Orange, zested (aprox. 1 tablespoon or more)
1/4 tsp. crushed Red Pepper
1/2 c. Water
1 1/2 tablespoons Corn Starch (according to desired thickness)
3 Green Onions, sliced
1 tablespoon fresh chopped Italian Parsley
Sea Salt and fresh ground Black Pepper (for sprinkling on chicken before browning)
3 to 4 cups cooked Rice, Quinoa, blend or low carb alternative..

Directions:
1. Rinse off and pat dry chicken; slice into smaller pieces and season with salt & pepper, then set aside till ready. (Begin cooking your rice or substitute at this time)
2. Pre-heat your skillet, wok or deep sided saute pan on medium high heat. Spray the inside with coconut oil spray and add chicken pieces, browning until lightly golden on all sides—about 10 minutes..
3. Remove the chicken with a slotted spoon to a plate and cover with foil to keep warm. It will not be finished cooking yet..
4. Lower heat to medium and add the sauce ingredients by combining the orange juice, lemon juice, sushi vinegar, Tamari soy sauce, Truvia brown sugar, minced garlic, ginger, orange zest, and crushed red pepper flakes..

5. Cook, stirring regularly, over medium heat until very slightly thickened and bubbly—about 5 minutes..
6. Add the chicken pieces back to the pan with juices and mix together to coat and then covering to simmer for about 5 to 10 minutes more—adjusting cooking temperature if necessary..
7. In a small bowl or measuring cup, combine water and corn starch and stir until corn starch is dissolved..
8. Add corn starch mixture to skillet and continue cooking, stirring regularly, until sauce is thickens completely—about 2 minutes..
9. When ready to serve spoon chicken over your rice, quinoa or substitute and garnish with sliced green onions, chopped parsley, additional orange zest, and red pepper flakes as desired..

Eat Hot and Enjoy!!


"Roasted Cauliflower, Broccoli & Brussel Sprout Soup"

I love roasting and eating vegetables..

I mean, if I can throw it onto sheet pan and drizzle it with oil—I will..

This recipe takes a simple side dish at dinner and adds in a few ingredients to create a perfect lunchtime or supper meal that's wonderful during these cold northeastern winters..

One of the first things I started with here is deciding on a mix of vegetables—so taking two recipes from my Thanksgiving side dish post, back in October, I got to work on what would become this delish soup recipe..

Going almost half Brussels sprouts and half cauliflower, with some broccoli thrown in for good measure—I tossed it all down onto my sheet pan and drizzled it with quality extra virgin olive oil with a little fine sea salt & pepper to finish. Then into the oven it went..

Truly I love simple recipes like this with just a few dishes needed; one pan, one pot a knife and a spoon—what could be simpler and leave less work for you afterwards then that. Well a skillet meal like my frittatas, and mexi-skillet recipe, but I digress..

While my veggies went about becoming all roasty browned and tasty; I prepped the base for my soup which included some lean prosciutto, shallots, garlic & chicken stock..


Quicker than you'd think it was time to pull my roasty toasty vegetables out of the oven and spoon them into the pot with the soup base and bring it up to a nice low simmer for about 10 minutes..

Here is where an immersion blender is key if you want to save on spatters, dribbles, spills and sloshing as you attempt to blend a little of the soup at a time and then dumping into another dish—you're guaranteed to add to your after cooking clean up; and really, who wants that, right!


A few minutes of immersion blending later and you have a supremely thick soup that just needs a little seasoning for taste before it's ready to serve..

Garnish each bowl with some reserved roasted veggies, the slightly crispy cooked prosciutto and some shredded Manchego cheese an you'll have a beautiful dish that's sure to please..

I loved it and I'm sure if you try it for yourself that you will to; because it is, oh so "Definitely Delish"

"Roasted Cauliflower, Broccoli & Brussels Sprout Soup" 

Ingredients:
16 oz cauliflower florets
16 oz Brussels sprouts, halved
8 oz. Broccoli florets
4 oz. lean Prosciutto, cut into small pieces (see notes for vegan options)
3-4 tbsp Extra Virgin Olive Oil
2 tablespoons Butter (see notes)
1/4 cup Shallots, chopped
2 cloves of Garlic, minced
3 1/2 cups low sodium Chicken Stock (see notes)
1 cup Vegetable Broth
1/2 teaspoon fine Sea Salt, plus more to taste
White Pepper, to taste
1 tablespoon fresh chopped Italian Parsley
Natural Olive Oil Spray

Directions:
1. Preheat oven to 450 degrees Fahrenheit..
2. Spray a large baking sheet with the Olive Oil Spray. Place the cauliflower, broccoli and Brussels sprouts cut side down on the baking sheet, drizzle with 2 tablespoons of olive oil and sprinkle with sea salt—then roast on the bottom third of the oven 25 minutes, tossing half way until slightly browned..
3. Meanwhile, add 1 tablespoon of oil to your soup pot on medium heat and add your pieces of prosciutto—cooking until browned, then remove from the pot and reserve for later..
4. Now lower the temperature of the pot to low heat and melt the butter, then add the shallots & garlic. Cook until translucent, about 5 minutes..
5. Add the chicken stock and simmer 5 minutes..

6. Shut the oven, reserve about 1 cup or more of the roasted vegetables and keep warm on the baking sheet..
7. Transfer the rest to the pot and simmer for 5 minutes, covered..
8. Now, using an immersion blender, blend until a thick even consistency is reached. You may also enjoy it chunkier, so can stop when it reaches the style you enjoy..
9. Now simmer on low heat for 5 to 10 minutes, adding up to 1 cup of vegetable broth if thinning of the soup is needed. As well as adding sea salt and white pepper to taste. (Any last minute additions such as fresh herbs, rubbed sage, etc can be added to enhance the flavor if you desire)


Notes:
1. Serve in bowls topped with the some of the roasted vegetables, cooked prosciutto, chopped parsley and a drizzle of extra virgin olive oil..
2. You can also add a bit of fresh shredded 8 month Manchego cheese, which I did. (Optionally Romano or another cheese could be substituted) Serve immediately..


3. You can remove the prosciutto (or use vegan/vegetarian friendly option if available), substitute the butter for a non dairy version (Olio olive oil spread, or another) and replace the chicken stock with vegetable broth to make this soup Vegetarian or Vegan friendly....

"Protein Packed Belgian Waffles"

Every once and awhile I get to wanting something I just don't eat anymore—usually..

When this happens; sometimes, just sometimes, I'll get creative and try to figure on how in creation I can achieve this without regretting almost immediately indulging in a treat of this kind..


Of course when I say this kind; what I'm referring too, as you can see from the photos, is nothing short of a stack of protein packed "Belgian Waffles" with "Gelato" and "Whipped Cream"

Today I was successful (though that's not always the case when trying a new technique) by using a mix of protein powder, flapjacked pancake mix, egg & egg whites, stevia, coconut oil, vanilla & almond extracts, cinnamon and almond milk..

An with a little wrangling, and a very short amount of time, I was able to create perfectly fluffy and delicious waffles..

Topped with a little low fat, no churn chocolate protein gelato made with cool whip and finished with whipped coconut cream—this delectably tasty dish was just full of protein, with none of the heavy carb regrets..

Definitely happy with this for a little "Breakfast for Dinner" after hitting the gym; because it was,
most assuredly, oh so "Definitely Delish"


"Protein Packed Waffles"

Ingredients:
2 scoops of Protein Powder (I use Quest Baking Protein-Unflavored)
1/4 cup FlapJacked Protein Pancake Mix (Any protein pancake mix, or gluten free substitute can be used)
2 Eggs, room temperature
1/2 cup of Unsweetened Almond Milk
1 teaspoon Baking Powder
1 teaspoon Baking Soda
1/4 teaspoon fine Sea Salt
1 teaspoon Vanilla Extract
1/2 teaspoon Almond Extract
1 teaspoon Sweetener (stevia, truvia, splenda, etc)
1 tablespoon Coconut Oil, liquified
Natural Cooking Spray
See Notes for Options & Additions

Directions:
1. Pre-heat waffle maker on medium high temperature. (Temperature and time may need adjustment due to differences in waffle makers)
2. Mix all dry ingredients together in a deep bowl with whisk adding any additional dry ingredients such as cinnamon..
3. Add cool liquid coconut oil (if heated to melt or another oil substitute), eggs, Almond milk, vanilla & Almond extracts..
4. Whisk ingredients together adding additional tablespoons of Almond milk if necessary and the batter was too dry. Let sit for a minute..
5. Using a spatula, gently fold any optional ingredients such as mini chocolate chips, blueberries or diced banana if so desired..

6. Spray the inside of your waffle maker with natural oil sprays (I use Pompeian brand natural grapeseed or coconut oils with no propellants)
7. Pour 1/4 to a 1/2 cup (depending on size) of batter out onto your waffle maker and close lid..
8. Cook for 1 to 2 minutes and check. (Some waffle makers are cooler on top like mine, so halfway through I'll flip my waffle with help of a small rubber spatula) Cook for another 30 seconds to 1 minute, till done..
9. Repeat with remaining batter till all waffles are finished..
10. Top with your choice of toppings or additions and enjoy..

Options:
1. Mix and match add ins such as more vanilla extract and blueberries, banana extract and diced banana, mini chocolate chips, cinnamon, pumpkin pie spice—use your imagination..
2. When I'm looking for extra protein on gym day I will substitute out some Almond milk for additional egg whites (or carton egg beaters) I'll add the 2 eggs, 1/4 cup of carton egg beater eggs (or more) and then add Almond milk till a nice batter like consistency is reached..
3. Toppings can include butter (or substitute, I use Olio light spread) pure maple syrup (or low sugar substitute), homemade whipped cream, fat free gelato (I make a fat free, naturally sweetened protein gelato) or a scoop of "Halo Top" Protein ice cream (which I love, yum)—fresh fruit, preserves or a variety of other options can be added, it's all about personal tastes..

"Herb and Cheese Frittata with Vegetables"

"Herb & Cheese Frittata with Veggies"

It's been a little bit of a skillet meal kick that I've been on recently, but who doesn't love the ease and variety of simple one pan dishes such as these—now let's get down to business..

Last night I decided to make me and my Baby some "Brinner"

You know, a little "Breakfast for Dinner"

What I ended up throwing together was a wonderfully yummy "Frittata"

Had to do a bit of scrounging, the cupboards were a little more bare then usual..

"Asparagus Cheese & Herb Frittata"


First I wanted to have some cheese to add, but lacking any beyond some Parmesan, I ended up having to make my own from scratch..

A little heavy cream, milk and lemon juice later and I had my homemade "Ricotta" draining thru some cloth..

Next I prepped some garlic, shallots, grated Parmesan, fresh herbs and grape tomatoes; along with some leftover steamed broccoli I had..

"Zucchini, Squash & Ricotta Cheese Frittata"

A little sautéing later; followed by pouring in the eggs and egg whites, then it was time to add a few dollops of fresh cheese and the seeded an halved tomatoes..

Under the broiler it went; and a few minutes later we had this wonderfully tasty and beautifully golden "Herb and Cheese Frittata" with vegetables...

I sprinkled on a pinch of pink salt and black pepper and then it was all ready to serve..

So very good with just the right amount of each ingredient and with nothing overpowering anything else..

"Definitely Delish" and definitely a dish to be had for dinner, for breakfast, or for both...


"Herb and Cheese Frittata with Vegetables"

"Herb & Cheese Frittata with Tomato"

Ingredients:
8 Eggs (Or a mix of Eggs and Egg Whites-more egg or whites may be needed depending on pan size)
Fresh Herbs—Rosemary, Thyme, etc...
Tablespoon Olive Oil or Coconut Oil
Homemade or Store bought Ricotta Cheese (Goat Cheese, Feta, Fontina, etc)
Himalayan Pink Salt or Sea Salt
Fresh ground Black Pepper
Grape Tomatoes, halved and seeded (Other Vegetables can be used)
Broccoli or Asparagus or other Vegetable

"Zucchini, Squash & Ricotta Cheese Frittata"


Directions:
1. Mix eggs (plus egg whites if cutting down on whole eggs) with whisk in bowl with pinch of pink salt...
2. Turn broiler on to 500 degrees..
3. Heat Oven Proof Pan on stove on just below medium heat. (I like using an oven proof oval pan)
4. Add Coconut Oil and Sauté Vegetables with a pinch of salt and pepper till tender. (You can add some herbs at this point if desired)

"Herb & Cheese Frittata with Tomato"


5. Pour Eggs over top the veggies and cook on medium low, till eggs begin to set—will vary depending on size of pan, depth and whether eggs are at room temperature, check with spatula if needed. (You want them to be at least halfway cooked through or more but be careful not to burn the bottom, adjust temp if needed)
6. Add Tomatoes, a few dollops of Cheese and some of the fresh Herbs...
7. Transfer pan under broiler on middle wrack of oven; cook till nice and golden with eggs being completely set. (Careful not to burn by checking often)


Notes:
There are so many options and changes available that it is not even worth listing them. Suffice it to say, pick a mix of cheeses, herbs, seasonings, vegetables and go with it—experimentation and imagination is all you need for a delicious meal the entire family will love, whether its for Brinner or Dinner...

"Chocolate Chip Oatmeal Bake For Breakfast"

Have you ever baked your oatmeal? If you haven’t, you’re in for a real treat. Up until just the other day, my only experience with oatmeal was either in a powdery packet or over a simmering stove-top...

But it turns out, throw some oats in a cast-iron skillet with milk, eggs, and a few other ingredients, and what you get is an oatmeal that is almost completely hands-off (with no risk of bubbling over!) but also completely delicious...


What's really appealing to me about baked oatmeal is its texture — unlike the traditional version, baked oatmeal is sturdy and dense more like a sweet breakfast casserole or a giant soft cookie than a porridge...

Plus, this makes it perfect for dressing up with a multitude of various cookie flavors...


Like I did this time; just throw in some chocolate chips and a hefty dose of vanilla for a chocolate chip oatmeal “cookie” for breakfast, dried cranberries, orange zest, and almond extract for a holiday take, or a few teaspoons of cinnamon and some plump raisins for an oatmeal raisin cookie version...

You're only restricted by your imagination when it comes to this dish. I'll be trying a mix a vanilla chips and toasted nuts (perhaps macadamia) next time I cook this one up for me and my Baby...

It really is a quick and simple dish that's easy to prepare; a few minutes of prep toasting the oats and mixing up the eggs and cream, then into the oven it goes...

What's great too is that all the leftovers can be saved in Tupperware containers for a quick meal on the way to work, or even a late night snack-it kind of really is like a giant breakfast cookie, Yum...

"Definitely Delish" and definitely a dish to try again and again...


"Cinnamon Raisin Cookie Baked Oatmeal"

Ingredients:
2 tbsp butter (optional)
2 cups rolled oats (use certified gluten-free if needed)
3 tbsp brown sugar
3 tbsp granulated sugar
2-3 tsp ground cinnamon
1 1/4 tsp baking powder
1/4 tsp kosher salt
2 cups whole milk (or non-dairy milk of choice — any will work!)
1 tsp pure vanilla extract
2 eggs
1/2 cup raisins (or more or less, to taste)

For serving:
Yogurt
Honey or pure maple syrup (I used a low sugar syrup)
Cinnamon
Homemade Whipped Cream 

Directions:
1. Preheat oven to 350 degrees.
Optional: Toast your oats first. In a 10-inch cast-iron skillet, melt the butter over medium heat. Add the oats and stir to coat evenly, then continue to cook, stirring every few seconds to prevent burning, until oats smell toasty, like popcorn. This should take only 2-4 minutes, but gives the oatmeal a deeper flavor and makes it taste a little more cookie-like, in my opinion.
2. Mix together oats, both sugars, ground cinnamon, baking powder, and salt in a 10-inch cast-iron skillet. You can also use an 8×8-inch baking dish — in that case, you may want to line it with parchment paper to prevent sticking.
3. In a bowl, whisk together milk, vanilla, and eggs. If you didn’t toast your oats, you can add a tablespoon or two of melted butter here, if you’d like. 
4. Pour the wet ingredients over the dry and give the dish a shake or stir it to evenly moisten. 
5. Scatter the raisins (or chips if doing optional recipe, which I made this time) evenly across the mixture and stir again to incorporate.
6. Bake for 30-35 minutes, or until golden on the edges. Oatmeal should still be soft in the center when removed but will set as it cools.
7. Serve while warm with whipped cream, syrup or whatever various toppings you enjoy....

Recipe options:
For a chocolate chip oatmeal cookie version:
Up the vanilla to 2 tsp, omit the cinnamon, and swap out the raisins for chocolate chips.
(This is the recipe I did, using a dash of cinnamon sugar and mini semi-sweet chips with the extra vanilla extract)

For a Cranberry Orange version:
Add one to two tablespoons of orange zest, half a teaspoon of almond extract, and swap out the raisins for dried cranberries.


Notes:
Serve with homemade whipped cream, syrup, vanilla ice cream or whatever else you think might go good alongside or on top if desired..

"Skinny Bourbon Chicken"

I love food that's bad for you...

  I mean who doesn't, right?

  But as I've gotten older I've found that I just can't eat like I used, not on a regular basis anyway...

  Though I'll still on occasion make something sinfully delicious as you can plainly see from some of my other posts...

  This, though, just happens to be one of those happy creations where I discover a way to create that unbelievably delectable experience without the sin...


  Taking the wonderful flavors of a "New Orleans Style Bourbon Chicken" and tweaking the ingredients, measurements and cooking to create something that tastes, in essence, so incredibly close to the original but with less than half the calories amazes me...

"Blues on Bourbon" by R.Fisher


  That is what we have here; a scrumptious melding of Southern Comfort and other ingredients brought together in harmony to compose a sweet and slightly spiced melody that'll have you singing the Blues when it's all gone...

  I served mine with a sticky risotto rice this time but next time for an even healthier version I think I'll be using some riced cauliflower instead; either way I think you'll find this dish is perfect—because it is, oh so "Definitely Delish"

"Skinny Bourbon Chicken"

Ingredients:
2 tbsp coconut oil
3 lbs boneless, skinless Chicken, cut into bite size pieces
1 cup Water
1 cup brown sugar, packed (less using Truvia brown sugar blend-6 tblsp's)
3/4 cup low-sodium Chicken broth
1/2 cup soy sauce (Tamari-lite Japanese Soy)
1/4 cup Ketchup (low sugar)
1/4 cup Southern Comfort
2 tbsp Apple Cider vinegar
5 cloves Garlic, minced
1/2 sweet Onion, minced
1 Shallot minced
1/4 tsp crushed Red Pepper flakes (more if you like it spicy)
1 1/2 tbsp freshly grated Ginger
1/2 cup Apple Cider
1 tbsp Corn Starch
Fresh Chives, Scallions and Parsley for garnish
White Rice (I used 1 cup Risotto Rice cooked with 3 cups of water till done and sticky)

Directions:
1. Heat the oil in a large heavy bottom pot. Add the chicken pieces and brown until lightly golden on all sides. This will take about ten minutes. Remove the chicken with a slotted spoon to a plate and tent with foil to keep warm. It will not be fully cooked yet...

2. In the now empty pot, add the water, sugar, chicken broth, soy sauce, ketchup, Southern Comfort, apple cider vinegar, garlic, onion, red pepper flakes, and ginger. Bring to a boil, and use a wooden spoon to scrape all the browned bits off the bottom of the pan...

3. Add the chicken pieces back into the pan with the sauce, along with any accumulated juice on the plate. Reduce the heat to medium-low and let simmer for 20 minutes, until the chicken is cooked through, and the sauce has started to thicken...

4. In a small bowl, whisk together the apple juice and corn starch. Stir into the pot with a wooden spoon, then turn up the heat to medium-high and bring to a boil for 1 minute, stirring constantly, to thicken up the sauce. Add 1 tablespoon of Southern Comfort at the end before serving...

Serve while hot, and remember, this goes great with rice (and a glass of bourbon)

"Easy like a NOLA morning" by R.Fisher

Notes:
1. Slow Cooker Directions: Whisk together everything except for the chicken, apple juice, and corn starch. Pour into the bowl of your slow cooker. Add the chicken pieces, toss with a wooden spoon to coat, then cook over low for 6-7 hours, or high for 3 hours. Stir in the apple juice and cornstarch mixture at the very end to thicken up the sauce more if needed...

2. I used sticky white risotto rice this time but to cut the calories even more you could use riced Cauliflower or another alternative. (I'll be trying this next time I make it)

"Healthy Faux PF Chang's Mongolian Beef" with "Noodles"

"Healthy Mongolian Beef with Ramen Substitute"

Every once and awhile I will see a picture, walk by an item or think of something and say to myself—"You know what, I just have to try that"

Recently I had experienced an almost cascading avalanche of these ideas an fixations as a plethora of thoughts went tumbling through my mind...


"Blue Orchids"

It all started, simply enough, with a discussion of ramen noodles and how I first got into cooking as a kid by playing around with the seasoning and cooking method of this simple, cheap staple of college students and kids practically the world over...

Shortly after this; and with the thoughts of ramen still percolating through my subconscious, like magic, I wandered across the image of an Asian beef dish while skimming an article which included, amazingly enough, ramen noodles...

"Faux-PF Chang's Mongolian Beef with Ramen"

It was then that I truly began to get intrigued. I mean, I haven't had ramen in so long but maybe just maybe it'd be worth it—still I wasn't sold just yet...

Finally as I walked the aisles of my local market I passed, in the freezer case, what just happened to be the exact same beef dish I had just seen in the article—"PF Chang's Mongolian Beef"

This is what finally set off the shock-wave within my brain causing my thoughts to begin that headlong rush, that unstoppable tsunami, which would culminate in the creation of a new landscape and, I hoped, a new recipe worth sharing...


"Descending"

I began researching and almost gave up the journey; the carbs, the sugars, the sodium was just massive—I mean I just don't eat like that anymore, being on the wrong side of "40" and all that...

It was then I said to myself that it must have been "kismet" or "serendipity" that brought me here through this congruence of events, that the universe itself must be telling me to look further into this and not give up so easily—that just maybe I could find a better way to a better recipe...

And I did...


Using every trick in the book, and a few I didn't even know where an option, I eventually came up with what so closely resembles the flavors and textures of "PF Chang's Mongolian Beef" but with a vastly healthier list of ingredients and all of it finished off with my newest, favorite noodle substitute—the "Miracle Noodle" or "Shirataki Noodles"

None of the fat, sugar or heavy starches of the ramen dish I first saw but with all of that amazing flavor. Try it out yourself; I think you'll find that it is, most assuredly, oh so
"Definitely Delish"

"Healthy Mongolian Beef"

"Healthy Faux-PF Chang's Mongolian Beef" with "Noodles"

Ingredients:
1 1/2 lb lean Sirloin, sliced/cut small (I used lean Filet Mignon cuts)
2 tbsp Cornstarch
2 tablespoons Coconut oil
1 Bell Pepper, sliced into thin strips (I used a mix of Orange and Yellow)
3 Green Onions, chopped
2 tbsp Rice Wine Vinegar
1 package Angel Hair Miracle Noodle (Shirataki Noodles)

For Sauce:
2 tbsp Toasted Sesame oil
1/2 cup Tamari Lite Japanese Soy Sauce
3-4 tbsp Truvia Brown Sugar Blend
1 1/4 cup low sodium fat free chicken broth
5 cloves fresh Garlic, minced
1/4 tsp red pepper flakes

"21day Fix Mongolian Beef"

Directions:
1. Slice the lean beef into small thin pieces against the grain, pat dry with paper towels. Then place the beef in a medium sized bowl with the cornstarch and mix together to lightly coat...
2. Prepare your "Shirataki Miracle Noodles" by first rinsing them off in a colander for 2 minutes under warm water. Then place them in a small pot of water and bring to a boil, cooking for 3 to 4 minutes. When ready drain in the colander and rinse again for 30 seconds under warm water. Finally place drained noodles in a large non-stick pan and cook on medium heat, without oil, for approximately 8 to 10 minutes to dry and toughen up the noodles, being careful not to overcook...
3. In a wok, or non stick skillet, heat the 1 tablespoon of the coconut oil on medium to medium-high heat. When the oil is hot, add beef and cook until browned on all sides. It will take 2 to 3 batches because you want the beef to brown without sticking together. Also add another tablespoon of coconut oil after the first batch and feel free to add more if needed...
4. Remove beef from the wok to a plate, covering with foil and then add the 2 tablespoons of rice wine vinegar scraping up any brown bits stuck to the pan...
5. Add the bell pepper and saute it for a couple minutes just until it begins to soften. Remove the pepper from the skillet to a plate and set aside.
6. In that same skillet add all of the sauce ingredients, the sesame oil, tamari soy sauce, truvia brown sugar, garlic, chicken broth and red pepper flakes. Stir and cook over medium heat until sauce thickens a bit and reduces by about a quarter. It can take up to about 10 minutes until the sauce thickens and reduces. You don't want to reduce it by too much because you want enough sauce to coat the noodles and beef...
7. Return the beef and bell pepper to the skillet and toss in the sauce. Add the cooked shirataki miracle noodles to the wok and toss everything together. Top with sliced green onions and serve while hot...

"Window on the Wetlands"

"Greek Bifteki Meatball Gyro-A Healthy Mediterranean Meal"

"Greek Bifteki Meatball Gyro"

I have this enduring love of Mediterranean cuisine; truly I do, whether it's "Egyptian Lentil Soup" or "Italian Pasta with Garlic and Oil"

It seems to me no matter how much I love meat and potatoes, owing to my Austrian-Irish heritage, I just can't get enough of that delicious and healthy Mediterranean diet...
Be it Humus or Kebab, Branzino or Paella—there are just so many healthy, flavorful and delicious choices to choose from...      

"Departing Corfu at Sunset"


Today I decided on a fusion of favorites and flavors from across the Aegean and Mediterranean; what I ended up creating was a Greek Bifteki, shaped like an Italian meatball and filled with an incredible mix of cheeses, spices and herbs from all across Turkey, Greece, Hungary, Bulgaria and Italy...

"A healthy Mediterranean meal"


Topped with fresh cucumber, tomato, red onion and the "Tzatziki" yogurt sauce inside of a griddle warmed Pita bread—it was truly just a perfectly wonderful blending of tastes and flavors reminding me of my lovely travels across the seas surrounding the beautiful shores of Italy, Greece and Turkey...


This is one healthy dish to serve for lunch or dinner and is sure to become a family favorite in your own home—so why not give it a try; I think you will find that it is, oh so
"Definitely Delish"


"The Mediterranean Diet"

"Bifteki Style Meatball Gyro" with "Tzatziki"

Ingredients:
Bifteki:
8 oz. ground Pork
8 oz. ground grass-fed lean Beef
4 oz. ground Lamb
4 tablespoons Red Onion, minced
2 teaspoons Shallot, minced
2 cloves Garlic, finely minced
1 teaspoon Thyme, fresh chopped
2 tablespoons Italian Parsley, fresh chopped
1 teaspoon dried Greek Oregano (I used some I bought in Corfu at a roadside stand)
1/2 teaspoon Turkish Cumin
1/2 teaspoon Hungarian Paprika (Szeged brand)
2 teaspoons Mediterranean Sea Salt, fine
1/2 teaspoon Black Pepper, fresh ground
1 tablespoon Kalamata Olive Oil (I used a bottle I bought in Olympia Greece)
1 tablespoon Italian Red Wine Vinegar
2/3 cup Panko style plain Breadcrumbs
1 large Egg
3-4 oz. Feta Cheese, grated (I used Bulgarian Feta for the smoother, less salty & tart taste)
2 1/2 small vine ripe Tomatoes, minced after seeds and insides removed (mine were Hothouse variety, just smaller than a golf ball in size)

"Greek Meatball Gyro"

Tzatziki:
2 (7 oz.) containers fat-free Greek Yogurt
1 Cucumber, seedless
1/4 cup low-fat Sour Cream
2 tablespoons Lemon Juice, freshly squeezed
1 tablespoon White Wine Vinegar
1 tablespoon Dill, fresh minced
1 1/2 teaspoons Garlic, finely minced
2 teaspoons Mediterranean Sea Salt
1/2 teaspoon Black Pepper, freshly ground


"Oia at Sunset"

Topping:
3-4 Kirby Cucumbers, diced
4-6 small vine ripe Tomatoes, seeded & diced
1 Red Onion, sliced or chopped
Sea Salt & Black Pepper
1/2 tablespoon Red Wine Vinegar
2 tablespoons Italian Parsley, fresh chopped

Other:
Fresh Made or Quality Store Brand Pita Bread

"Corfu and Cats"

Directions:
Bifteki:
1. Preheat oven to 350 degrees Fahrenheit; then in a large bowl add all of your minced and chopped ingredients along with your spices, meat, cheese, egg and breadcrumbs...
2. Mix well by hand. (I wear plastic gloves for this and when forming the meatballs)
3. Take out a baking tray with a rim and begin forming small meatballs, around 1 to 2 inches in size, placing them in the baking tray—then repeat with the remaining meat mixture until all of its used...
4. You'll end up with 40-60 meatballs depending on size. Now place the tray and bake them at 350 degrees for 35 minutes...
5. Once they are done cooking they can be stored in a container in the fridge for 3 or 4 days; when ready to use, heat a pan on the stove on medium high heat and brown the outside of the meatballs till warmed through and ready to eat...

"Flavor Filled and Delicious

Tzatziki:
1. Place the yogurt in a medium bowl…
2. Grate the cucumber on a grater and squeeze the grated cucumber with your hand, or using cheesecloth, to remove some of the liquid….l
3. Add it to the yogurt along with the sour cream, lemon juice, vinegar, dill, garlic, salt and pepper and stir to combine…
4. Refrigerate until ready to use…

"Oh Olympia, thou art ruined"


Toppings:
1. Dice the cucumbers and place them in a small container or Ziploc bag with a dash of sea salt and pepper with the red wine vinegar—then toss to combine and refrigerate until ready to use...
2. Remove seeds and inside of tomatoes, then dice and store in a small container or Ziploc bag till needed—repeat with the red onion and parsley...

Gyro:
1. Warm a skillet or griddle pan on the stove at medium heat and lightly toast/warm your pita bread on both sides...
2. Put 2 tablespoons of Tzatziki sauce on the "Gyro" with 4-6 "Bifteki" meatballs, some of the cucumbers, tomatoes and parsley—then enjoy....

"White on White on Blue"-Santorini by R.Fisher

"Mexican Inspired Lasagna"

"Tex-Mex Lasagna"

This "Mexican-Inspired Lasagna" was not only for me and my Baby to try out and enjoy the other night, but it just so happens to be a shout out to all her friends who've been caught by the fitness bug now that they're all Beachbody coaches...

So, to help them all out I decided that I would try, on occasion, to come up with some recipes to share that would help them all on their fitness journeys.

"Mexican Inspired Lasagna"

Now, after having carefully crafted a few lo-fat Shakeology Gelato's, along with some Shakeology Muffins and Marble Cake-it's now time to get to the heartier fare...

What could be heartier then beans, and this recipe doesn't disappoint. Being a mix of black beans, pinto beans and white meat chicken-the cheesy, salsa layered goodness fills your stomach without worry of breaking your 21 day fix routine...

"Quiet Southern Beauty"

Low fat, low carb and full of good proteins and fiber; this happy union would be totally at home among a Tex-Mex themed summer barbecue or any dinner time, regardless of the season...

Serve it up with some sour cream, guacamole, sliced avocado and picante sauce for a delicious, healthy meal that can't be beat. Try it for yourself, I think you and your family will find that it is, most assuredly, "Definitely Delish"


"Healthy Mexican Inspired Lasagna"

"Mexican Inspired Lasagna"

Ingredients:
4 cups Chicken breast, roasted & shredded (2 rotisserie chickens)
2 (16 oz.) jars Chunky Salsa (homemade or favorite brand choice)
1 cup Pinto beans, drained & rinsed
1 cup Black beans, drained & rinsed
1 (7 oz.) bag 2% Sharp Cheddar, shredded
1 (7 oz.) bag 2% Mexican Mix Cheese, shredded
1 (14 oz.) can Fire Roasted Diced Tomatoes, drained
1 teaspoon Onion powder
2 tablespoons Chili powder blend (see below for recipe, or use favorite pre-made)
2 packages Damascus Bakery Flax Roll-Ups (see notes)
Sea Salt & Black Pepper, to taste
Low fat Sour Cream, for serving
Fresh Cilantro leaves, torn for garnish

"Layering the Deliciousness"

"Layering the Deliciousness"

Directions:
1. Pre-heat your oven to 350 degrees Fahrenheit and take out a 9 x 13 inch baking pan or dish and grease the insides with butter or a non-stick baking spray...
2. Take cooked rotisserie, or roasted, chicken and shred the white meat, placing into a large bowl for mixing. Season with Chili powder blend, onion powder, and sea salt and pepper to taste, until evenly coated. Then set aside till ready to use...
3. Next take the flax roll ups and cut them into 3 even width strips across the short sides of the roll ups, these will make up your "lasagna" noodle substitutes. You should end up with 16 strips approx. 9 inches by just over 3 inches in size...
4. Now, in a bowl, mix together the 2 jars of chunky salsa with the can of drained fire roasted tomatoes. In a second bowl, mix the two bags of low fat cheese together in preparation...
5. To begin layering, start by ladling out 2/3 of a cup of salsa evenly into the bottom of your baking dish (I'll usually give the tray a few shakes back and forth to help spread the salsa). Then cover it with 4 strips of the cut flax roll ups...
6. Cover the 4 strips of flax roll ups with about 1/3 of the chicken, spreading it evenly. Follow that with 1/3 of a cup of the black and 1/3 of a cup of the pinto beans. Cover that with a 2/3 of a cup of the salsa and tomatoes, then 1/4 of the total amount of shredded cheese...
7. Repeat with another layer of roll ups strips, chicken, beans, salsa and cheese until only salsa and cheese remain...
8. After laying down the last 4 strips, cover them with 2/3's of a cup of salsa and the remaining cheese...
9. Place into the oven for 25 to 30 minutes, until warmed through and the cheese is melted and golden brown. Serve with low fat sour cream, avocado slices, torn cilantro leaves and remaining salsa or picante sauce...

"Southern Sunrise"

Notes:
1. I use the Damascus Bakery Flax Roll Ups for this dish because of the higher protein and fiber, with low calories. (Each Roll Up is 110 cals, 3 g fat, 15 g carbs, 9 g fiber & 12 g protein)
This helps to keep the overall fat and carbs low while raising the fiber and protein a nice amount without affecting the taste...


"Chili Powder Spice Blend"

Ingredients:
2 tablespoons Ancho chili's, ground into powder
1 tablespoon Turkish Cumin, ground
1 tablespoon Mexican Oregano, dried
1/4 teaspoon organic Cayenne powder
1/2 teaspoon Mexican Cocoa powder
1/2 teaspoon organic Onion powder
1/4 teaspoon Hungarian Paprika (I use Szeged brand)
1/2 teaspoon Coriander powder

"Mexican Lasagna with Mango Rose"

"Mexican Lasagna with Mango Rose"

Directions:
1. Combine all of the ingredients in a small mason jar with a tight fitting lid, shake until evenly mixed and store in a dark cupboard till ready to use...

"Dark Chocolate Popcorn Granola Bars"

"Dark Chocolate Granola Bars"

I'm always fiddling around the kitchen playing with this or that recipe and though not everything is a home run the first time out, more often than not, I will still make something worthwhile and delicious to nosh on...

This one though was a definite hit; mixing the slightly buttery & salty taste of fresh made popcorn with the crunch of granola, the sweet tang of dried cranberries and nuttiness of chopped pecans enrobed in dark chocolate and honey to create something not unlike but so much better than a rice crispy treat...

"Streets of Salem in Fall"

Decadent, Delectable & Delicious—truly this on the go snack, or late night treat, tastes almost to sinful to eat—but it's full of so much organic, healthy and natural goodness that you can most definitely give yourself a pass and enjoy it no matter whether you're in full on fit mode or not...

I know I'm going to love snacking on this in the days ahead and I think you would too; because it is, oh so "Definitely Delish"

"Dark Chocolate Granola Bars"


"Dark Chocolate Popcorn Granola Bars"

Ingredients:
7 cups Organic Popcorn, popped
1 cup Organic Pecans, chopped
1 cup Dark Chocolate Chips
1/2 cup Cinnamon Granola (I used an Organic fresh mix from a Organic Market, but Bare Naked and other brands are good too)
3/4 cup Dried Cranberries (natural no sugar added)
2/3 cup natural, unfiltered & organic Raw Honey
1/2 cup fresh made ground Almond Butter (Natural Almond Butter is okay as well)
2 teaspoons natural Vanilla extract
1 teaspoon ground Cinnamon
1/4 teaspoon ground Cloves
1/4 teaspoon Sea Salt, finely ground

"Dark Chocolate Granola Bars"

Directions:
1. Make the popcorn fresh and then mix together with the pecans, chocolate chips, granola and cranberries in a large bowl. Stir, then set aside...
2. Place a generous amount of raw honey in a medium-sized saucepan set over medium-low heat. Bring it to a gentle boil, adjusting heat if necessary... 
3. After the honey is boiling then stir in your almond butter, and let it bubble for 1 minute. Turn off the heat and stir in the salt, vanilla, ground cloves and cinnamon...
4. Carefully pour the hot mixture over top of the popcorn and other ingredients, then mix together thoroughly...
5. Line a 13x9 inch baking pan with parchment paper and spray with a nonstick butter spray, then scoop out and evenly press the mixture into the pan...
6. Let it cool in the fridge for 15 minutes or more (loosely covered); then, when ready, remove it from the pan and slice it into squares  or bars to serve...
7. Store in a covered container for up to 5 days—or up to a week, or more, when refrigerated... 

"NOLA at Night"

"Strawberry Shakeology Gelato To Fixate On"

It's not every day that you come to the conclusion that you need to make a change; whether it's lifestyle or your job, when this epiphany occurs its sometimes best for you to take that chance and dive right in head first...

"Strawberry Shakeology Gelato"


In my life this happened within the last few years; you see after surgery to remove a failing organ, as well as a terrible relationship which was dragging me down both physically and emotionally, I decided I had had enough and needed to get my life back on track and start taking care of myself for a change...

"Spring Flowers"


For too long I had let things slide and as a result I had put on more weight then some could realize, as my height tended to hide it well-but in actuality between my poor diet and stress, I was falling apart...

Now with sometime having passed, and with me having made the changes necessary in my life to get back on a healthier road and a healthier lifestyle, I see my Baby doing something similar with an old friend from school...

"Strawberry Shakeology Gelato"


You see; after Nikki excitedly went back and forth talking with her friend, we decided we'd join up, with Emily, as Beachbody Coaches too. Between the exercise routines, challenges and wonderful Shakeology shakes-you get a full range of products that taste good and with the people you meet, the encouragement to keep on the straight and narrow... 

"Spring has Sprung"

So considering my not to modest cooking skills, and my love of experimentation, I decided to put them to the test and play around with different recipes and products to come up with some delicious 21 day fix meals as well as some tasty treats using, of all things, protein powder-of which this is the first...

So sit back and try the first in what I hope will be a series of dishes and treats, I think you'll find that they are oh so "Definitely Delish"


"99% Fat Free Shakeology Gelato"


"Strawberry Shakeology Gelato"

Ingredients:
1 1/2 cups fresh Strawberries
1 1/2 teaspoons Vanilla extract
2 teaspoons Sweetener (stevia, splenda, truvia, coconut palm sugar)
1/2 teaspoon Strawberry extract, if needed
2 scoops Strawberry Shakeology protein powder
1/2 cup unsweetened Almond Milk
3-6 drops of red food coloring
2 containers Fat Free Cool Whip (You could also make whipped cream using coconut milk)

"Protein Powder Gelato"

Directions:
1. Defrost Cool Whip on counter for 1 to 2 hours. Take out strawberries, remove greens and then slice into smaller pieces. Place strawberries in freezer for 1 hour hour minimum...
2. Meanwhile take a bowl and add in the "Shakeology" protein powder, vanilla, sweetener, almond milk and blend using a hand mixer. Add the red food coloring, mix and then set aside...
3. Take frozen strawberry pieces from freezer and chop them up using a food processor, blender or nutri-bullet/ninja. You do not want them to completely puree, there should be some variation in texture with bigger and smaller pieces mixed in with the pulped berry...
4. Add the processed strawberries to the liquid protein powder mix and stir together. Now pour the combined mixture into a large bowl with the defrosted cool whip. Stir together slowly until completely combined...
5. Pour the mixture into a nice sized Tupperware container with a lid and then freeze for a minimum of four hours before serving, overnight is best, and then enjoy... 


"Stepping out of my comfort zone with some Chicken Vindaloo"

"Chicken Vindaloo"

Recently I decided to step out of my comfort zone and try a type of cuisine that I never had before; my decision of course was greatly influenced by two amazing, and awe inspiring, women that I've befriended here in the Foodie community...

The incredible Indian inspired dishes that both are always creating, on their own sites, always look so wonderfully delicious that I finally had to take the plunge and attempt one myself...

So in keeping with this, my culinary journey of discovery, I first did a small amount of searching, through various media, to decide on what to choose for my first attempt at Indian Cuisine...

"Chicken Vindaloo"

What I ended up coming across again and again where recipes for "Chicken Tikka Masala"; to me it seems like it is the go to dish for anyone attempting Indian cooking for the first time, and that it's one of those dishes that any non-Indian always orders at a restaurant. Now there's nothing wrong with that of course, but for me, well I just have this need to be a tiny bit different...


It was then that I came across this photo for this wonderful dish, "Chicken Vindaloo" and I knew I had found what I was looking for; now I know what you might say, the origins for this dish aren't strictly Indian — but what the Goan's have done to make this dish their own is truly amazing and I hope that in the creation of my own version of this recipe, that I've honored the traditions of cooking they created...

"Chicken Vindaloo" with fresh "Naan"

So after lots of research, and a big comparison of recipes from all sorts of people and all sorts of sources I learned that this dish has it's roots in a Portuguese dish known as "Vinha de Alhos" which translates as "Wine and Garlic". You see; Goa was for a long long time a colony of Portugal and as such the transfer of cuisine, culture, religion and architecture flowed back and forth constantly between them. This dish is one such item, and a tasty one at that...

Another item of note before I get on to the good stuff. (The Recipe
I've made this several times now and have fluctuated back and forth between using potatoes or not. I have enjoyed it both ways so I've included it as an option; but I was amazed to find out that besides being used as a way to stretch out the dish due to the expense of meat (potatoes are of course cheaper), but that it was partly due to a corruption and mistranslation of the name...

You see; the Portuguese dish "Vinha de Alhos" became over time "Vindalho" which finally became "Vindaloo" and funny enough "Aloo" is the Hindi word for "Potato"—what's the chance of that, right...

Regardless, though, whether you use potatoes or not, my recipe or a family favorite—this dish is, most assuredly, "Definitely Delish"

"Delicious Chicken Vindaloo"

"Chicken Vindaloo"

Ingredients:
For Chicken and Base:
3-4 Skinless Chicken Breasts, cut into pieces
17 ounces chopped cooked Tomatoes
1-2 tablespoons Tomato Paste
1 Red Onion, finely chopped
1 small Sweet Onion, finely chopped
6 cloves of Garlic
2 tablespoons Olive Oil
4-5 small gold potatoes, halved (optional, see Notes)
2-3 tablespoons flour
Sea Salt and Ground Pepper, to taste

For Vindaloo Spice:
1 tsp ground Cumin
1/2 tsp ground Turmeric
2 teaspoons Garam Masala
1 tsp Mustard Powder
1 tsp ground Coriander
1/2 tsp cayenne pepper (or 3 red chiles, finely chopped)
1/4 tsp ground Cinnamon
1/4 tsp ground Cloves
1 tsp Sugar
1/2 tsp Paprika
1 inch square fresh Ginger, finely grated
6 tablespoons White Wine Vinegar 

"Rice, Spinach, Hummus and Chicken"

Directions:
1. In a bowl; add all of the ingredients for the Vindaloo Spice blend, stir together and set aside till needed—then pre chop your onions and garlic so that they're ready...
2. Rinse, pat dry and slice Chicken Breasts into pieces and toss with flour—then sprinkle with a tiny bit of salt and pepper...
3. Pre-heat deep sided sauté pan or pot on medium high heat. Add 1 tablespoon of Oil, the Chicken and then cook to brown & sear on the outside, approximately 5 minutes. Remove Chicken from pan and set aside loosely covered in foil...
4. Reduce heat to medium (or medium low depending on stove top) and add the additional tablespoon of Oil as well as the Garlic and Onion, sautéing till softened—about 5-7 minutes. (be careful not to burn)
5. Stir in the tomato paste with the onion and garlic, cook for 1 minute— then add the tomatoes, Vindaloo spice, Chicken and Potatoes (if using).
6. Stir well and cover, bringing the mixture to a boil—then reduce heat to low and simmer for about 30 minutes. Be sure not to let the Chicken dry out, adding water a 1/4 cup at a time only if necessary...
7. When the chicken is cooked through and the potatoes (if using) are tender, taste, adding Sea Salt and Pepper if needed...

"Tasty Indian Vindaloo"

Notes:
1. Potatoes are optional, have done both with or without. When using baby golds and reds are good, I especially like these French sweets available by me as it cuts some of the heat nicely...
2. Serve with oven warmed Naan bread and some sides, Pilau Rice or some other Indian inspired dishes...
3. This is a little less spicy version then some I've seen; but, if you prefer it to be even more so—just add additional 1/4 tsp's of cayenne, cinnamon or red pepper flakes...
4. I served my dish with both a Rice and Couscous; as well as a Scallion Pepper Spinach dish, a Mint & Cumin Yogurt sauce, Harissa Hummus and Naan bread...

"Look under recipes for additional Side Dishes to use alongside the Chicken Vindaloo"