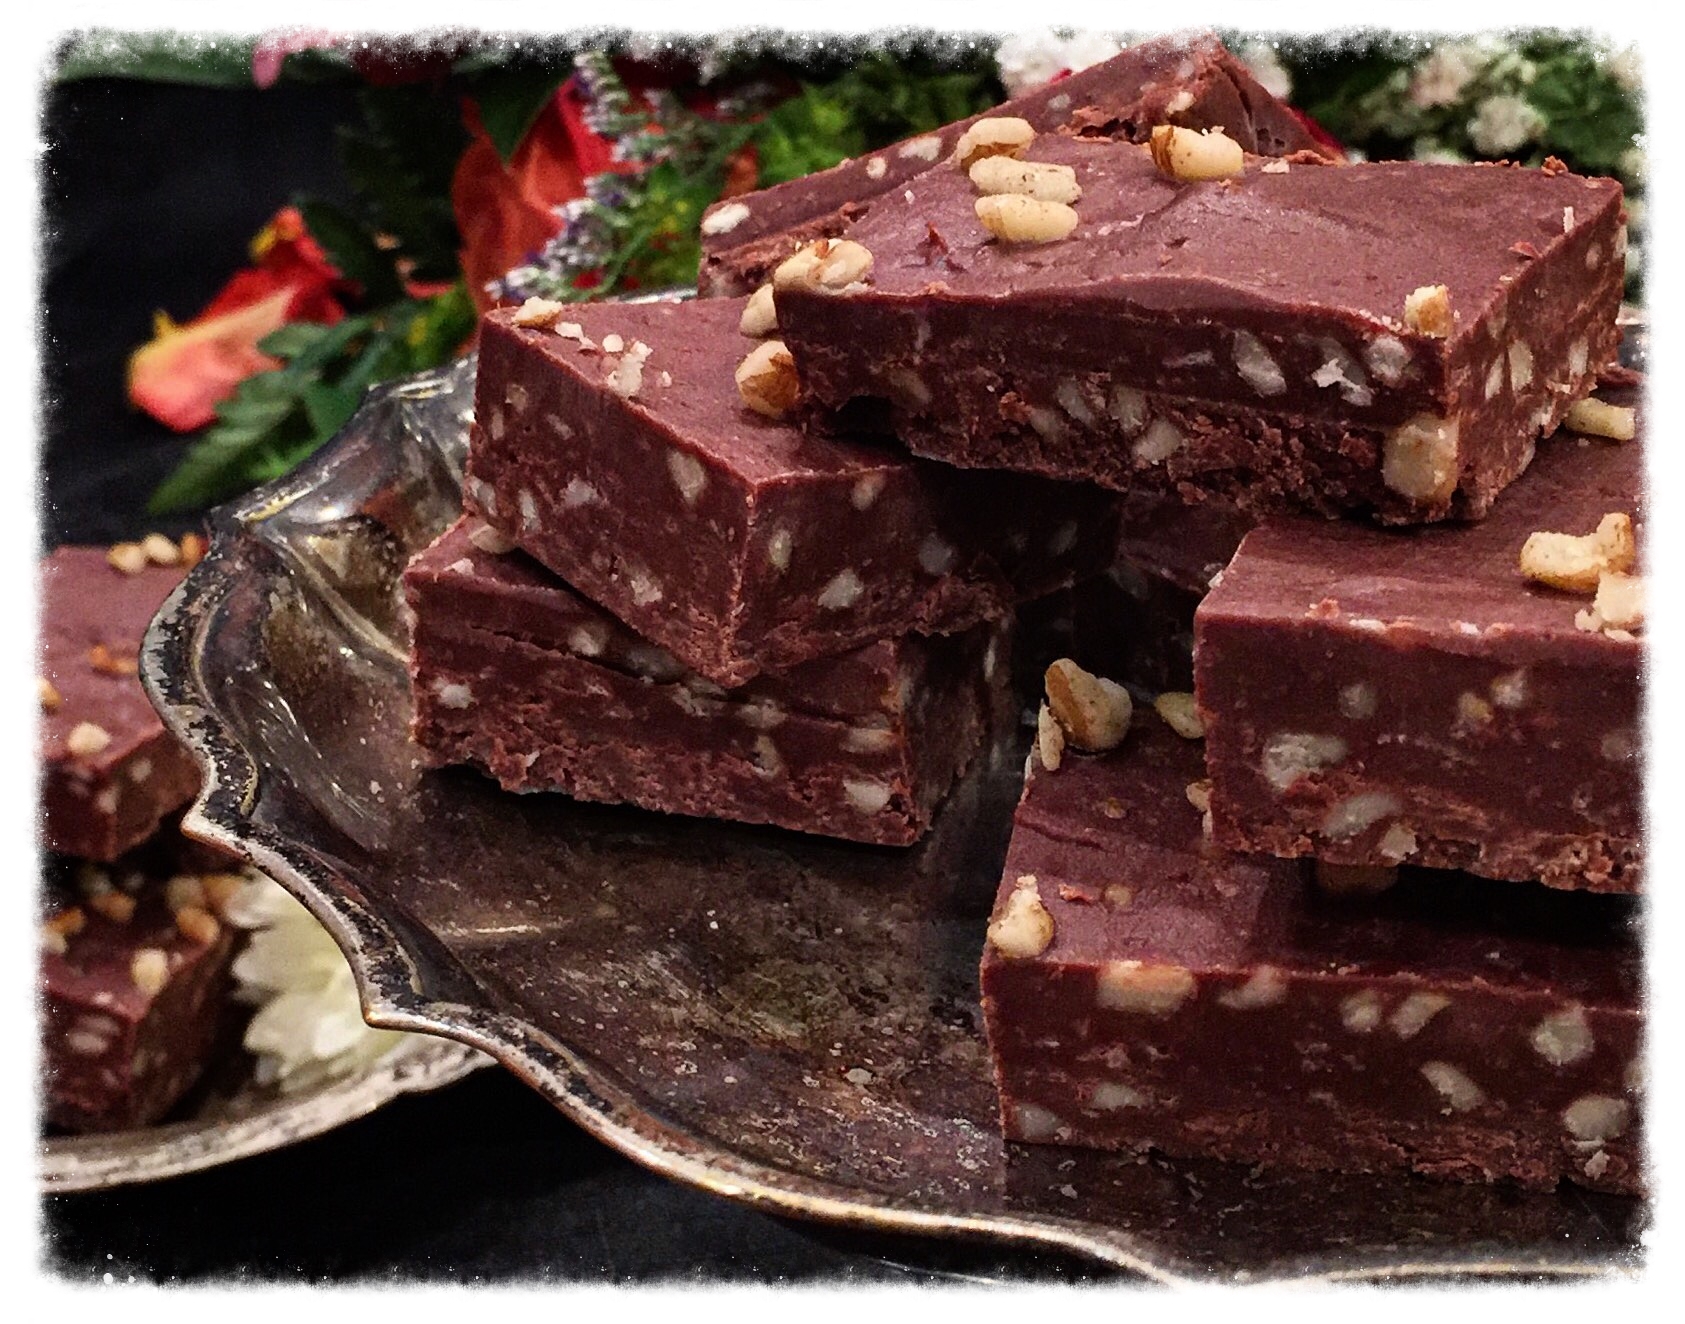
"Irish Coffee Fudge"
St. Patrick's Day is Thursday and that means corned beef and cabbage will soon be boiling up, in pots, in homes and homesteads from one side of the Atlantic to the other...
So besides this classic staple of culinary corned beef perfection, green beers and soda bread what other Irish inspired indulgences might you partake of...
For me, a connoisseur of all things coffee, I turn to that wonderful staple the "Irish Coffee"
"Whiskey and Fudge"-what a combination...
This hot drink has long been a favorite in Irish pubs with a popularity that could be said to rival a great stout (as tough as that may be).
"Decadent Whiskey Fudge"
Joe Sheridan, it's creator, had the right idea when he first combined a robust Irish whiskey with rich, black coffee and created the original Irish Coffee Cocktail...
Despite some common shortcuts that have been taken in the past, a great Irish Coffee is not as simple as adding a shot of whiskey to a cup of coffee. No, this is a well-planned, carefully constructed coffee drink that should be mixed with the care of any modern latte or cappuccino...
For this sweet and indulgent recipe I took the incredible essence of my favorite Coffee Cocktail and worked it into a wonderfully decadent, mildly intoxicating, batch of deliciously sweet fudge...
Truly Saint Patrick and my wild Irish ancestors were with me on the day I decided to play around in my kitchen creating this...
"Irish Eyes Are Smiling"
So in honor of my Ó Céileachair (anglicized to Kelleher) ancestors, who immigrated here during one of the many famines to strike the heart of that beautiful Emerald Isle, I give you this addition to your next St. Paddy's celebration...
Trust me; just as Ó Céileachair means a "lover of company", your friends will be feelin' the luck of the Irish and loving you too after enjoying a few of these sinfully tasty little devils- because they are, oh so "Definitely Delish"
"Cutting up something yummy for Family"
"Irish Coffee Fudge"
Ingredients:
Coffee layer:
2 bags Semi-Sweet Ghirardelli Chocolate Chips (12 oz. each bag)
1 can Sweetened Condensed Milk (14 oz.)
8 tablespoons Jameson Irish Whiskey (½ cup)
2 tablespoons Espresso Powder (Nescafé Instant coffee is also a good alternative)
1 tablespoon Cornstarch
Irish Cream Layer:
1 ½ bags of Ghirardelli White Chocolate Chips (11 oz.)
1/4 cup Sweetened Condensed Milk
1/4 cup of Bailey's Irish Cream
2 teaspoons Cornstarch
Other:
Nescafé Instant Coffee, for dusting (2 teaspoons)
11x7 or 8x8 deep sided pan lined with plastic wrap
"Sweet, decadent and delicious"
Directions:
1. Mix Jameson Whiskey, Cornstarch and Espresso powder in a microwave safe measuring cup. Then heat in the microwave for 40 seconds, stirring halfway through...
2. Set aside in fridge to thicken; then in a separate cup repeat with Bailey's Irish Cream and Cornstarch, also setting it in fridge to thicken slightly...
3. Meanwhile in 2 separate (large) Microwave safe bowls add the chocolate chips; both bags of dark chocolate to one, and the white chocolate in the other...
4. Add a full 14 oz. can of sweetened condensed milk to the dark chocolate chips, and a 1/4 cup of sweetened condensed milk to the white chocolate...
5. At this time pour the Jameson and Espresso mixture into the bowl of Dark Chocolate and heat in the microwave 20 seconds at a time, stirring in between heating’s until the chocolate has just melted—set aside and stir until a thick consistency is reached...
6. Pour and evenly spread the chocolate mixture into the plastic wrap lined baking dish or pan-then dust sparingly with Nescafe instant coffee...
7. Now add Bailey's Cream mixture to the white chocolate and heat in the microwave 20 seconds at a time, stirring, until chocolate just melts...
8. Continue stirring on the counter till smooth and then pour into prepared dish, overtop the dark chocolate—then spread smoothly covering the dark chocolate...
9. Dust sparingly with Nescafe Espresso powder, cover and cool in the refrigerator overnight—cut into 1 inch squares the next day and serve cool…
Note: Keep refrigerated until ready to serve; depending on pan size, makes between 60 and 80 pieces...
"Perfect for the holiday or that Irish Coffee lover in your life"